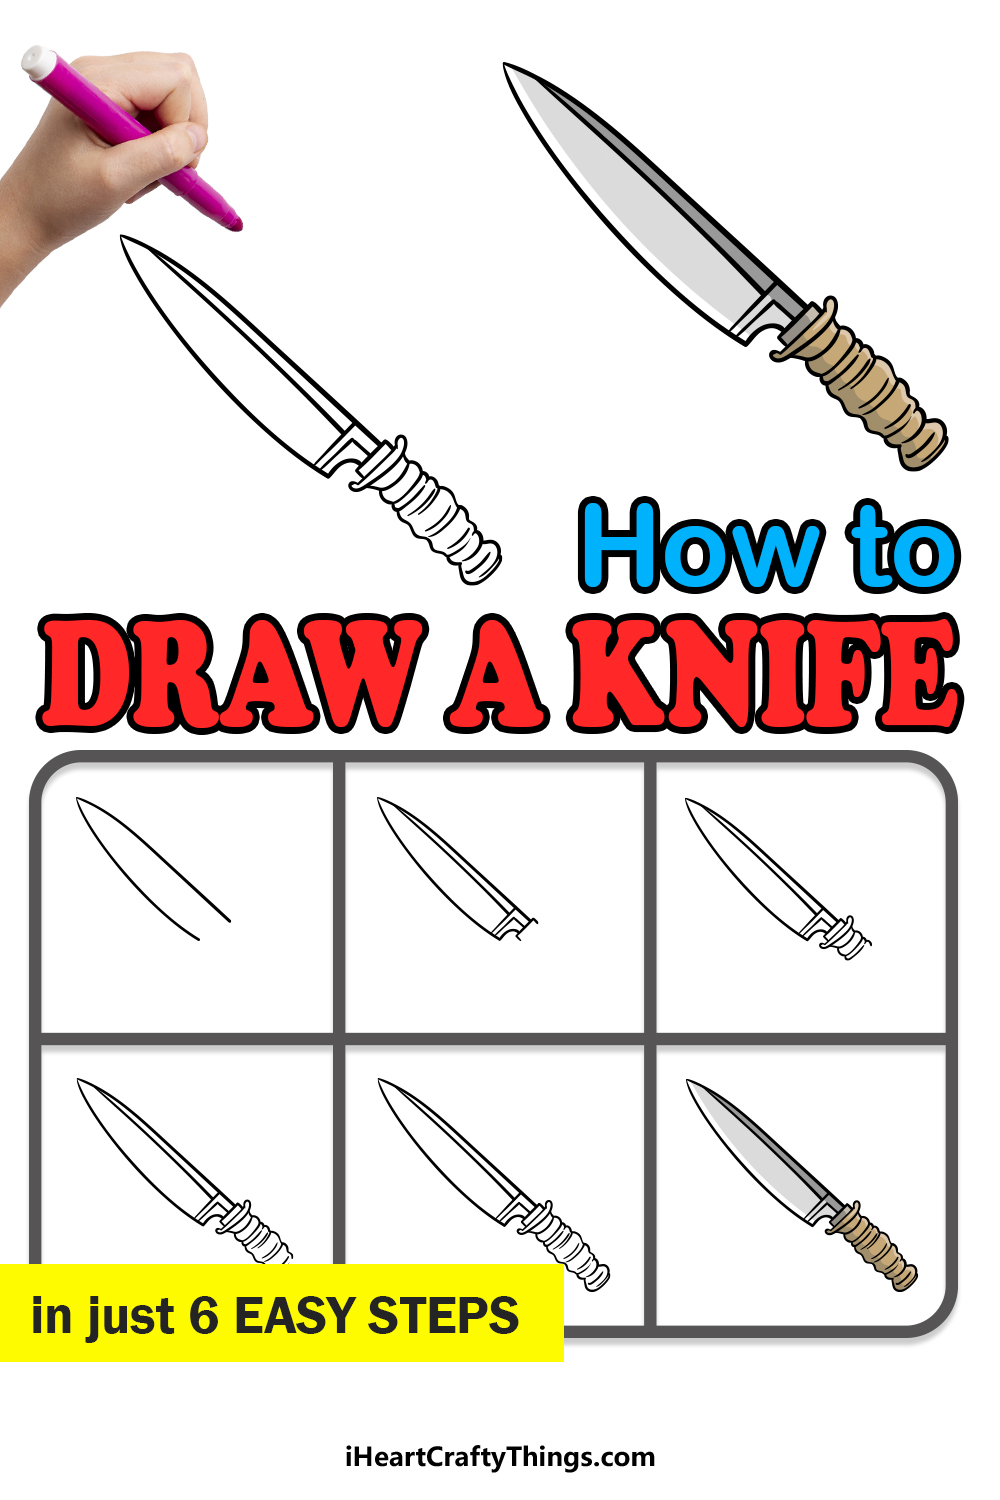
Basic Knife Drawing
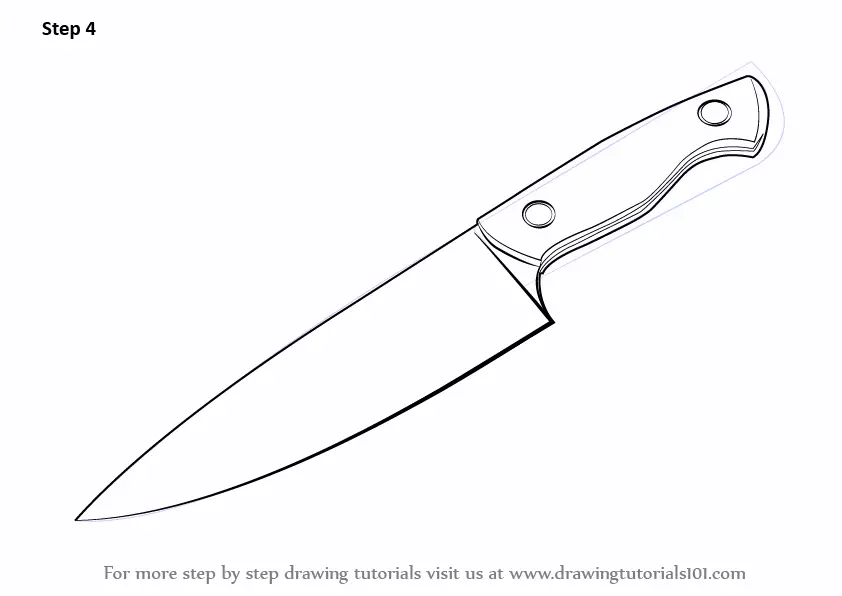
Basic Knife Drawing - Web step 1 drawing a knife begins with a handle. Complete the drawing by adding the necessary finishing touch. We draw a little line on the diagonal of the page. Web enhance the handle even more with some finer details. Make sure the proportions are correct. Web the first step is sketching out the basic shape of the knife. Then, draw a long, triangular shape for the blade. Draw a short zigzag line at the end of the curved line. This project will take 6 steps to complete as we continue to draw each part moving closer to the finished drawing. Near the very end of the bottom of the blade (the heel of the knife) draw an.
Star the from the tip and draw this part with a curve along both it’s top and bottom. Adjust the size and proportions according to. Add shading and shadows to give the knife a 3d look. You can do this with a curved line on the bottom of the blade that leads to a straight line where the blade will. Make sure the proportions are correct. Draw the knife pointed tip by drawing gentle, curved lines to form the tapering end of the blade. Indeed, knives are the most common and vital requirement of every household. (scott suchman for the washington post/food styling by lisa cherkasky for the washington post) chef’s knife. The curves should gradually straighten out as they go towards the end of the handle. For a fine chop, repeat the process twice more.
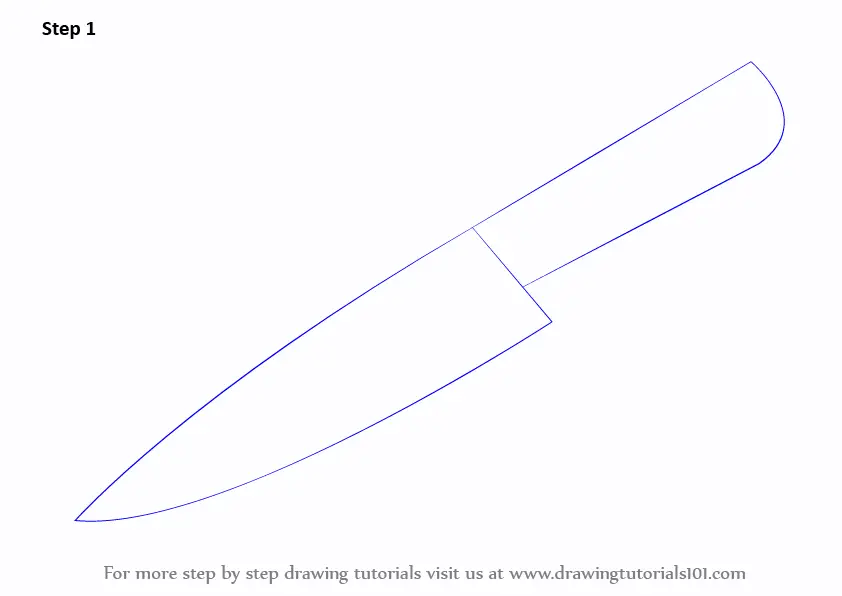
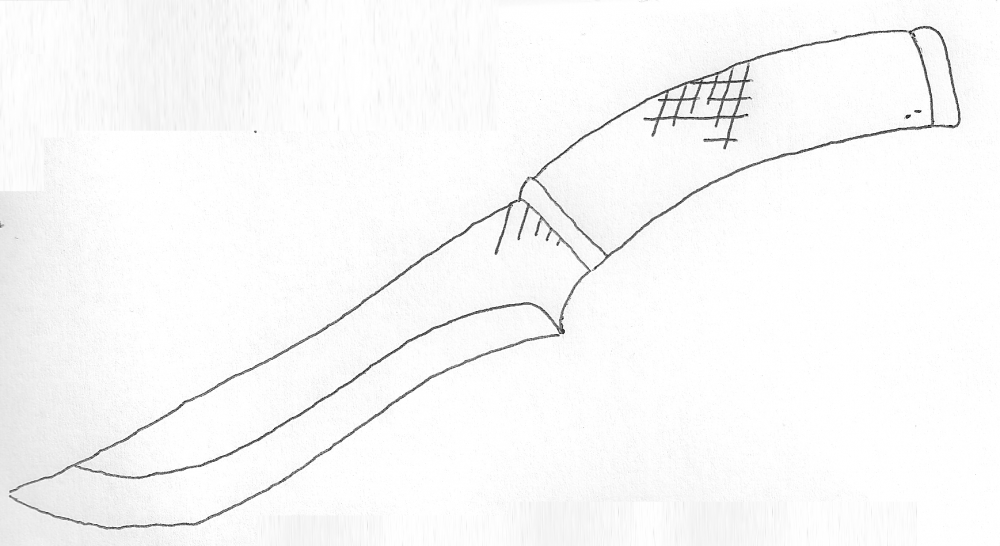
Clean up old logs or create the hewn look of the past. Experienced chefs use the knuckle of their middle finger as a width guide for slices. Web are you wondering how to draw a knife? Pay attention to the proportions and angles of the knife. In this second part of your knife drawing, we will be adding some detail to the side of the blade. May 3, 2024 at 9:00 a.m. Start by drawing a straight vertical line for the blade and a rectangle for the handle. This is the ricasso, the heavy thick shank of the blade between the grind and the front bolster. For a fine chop, repeat the process twice more. This can be a simple rectangle or oval.

How to Draw a Knife Really Easy Drawing Tutorial
Begin by lightly sketching the basic shapes that make up the knife. Begin by drawing straight, even lines to draw the outline of the blade and handle of the knife. The finished work of art will be detailed with color making it a work of art you will be proud to show off! Indeed, knives are the most common and.
Knife Drawing How To Draw A Knife Step By Step
Start with the handle, drawing a rectangular shape with rounded corners. You can do this with a curved line on the bottom of the blade that leads to a straight line where the blade will. Web welcome to my channel hb arts let's learn how to draw a knife for beginners. This can be a simple rectangle or oval. Slide.

How to Draw a Knife Really Easy Drawing Tutorial
2) dust respirator, either paper or deluxe. First, outline the knife’s blade. Web welcome to my channel hb arts let's learn how to draw a knife for beginners. Web enhance the handle even more with some finer details. Clean up old logs or create the hewn look of the past.

How to Draw a Knife Drawing Easy Knife Sketch Step by Step for
You can do this with a curved line on the bottom of the blade that leads to a straight line where the blade will. Make sure the proportions are correct. The chiffonade cut is mainly used for vegetable leaves and fresh herbs, in particular, basil. Web enhance the handle even more with some finer details. This can be a simple.
Knife Drawing Simple About Knives
Follow my step by step drawing of knife and i am sure you will be able to draw i. (scott suchman for the washington post/food styling by lisa cherkasky for the washington post) chef’s knife. Web advice by aaron hutcherson. You can do this with a curved line on the bottom of the blade that leads to a straight line.

How to Draw a Knife Really Easy Drawing Tutorial
A knife is typically longer than it is wide. Indeed, knives are the most common and vital requirement of every household. The finished work of art will be detailed with color making it a work of art you will be proud to show off! For a fine chop, repeat the process twice more. You can do this with a curved.
How To Draw A Knife Step By Step Easy
It consists of a blade with a handle at each end, which allows the user to pull the blade towards. Most knives have a long, slender blade, a handle, and sometimes a guard. Add shading and shadows to give the knife a 3d look. Pay attention to the proportions and angles of the knife. Pay attention to proportions and angles.
Learn How to Draw a Knife (Tools) Step by Step Drawing Tutorials
The leaves are stacked, rolled, and then sliced perpendicularly, creating thin strips. This project will take 6 steps to complete as we continue to draw each part moving closer to the finished drawing. Web enhance the handle even more with some finer details. On the right side, the line turns smoothly. Indeed, knives are the most common and vital requirement.
Learn How to Draw a Knife (Tools) Step by Step Drawing Tutorials
You can do this with a curved line on the bottom of the blade that leads to a straight line where the blade will. (scott suchman for the washington post/food styling by lisa cherkasky for the washington post) chef’s knife. Step 2 to continue the handle, finish drawing a curved line from below. Learn all of the basic culinary arts.
How to Draw A Knife Step by Step
Slide the fingers of your claw hand back and move the knife (not the food) after each cut. Begin by lightly sketching the basic shapes that make up the knife. Draw a straight line near the base of the blade. This is the ricasso, the heavy thick shank of the blade between the grind and the front bolster. Start with.
2) Dust Respirator, Either Paper Or Deluxe.
(scott suchman for the washington post/food styling by lisa cherkasky for the washington post) chef’s knife. Web step 1 drawing a knife begins with a handle. The curves should gradually straighten out as they go towards the end of the handle. Step 2 to continue the handle, finish drawing a curved line from below.
It Consists Of A Blade With A Handle At Each End, Which Allows The User To Pull The Blade Towards.
Near the very end of the bottom of the blade (the heel of the knife) draw an. Begin by lightly sketching the basic shapes that make up the knife. The chiffonade cut is mainly used for vegetable leaves and fresh herbs, in particular, basil. On the right side, the line turns smoothly.
Add Shading And Shadows To Give The Knife A 3D Look.
Draw a straight line near the base of the blade. Pay attention to the proportions and angles of the knife. This is the ricasso, the heavy thick shank of the blade between the grind and the front bolster. Complete the drawing by adding the necessary finishing touch.
Star The From The Tip And Draw This Part With A Curve Along Both It’s Top And Bottom.
This project will take 6 steps to complete as we continue to draw each part moving closer to the finished drawing. Drawing anime in 12 different anime style. Stage 3 from the bottommost line, it will be necessary to draw an additional line curving inside the drawing. A knife is typically longer than it is wide.