Do It Yourself Drawer Dividers
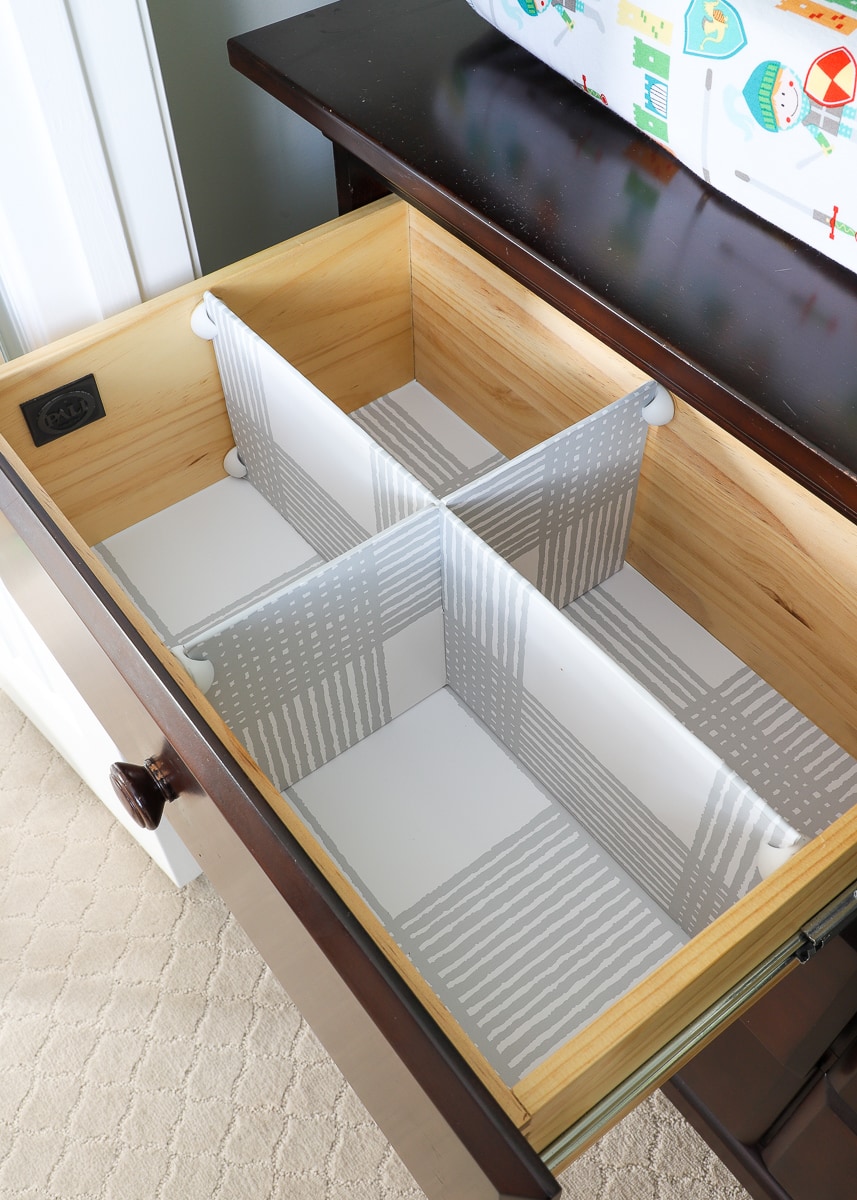
Do It Yourself Drawer Dividers - You need all three measurements to get a good fit. Slide the panels into the channel groove and position them for a dry fit. This became the plan for the diagonal drawer dividers: Be sure to get the measurement of the depth of the drawer, as otherwise you may find your dividers are too tall. It's not all about savings, though. Adding drawer liners is guaranteed to make you smile every time you open the drawers. Measure and cut your wood to length using a saw. Next up on my list of diy kitchen drawer organizer ideas is to build a spice rack in a drawer. Perfect for any drawer needs, these custom dividers are your solution to misplaced items. Bend the holder slightly as you lower it into position so the adhesive doesn't stick on the way down!
All that’s left to do is add in all your perfectly organized items. The big advantage of these slides is that they extend fully, giving you complete access to everything in the drawer. Slide the panels into the channel groove and position them for a dry fit. Remember that the sides are cut square on top and have a 45° miter on the bottom, and both ends of the bases are mitered. It is a really easy project that doesn’t cost a lot of money. Web drill the large “through holes” first. Use the craft knife to cut a 1/4″ wide slit halfway down the exact middle of one board and halfway up the exact middle of the other (as shown below). Secure the wood pieces together with wood glue. Web ok, so that was a lot of words for the quickest customizable drawer divider project ever! Bend the holder slightly as you lower it into position so the adhesive doesn't stick on the way down!
It's not all about savings, though. Check size in the drawer before you cover your divider and make any necessary adjustments. Web after the glue has dried, remove the dividers from the drawer and remove the tape. Not to mention that the actual interior sizes of the drawer dividers themselves are most likely not exactly what you’d hope for! Slide the panels into the channel groove and position them for a dry fit. These diy drawer dividers have score lines which you need to set and attach to the base layer. Robert maxwell for family handyman. Fit the wood in place to check that it fits correctly. You can get binning strips at rockler or on amazon. Always make your base 2mm shorter than the measures in your main design:

Do it Yourself! Quick and Easy Customizable Drawer Dividers in 2020
Web next, to make the diy drawer organizer you will need the binning strips. You need all three measurements to get a good fit. Add shelf paper to the bottom of the drawer and put your dividers in place. Web the formula to draw your drawer divider pattern: Always make your base 2mm shorter than the measures in your main.

DIY Drawer Dividers Easy & Cheap! Small Stuff Counts
Web say hello to budget friendly diy drawer dividers! Use these marks to drill the second, smaller holes in the edges of your divider parts. Next up on my list of diy kitchen drawer organizer ideas is to build a spice rack in a drawer. Web take out the divider, then repeat for the other end. Web draw a quick.
DIY Adjustable Drawer Dividers DIY projects for everyone!
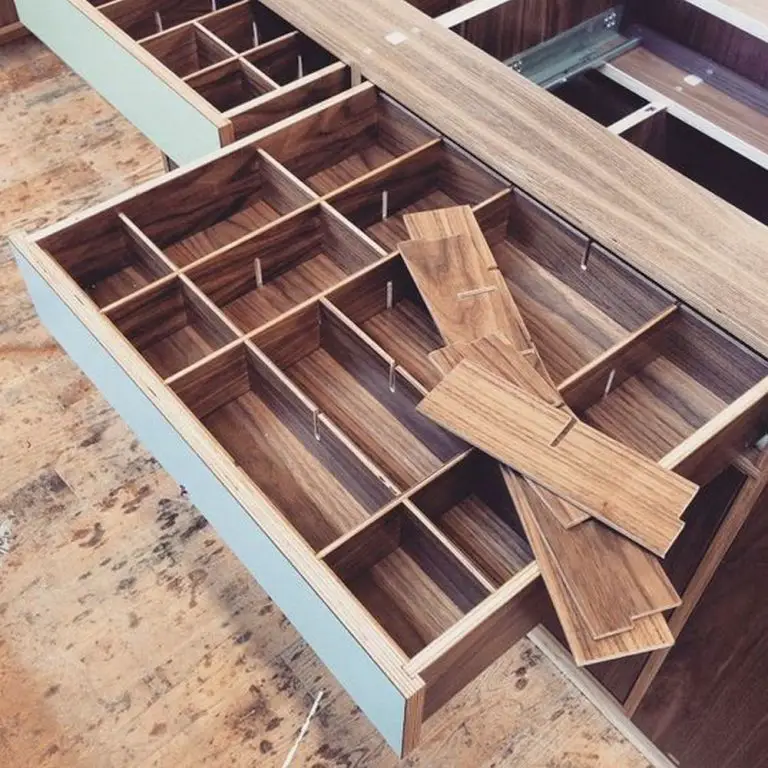
This became the plan for the diagonal drawer dividers: Web take out the divider, then repeat for the other end. Fit the wood in place to check that it fits correctly. Use the craft knife to cut a 1/4″ wide slit halfway down the exact middle of one board and halfway up the exact middle of the other (as shown.
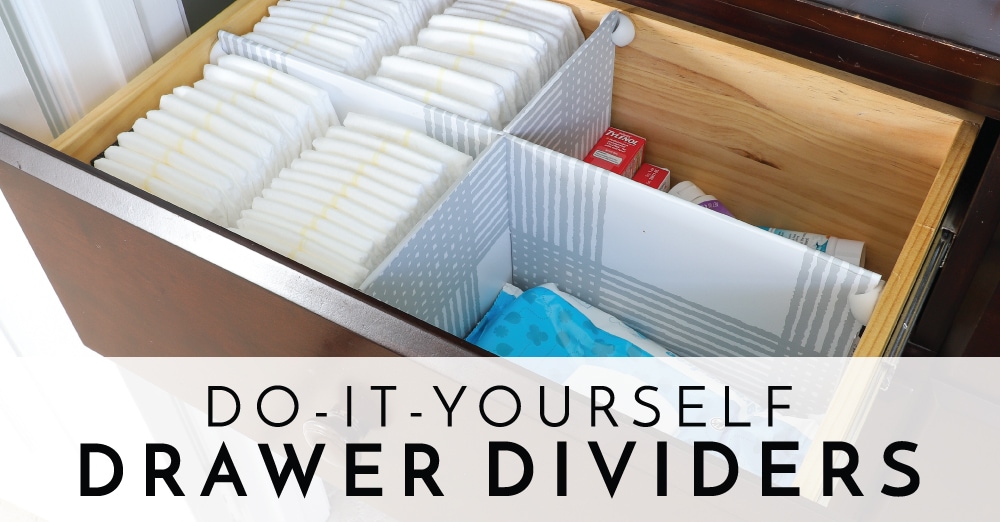
DIY Drawer Dividers for Perfectly Organized Drawers Houseful of Handmade
Adding drawer liners is guaranteed to make you smile every time you open the drawers. Web drill the large “through holes” first. Next up on my list of diy kitchen drawer organizer ideas is to build a spice rack in a drawer. Our guide on making diy drawer dividers is the companion you need. It's not all about savings, though.
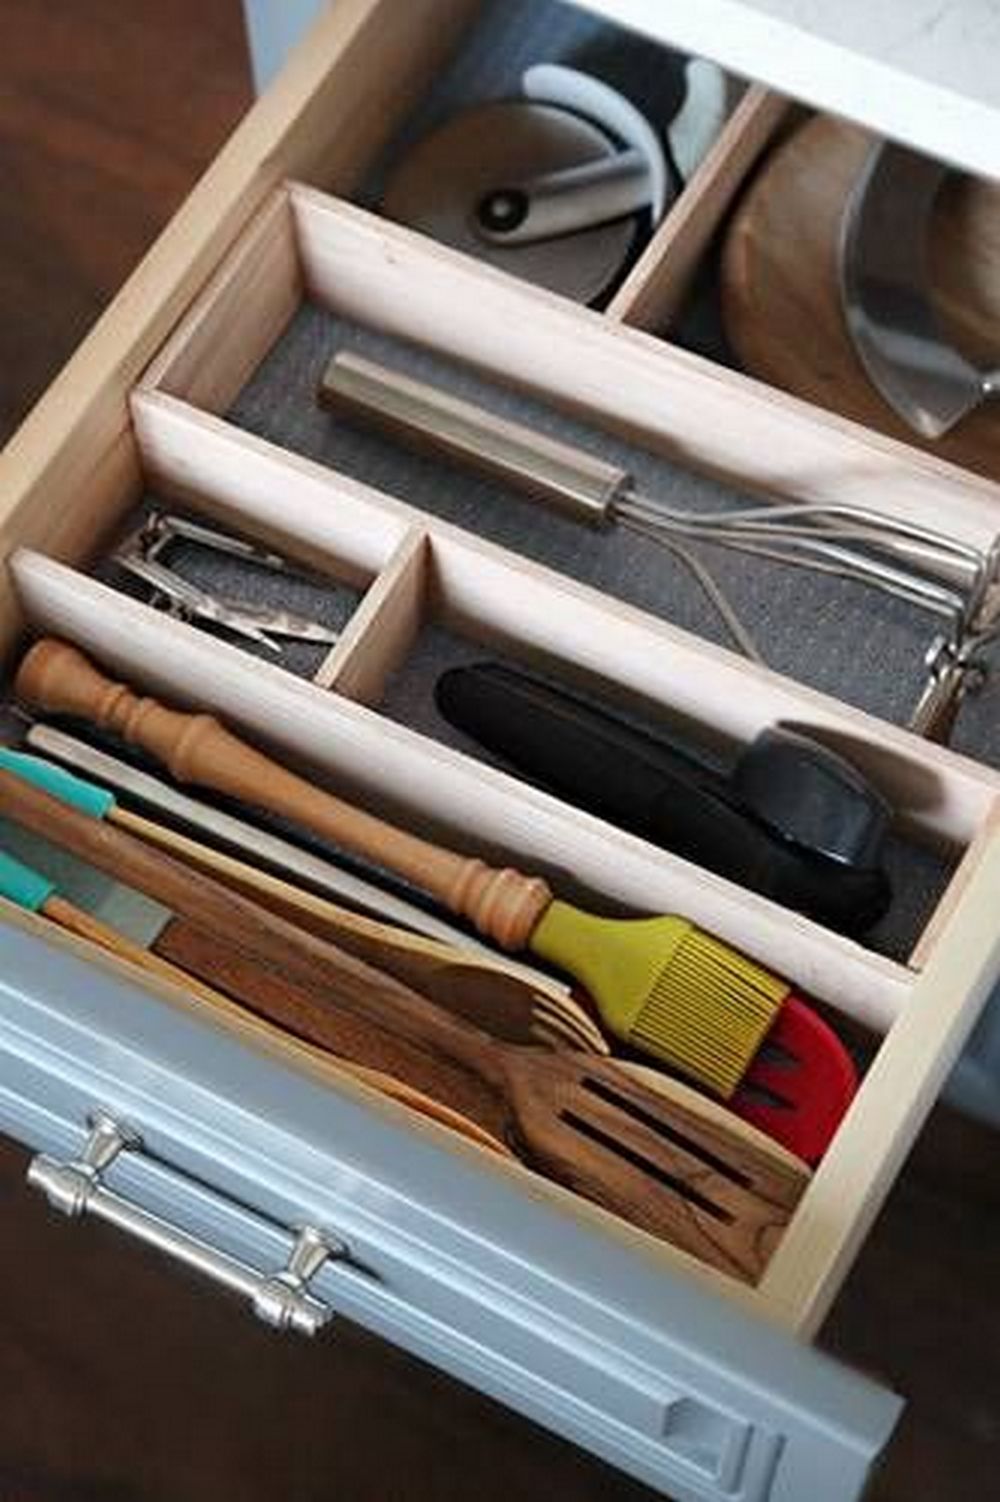
Easy DIY Drawer Dividers For Any Size Drawer The Homes I Have Made
Measure and cut your wood to length using a saw. Mark out the lines and size of your dividers on your cardboard or box then take care to cut them to size. As @fromgrittopearl points out, a. It is a really easy project that doesn’t cost a lot of money. Then do a dry fit of all parts, poking a.

DIY Custom Drawer Dividers in Under 15 Minutes Simplify Create Inspire
You need to locate the score line layer and change it from “cut” to “score” in the operation menu, then select both the score layer and the cut layer and. Attach the other end piece to finish the divider. Wrap the cardboard dividers like presents with pretty wrapping paper or contact paper. Repeat with the other pieces to form compartments..
DIY Drawer Dividers (using what you've got!) The Homes I Have Made
This became the plan for the diagonal drawer dividers: Hold the pieces together using clamps, and let the glue dry overnight. Web ok, so that was a lot of words for the quickest customizable drawer divider project ever! Measure and cut your wood to length using a saw. Then do a dry fit of all parts, poking a screw through.
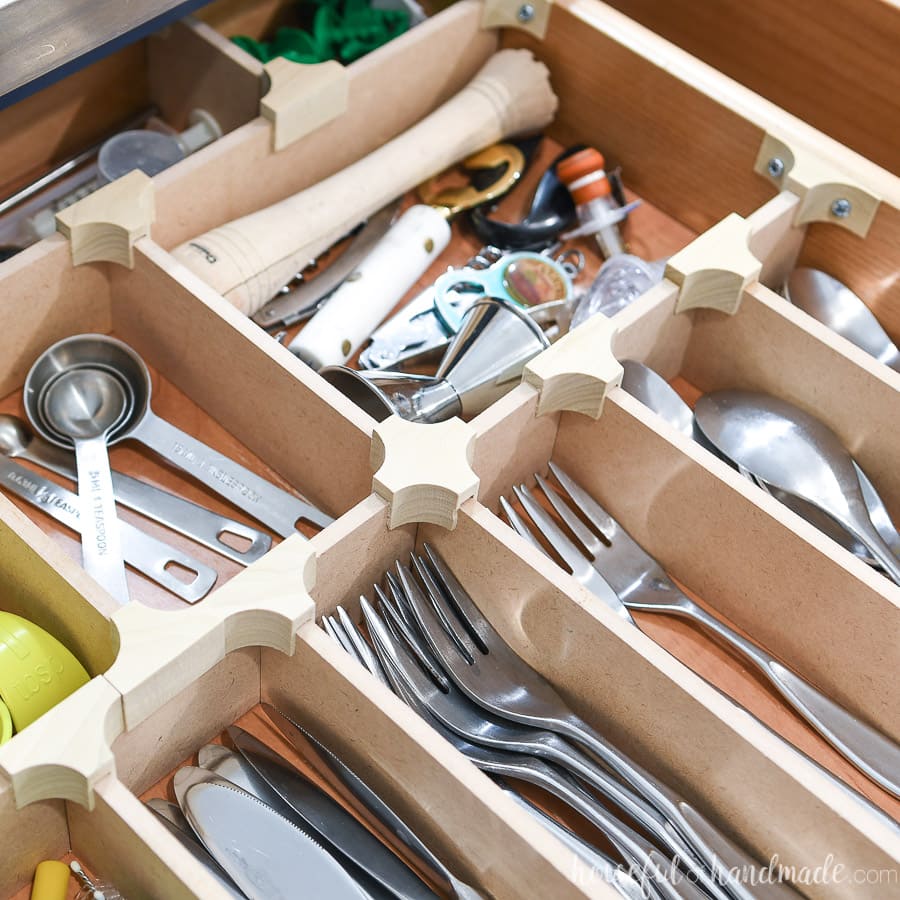
DIY Drawer Dividers for Perfectly Organized Drawers Houseful of Handmade
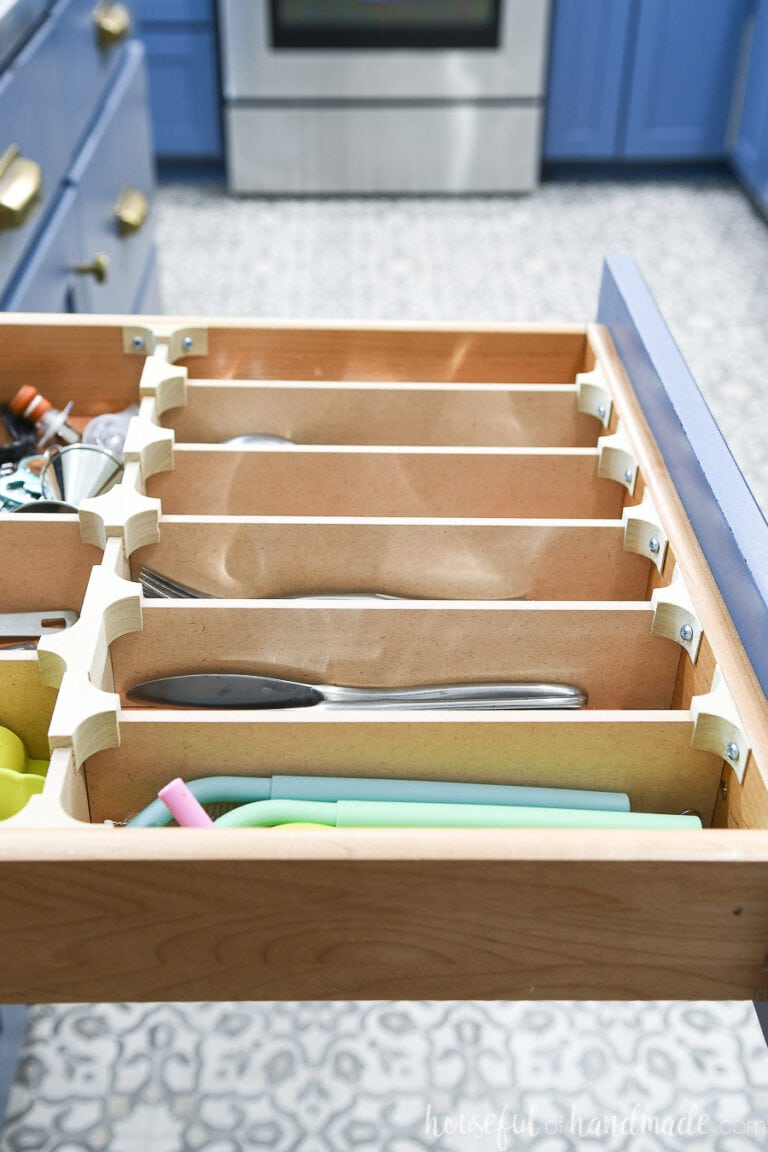
In this instance, we took into account the size of the pairs of socks in length and width. Create the layout of the cardboard inserts for drawer dividing. Hold the pieces together using clamps, and let the glue dry overnight. There are no limits to how many you can add, or the number of ways you can divide the drawer.
DIY Adjustable Drawer Dividers DIY projects for everyone!
Our guide on making diy drawer dividers is the companion you need. Then do a dry fit of all parts, poking a screw through each outer hole into the edge of the adjoining piece hard enough to make a mark. This project was so easy, i made a diy drawer divider. Mark out the lines and size of your dividers.

Kitchen Organizers DIY Dividers
Make sure the divider lines up with the markings on the bottom of the drawer. Finally, so that your dividers fit together, you need to cut out where the two boards will intersect. Use these marks to drill the second, smaller holes in the edges of your divider parts. Then do a dry fit of all parts, poking a screw.
You Need To Locate The Score Line Layer And Change It From “Cut” To “Score” In The Operation Menu, Then Select Both The Score Layer And The Cut Layer And.
Remember that the sides are cut square on top and have a 45° miter on the bottom, and both ends of the bases are mitered. You can get binning strips at rockler or on amazon. Mark out the lines and size of your dividers on your cardboard or box then take care to cut them to size. Web the formula to draw your drawer divider pattern:
How To Make A Drawer Dividers.
Adding drawer liners is guaranteed to make you smile every time you open the drawers. First thing, measure the length, width, and depth of the inside of the drawer. Web take out the divider, then repeat for the other end. Next up on my list of diy kitchen drawer organizer ideas is to build a spice rack in a drawer.
Hold The Pieces Together Using Clamps, And Let The Glue Dry Overnight.
Use the craft knife to cut a 1/4″ wide slit halfway down the exact middle of one board and halfway up the exact middle of the other (as shown below). Web apply wood glue to the edge of a compartment piece and attach it perpendicularly to an end piece. Secure the wood pieces together with wood glue. Always make your base 2mm shorter than the measures in your main design:
Slide The Panels Into The Channel Groove And Position Them For A Dry Fit.
In this instance, we took into account the size of the pairs of socks in length and width. The big advantage of these slides is that they extend fully, giving you complete access to everything in the drawer. This became the plan for the diagonal drawer dividers: Versions for about $40 a pair.