Draw Lines In Gimp
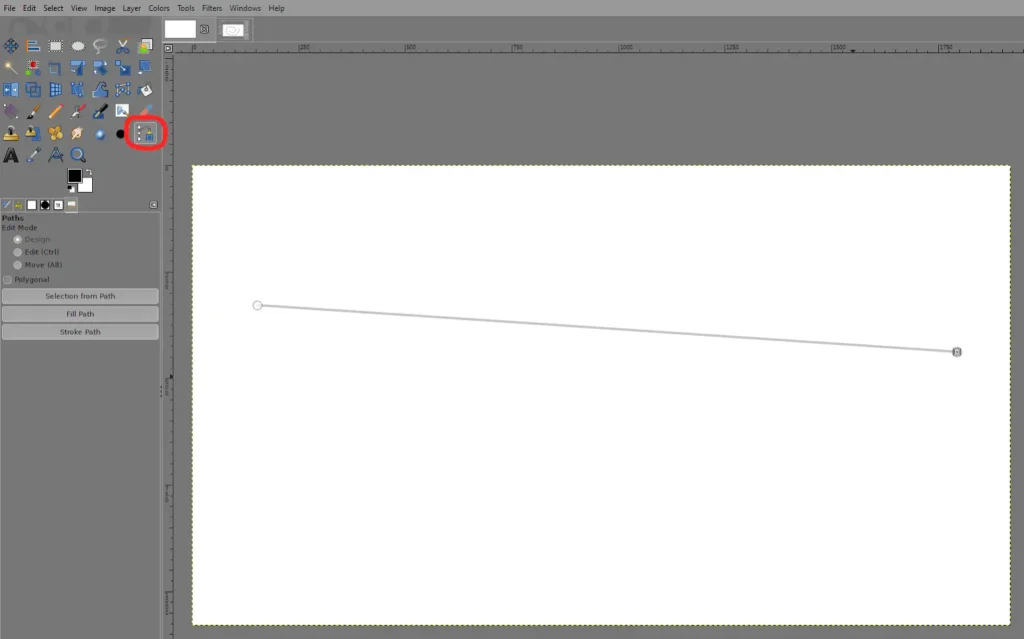
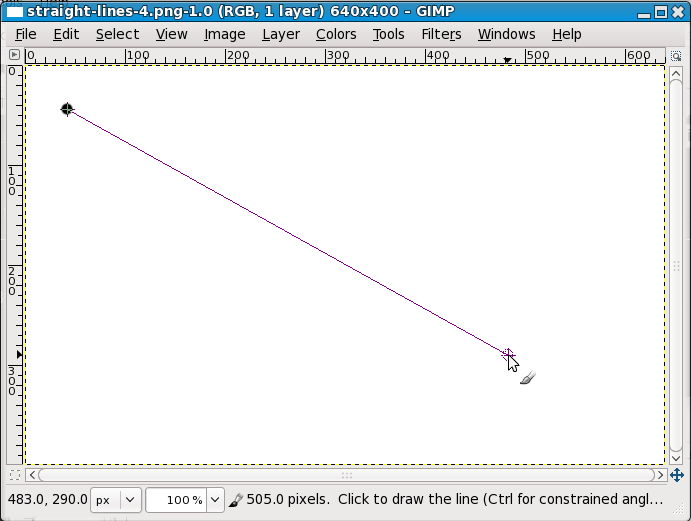
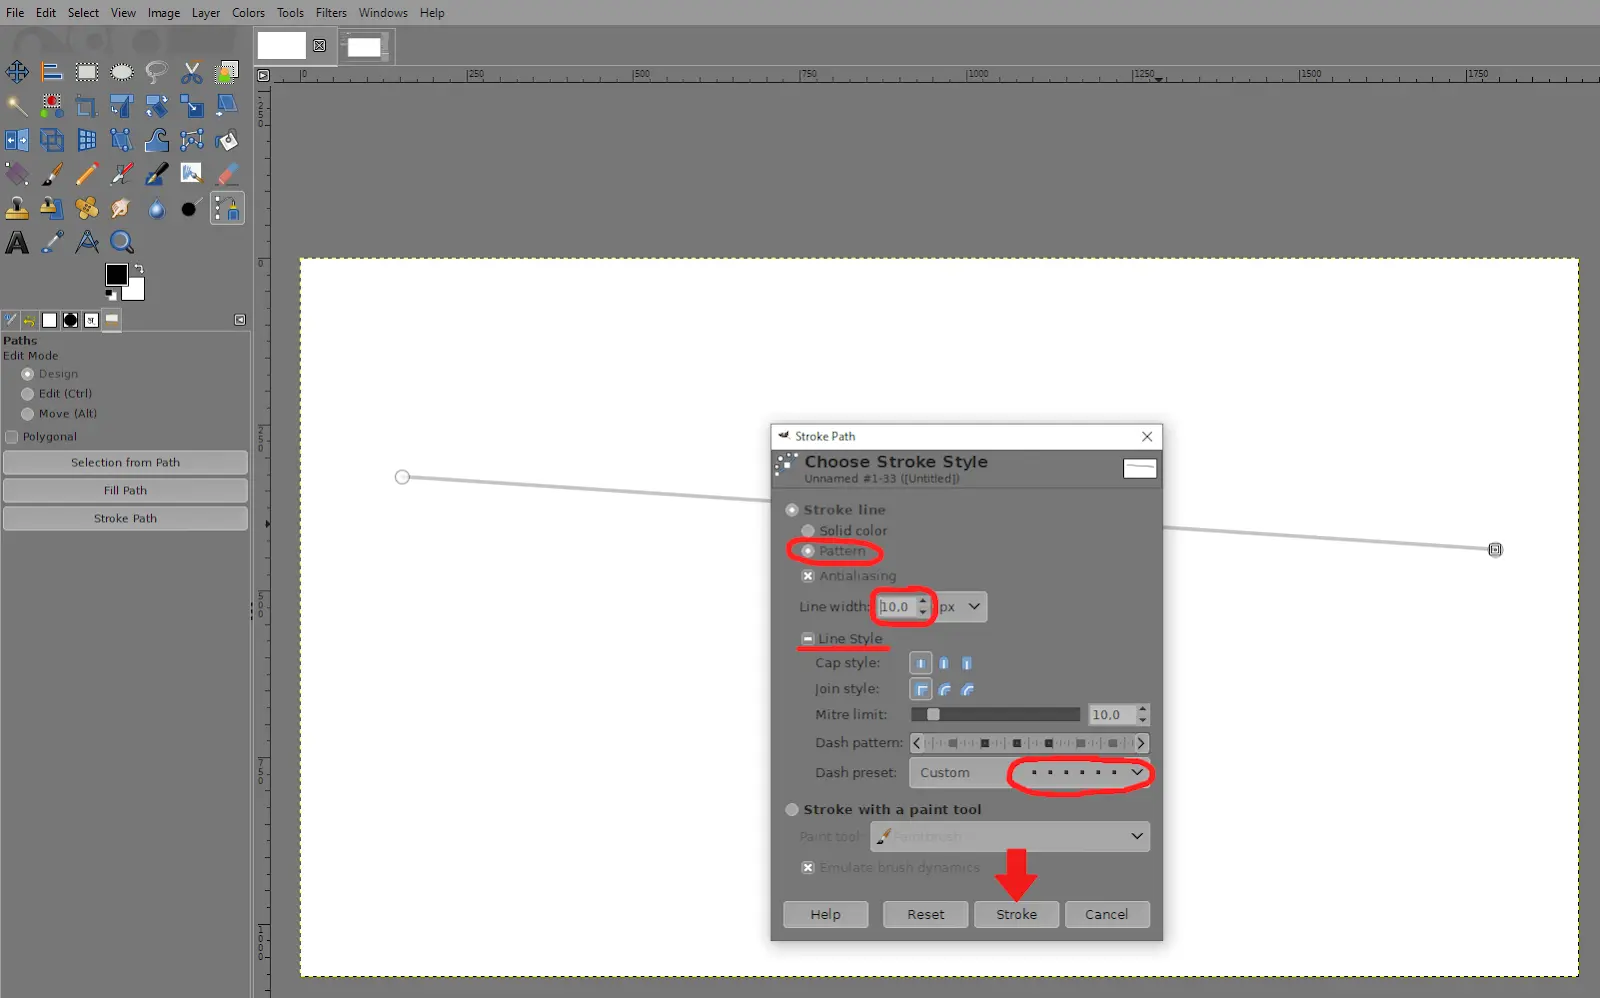
Draw Lines In Gimp - The size of this dot represents the current brush size, which you can change in the brush dialog. The size of this dot represents the current brush size, which you can change in the brush dialog (see section 3.2, “ brushes dialog ” ). Then, navigate to edit > stroke path and choose the size/thickness of your line. Web in this video, we are going to demonstrate how to draw lines with gimp using brush tools. To draw a straight line with gimp, create two points on your canvas using the paths tool. Now, click the end point of the line. Hold down the shift button, and keep it down. After you have a starting point and while pressing the shift key, you will see a straight line that follows the cursor. Web after you click the paintbrush tool, you can click the image. Now, lets start drawing a line.
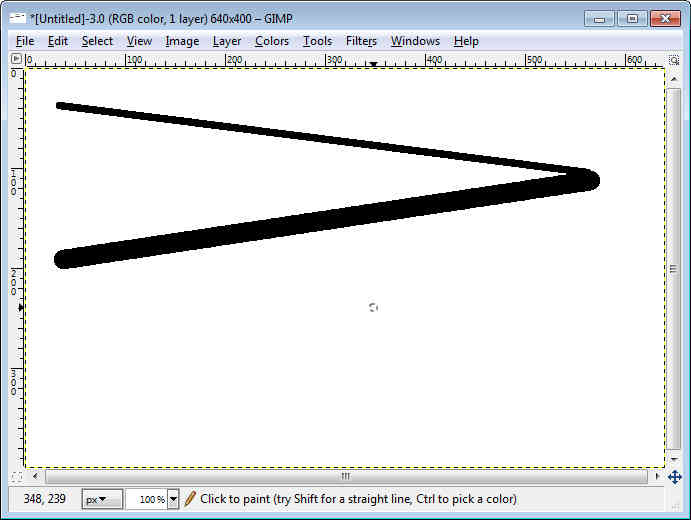
After you have a starting point and while pressing the shift key, you will see a straight line that follows the cursor. Web click the starting point of the line on your image, then hold down the shift button on your keyboard, and move your mouse to over the image to the point you would like the line to end. Web here’s how to use it: Draw straight lines using the paths tool. Web then click on the paintbrush. Hold down the shift key and click again to set the second point of your line. To draw a straight line with gimp, create two points on your canvas using the paths tool. Hold down the shift button, and keep it down. Release the shift key after drawing the line. Now, lets start drawing a line.
After you have a starting point and while pressing the shift key, you will see a straight line that follows the cursor. Now, click the end point of the line. Web here’s how to use it: During that whole “click” of the mouse button, you need to keep the shift key held down. When you click the endpoint, your chosen brush draws a straight line between the two spots. Web click the starting point of the line on your image, then hold down the shift button on your keyboard, and move your mouse to over the image to the point you would like the line to end. Web in this video, we are going to demonstrate how to draw lines with gimp using brush tools. Web after you click the paintbrush tool, you can click the image. Release the shift key after drawing the line. This will create a line going through the two points you created.
How to Draw a Line in GIMP Tech Lounge
Web click the starting point of the line on your image, then hold down the shift button on your keyboard, and move your mouse to over the image to the point you would like the line to end. Web in this tutorial i will show you how to draw a straight line with gimp without trying to follow your mouse.
How to draw straight lines with Gimp Tutorial YouTube
Web drawing a line in gimp is quite simple; After you have a starting point and while pressing the shift key, you will see a straight line that follows the cursor. Web in this tutorial i will show you how to draw a straight line with gimp without trying to follow your mouse and maintain precision, you will only need.

How To Make Lines In Gimp Pete Ginger
The size of this dot represents the current brush size, which you can change in the brush dialog (see section 3.2, “ brushes dialog ” ). When you click the endpoint, your chosen brush draws a straight line between the two spots. A single dot will appear on the screen. During that whole “click” of the mouse button, you need.

Gimp Drawing Lines How To Draw Straight Lines In Gimp Parker
When you click the endpoint, your chosen brush draws a straight line between the two spots. Now, lets start drawing a line. Now, lets start drawing a line. Gimp will automatically fill the space between the two points in a perfectly straight line using your chosen brush. Press the stroke button when finished.

How to Draw Straight Lines in GIMP Tutorial for Beginners YouTube
Web quick guide on how to draw straight lines inside of gimp. Web after you click the paintbrush tool, you can click the image. Web then click on the paintbrush. Shows how to use brush tool, pencil tool, guides, and pen tool for perfectly straight linesget full. Now, lets start drawing a line.
How to draw lines in Gimp Gimp 2.10.22 Tutorials for Beginners YouTube
Press the stroke button when finished. Release the shift key after drawing the line. Draw straight lines using the paths tool. Gimp will automatically fill the space between the two points in a perfectly straight line using your chosen brush. This will create a line going through the two points you created.
How To Draw A Line In Gimp Possibilityobligation5
Select and customize your brush, then click once on your image to set the first point on your straight line. Web here’s how to use it: Step 3¶ after you click the paintbrush tool, you can click the image. The size of this dot represents the current brush size, which you can change in the brush dialog. This will create.
5. How to Draw Straight Lines
To draw a straight line with gimp, create two points on your canvas using the paths tool. Press the stroke button when finished. Web here’s how to use it: Press the first button on the mouse (the leftmost one usually) and let it go. Now, click the end point of the line.

How to Draw a Line in GIMP Tech Lounge
Hold down the shift button, and keep it down. This will create a line going through the two points you created. Step 3¶ after you click the paintbrush tool, you can click the image. During that whole “click” of the mouse button, you need to keep the shift key held down. Now, lets start drawing a line.
How to Draw a Line in GIMP Tech Lounge
Web in this tutorial i will show you how to draw a straight line with gimp without trying to follow your mouse and maintain precision, you will only need to mark. Press the stroke button when finished. Press the first button on the mouse (the leftmost one usually) and let it go. Now, click the end point of the line..
Web In This Tutorial I Will Show You How To Draw A Straight Line With Gimp Without Trying To Follow Your Mouse And Maintain Precision, You Will Only Need To Mark.
Web quick guide on how to draw straight lines inside of gimp. Select and customize your brush, then click once on your image to set the first point on your straight line. Gimp will automatically fill the space between the two points in a perfectly straight line using your chosen brush. Release the shift key after drawing the line.
Hold Down The Shift Key And Click Again To Set The Second Point Of Your Line.
During that whole “click” of the mouse button, you need to keep the shift key held down. Draw straight lines using the paths tool. Now, click the end point of the line. Press the first button on the mouse (the leftmost one usually) and let it go.
Web Drawing A Line In Gimp Is Quite Simple;
Shows how to use brush tool, pencil tool, guides, and pen tool for perfectly straight linesget full. Step 3¶ after you click the paintbrush tool, you can click the image. A single dot will appear on the screen. Hold down the shift button, and keep it down.
You’ll See A Straight “Guide” Line Appear As You Move Your Mouse To Let You Know Where The Line Will Be Drawn.
Web click the starting point of the line on your image, then hold down the shift button on your keyboard, and move your mouse to over the image to the point you would like the line to end. Web after you click the paintbrush tool, you can click the image. You just need to choose your favorite brush tool, click the line’s starting point while holding down the shift key, then drag the cursor to the line’s ending point. Now, lets start drawing a line.