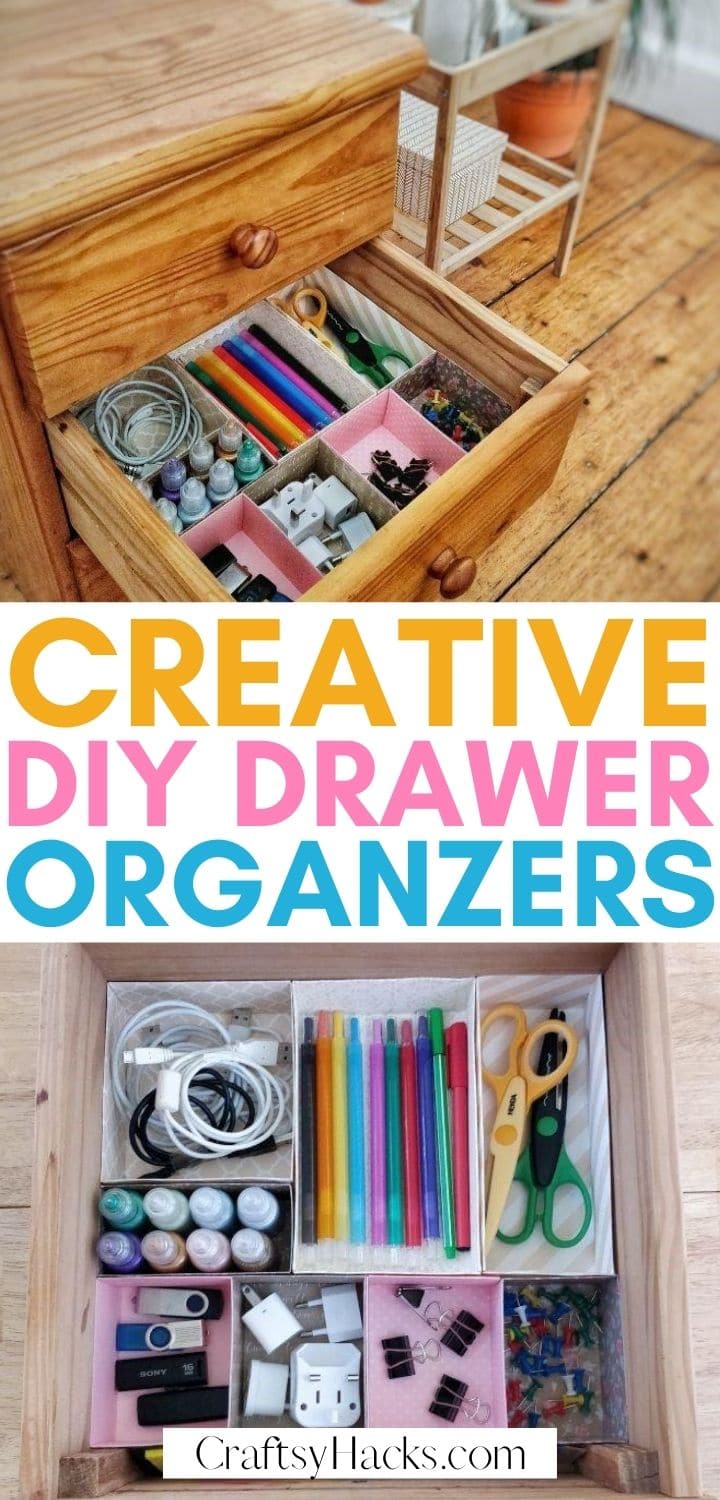
Drawer Dividers Diy Cardboard
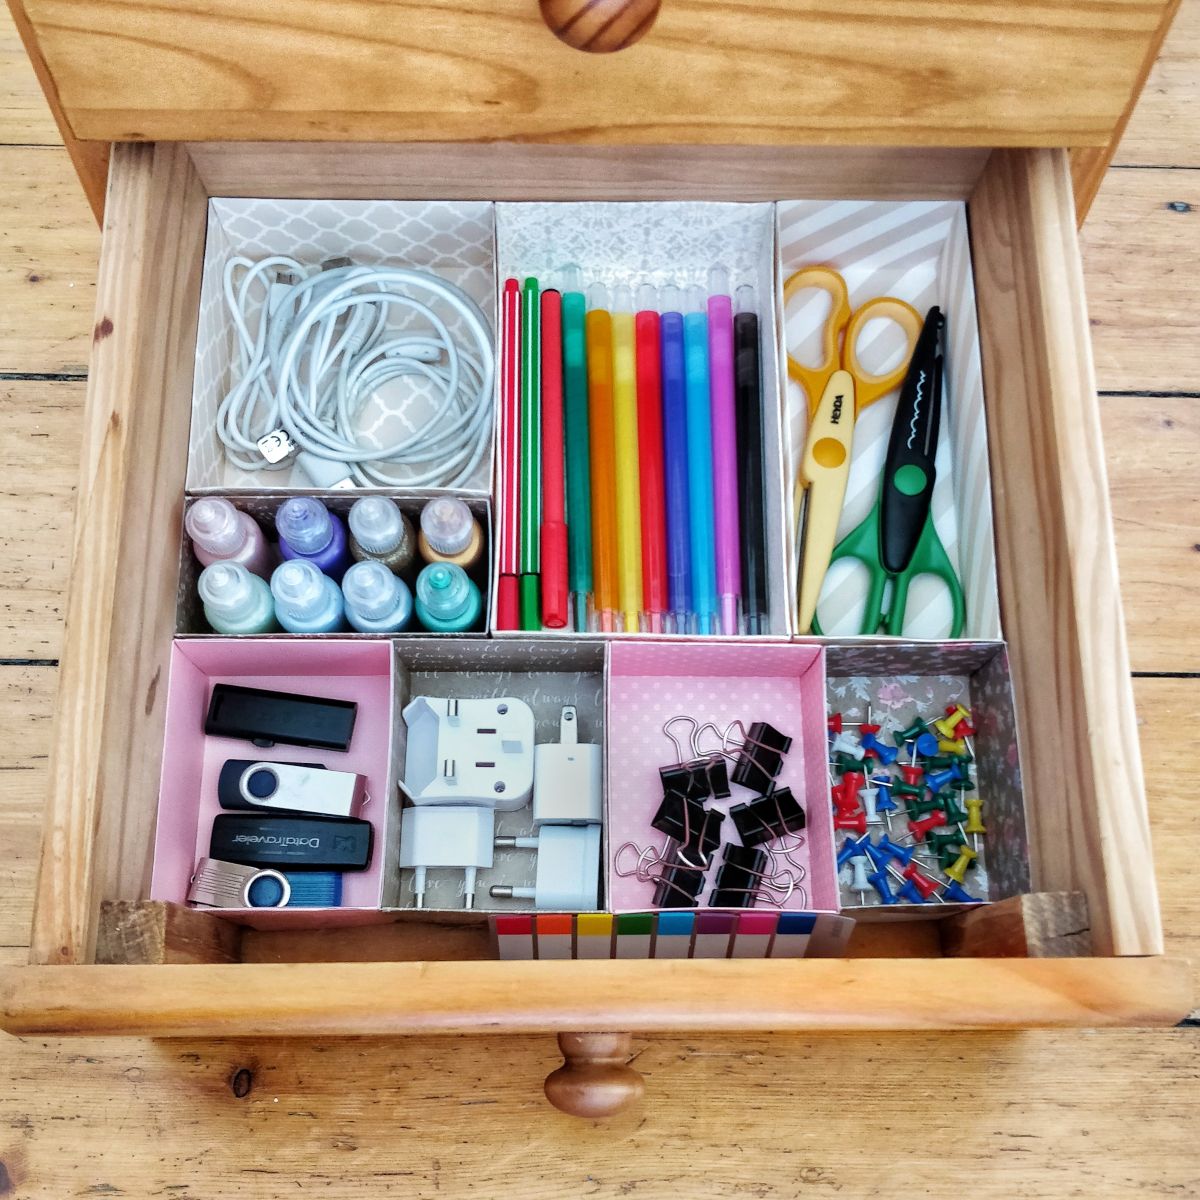
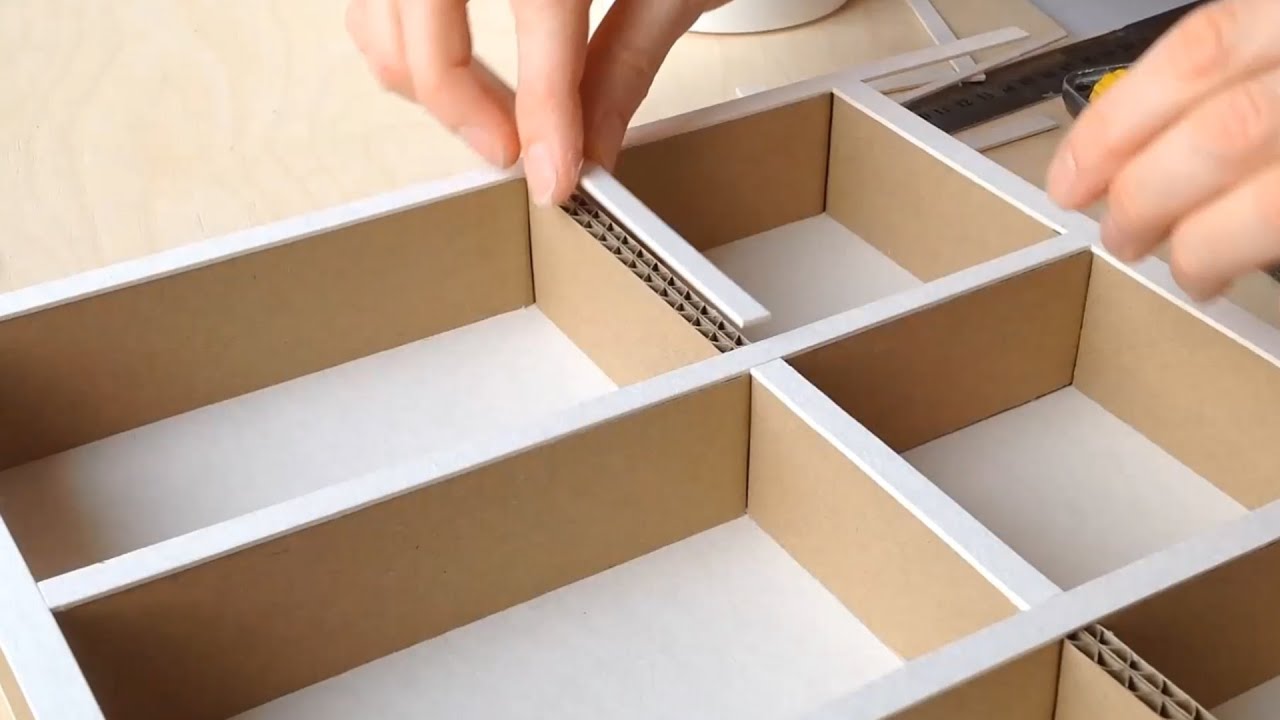
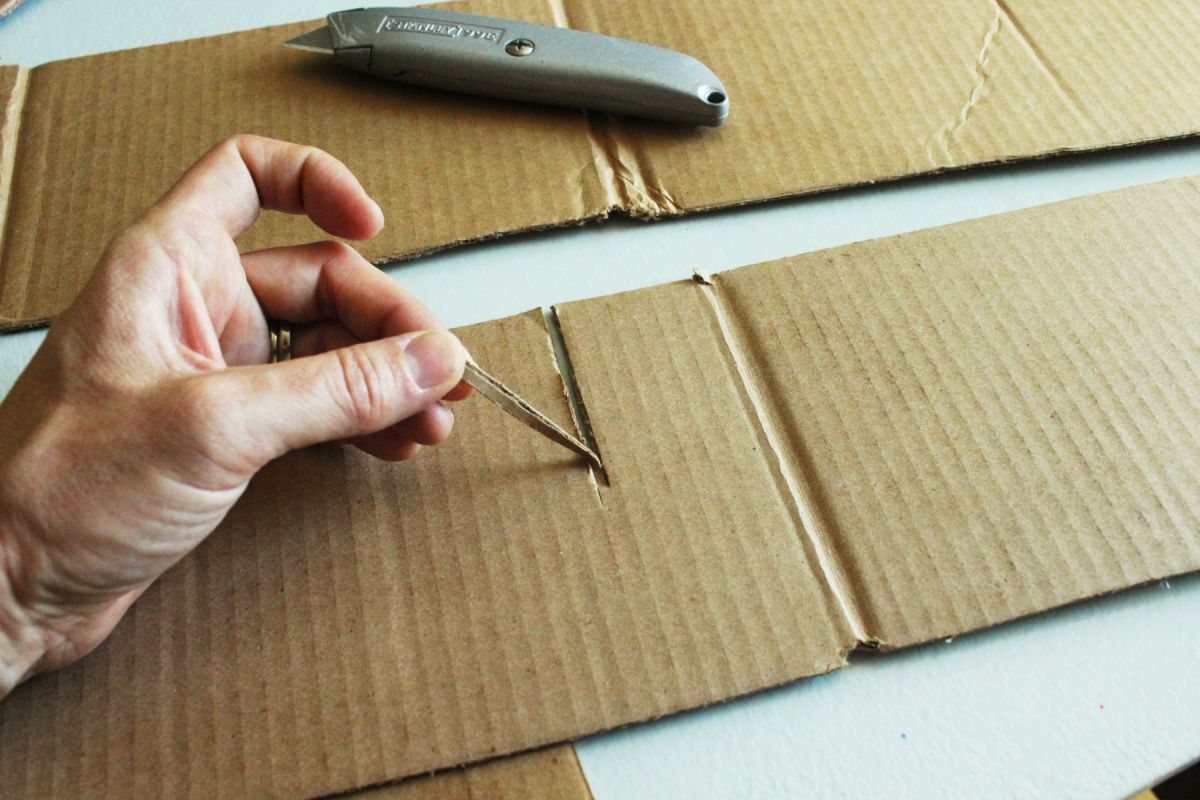
Drawer Dividers Diy Cardboard - Cardboard crafts organizers are very popular, let's make one today with my tutorial. In this instance, we took into account the size of the pairs of socks in length and width. Web the formula to draw your drawer divider pattern: Don’t forget to use the lids in addition to the boxes themselves. So you've got two rectangles. Web take out the card stock and use a ruler to draw a final outline, taking 2 mm off each side of the rough outline. Web after the glue has dried, remove the dividers from the drawer and remove the tape. Next, we need to create divider strips that fit our drawer. Fold your diy drawer dividers. Determine the layout of your diy cardboard drawer dividers that will organize its contents most efficiently.
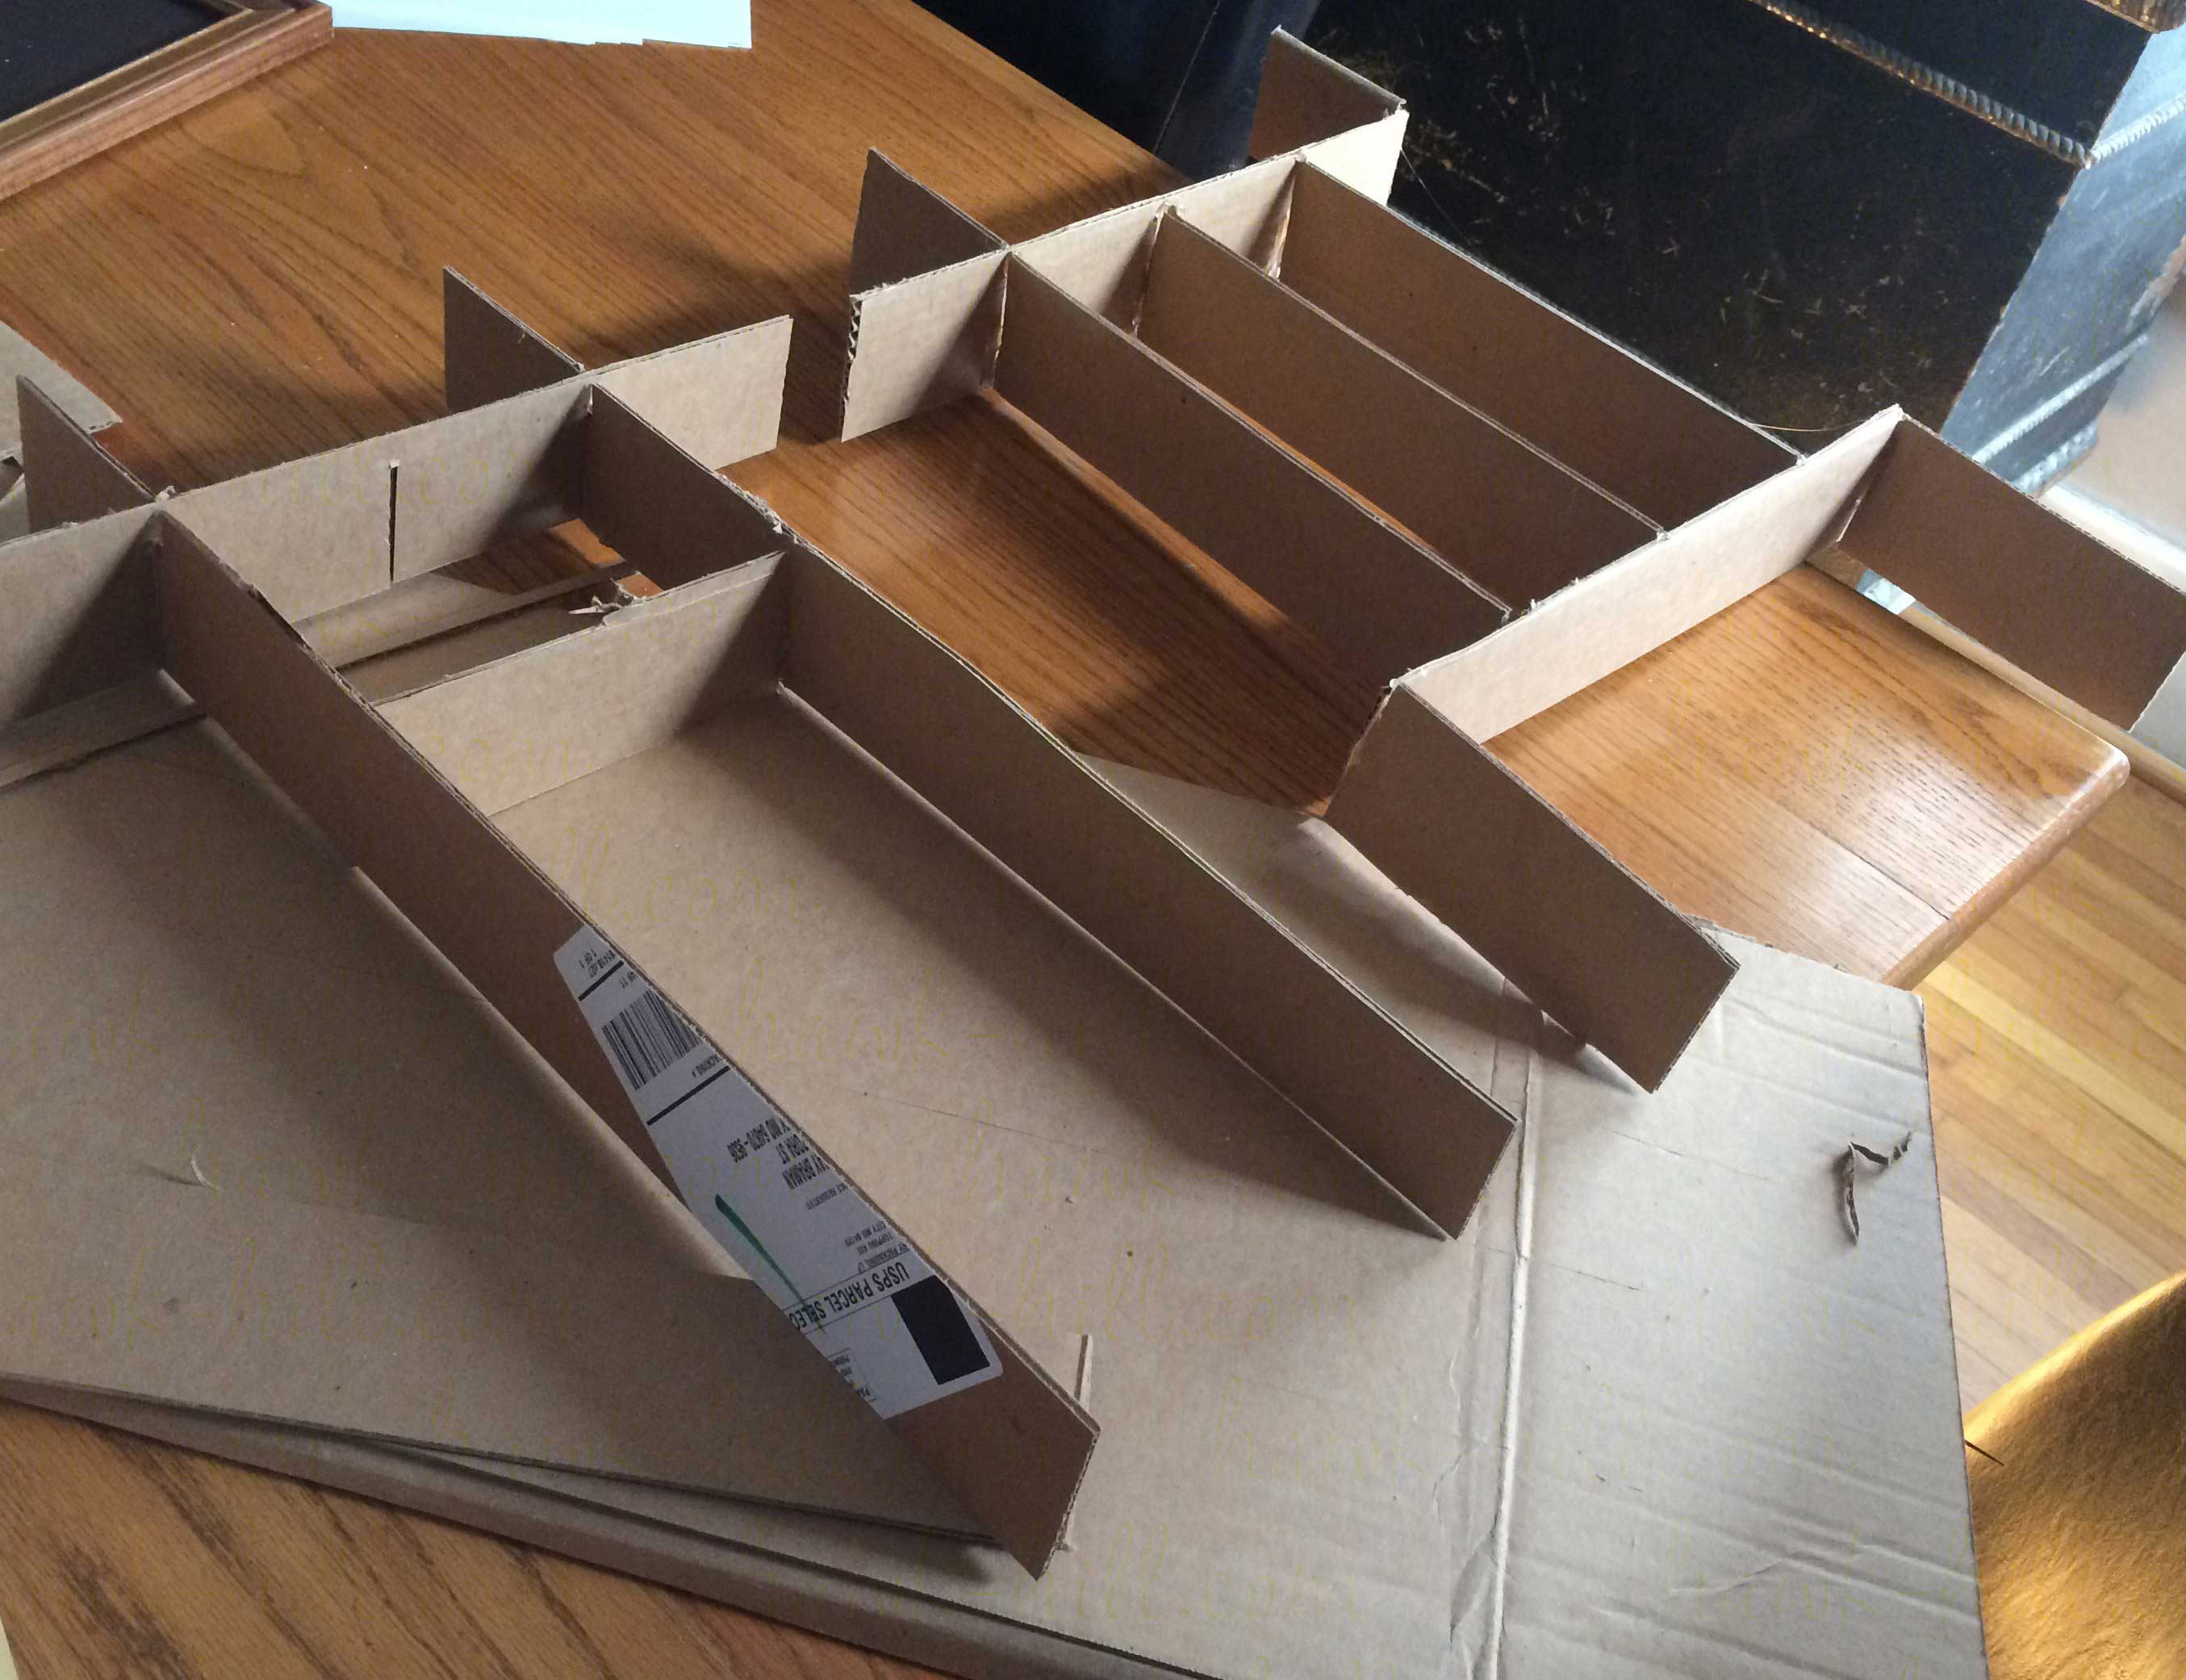
2) then cut one piece of cardboard: If you don’t want the overlap then it’s: Cardboard crafts organizers are very popular, let's make one today with my tutorial. Fold your diy drawer dividers. This project has help up well, although the glued and nailed t joints have needed repaired once. Don’t forget to use the lids in addition to the boxes themselves. There are a total of 10 folds. Putting the diy cardboard drawer organizer together is really easy! Web cut the piece of cardboard down and tape it into the middle of the box to make a divider, then decorate the outside with patterned paper, making sure to fully tape or glue down the edges so it won. You’ll find them free in my library — look for design #494.
Web cut the piece of cardboard down and tape it into the middle of the box to make a divider, then decorate the outside with patterned paper, making sure to fully tape or glue down the edges so it won. Web take out the card stock and use a ruler to draw a final outline, taking 2 mm off each side of the rough outline. Add shelf paper to the bottom of the drawer and put your dividers in place. Always make your base 2mm shorter than the measures in your main design: This became the plan for the diagonal drawer dividers: You could also use thick cardboard, but it's not as sturdy. This project requires minimal materials such as a white wood board, wood glue, and a nail gun or hammer and nails. 2) then cut two pieces of cardboard: Web comparatively, diy drawer dividers made from cardboard or foam board range from free (if you use your leftover amazon boxes) to just a few dollars per drawer! Determine the layout of your diy cardboard drawer dividers that will organize its contents most efficiently.
DIY Drawer Dividers Out of Cardboard Craftsy Hacks
If not, your organizer will be lopsided. 2) then cut one piece of cardboard: Web diy drawer divider using upcycled cardboard boxes. Web have you ever wanted to make your own corrugated cardboard furniture? Perfect for any drawer needs, these custom dividers are your solution to misplaced items.
DIY How to make a cardboard drawer organizer HD (corrugated cardboard
Check size in the drawer before you cover your divider and make any necessary adjustments. Make sure you fold really good creases in the cardboard so you can find your creases again when it’s covered in fabric. How to make a drawer dividers. Just follow these steps and get your thin. Cardboard crafts organizers are very popular, let's make one.
Tutorial DIY Drawer Dividers Kitchen Edition Hawk Hill
Web cut the piece of cardboard down and tape it into the middle of the box to make a divider, then decorate the outside with patterned paper, making sure to fully tape or glue down the edges so it won. You’ll find them free in my library — look for design #494. Next, we need to create divider strips that.
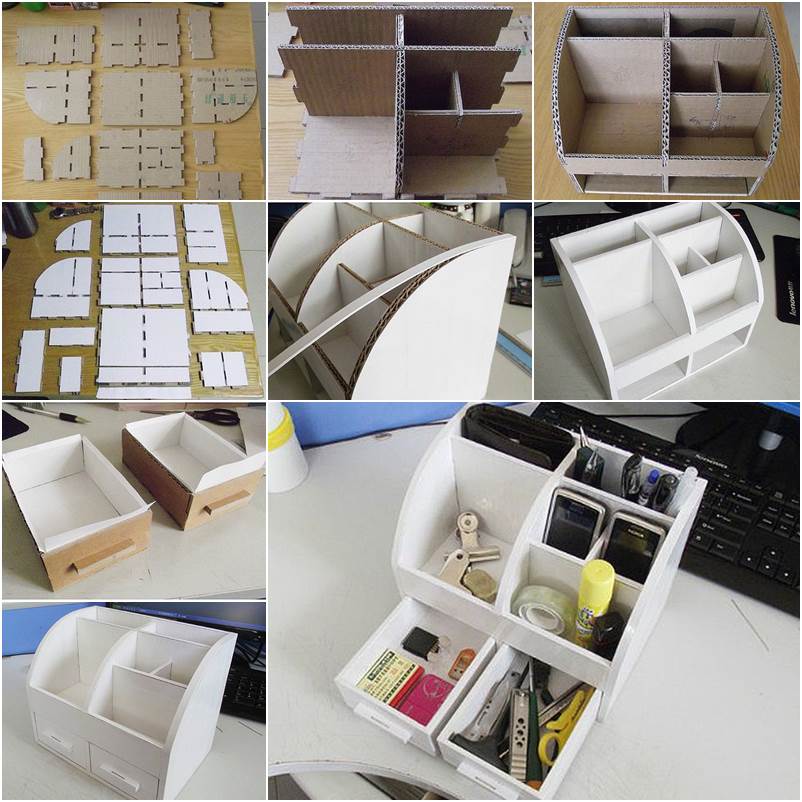
How to DIY Cardboard Desktop Organizer with Drawers
In this instance, we took into account the size of the pairs of socks in length and width. This project has help up well, although the glued and nailed t joints have needed repaired once. Whether you need a wide expanse of dividers for a kitchen utensil drawer or deep dividers for dresser drawers full of clothes. One piece height.

HowTo DIY Cardboard drawer dividers AppleGreen Cottage
I always grab rolls of solid colored wrapping paper at dollar tree to use on projects like this. Make sure you fold really good creases in the cardboard so you can find your creases again when it’s covered in fabric. This project requires minimal materials such as a white wood board, wood glue, and a nail gun or hammer and.
DIY Drawer Dividers Out of Cardboard Craftsy Hacks
Then add the dividers to any slot. Web diy drawer divider using upcycled cardboard boxes. Web having a hard time keeping your things organized in your drawer? Make sure you fold really good creases in the cardboard so you can find your creases again when it’s covered in fabric. It’s a simple solution, an.
Easy DIY Cardboard Kitchen Drawer Dividers 2023 AtOnce
Web diy drawer divider using upcycled cardboard boxes. All that’s left to do is add in all your perfectly organized items. Use these paper templates to cut your kraft board, chip. Outline the sides of the divider according to your preferred divider height. Be sure that both ends on the divider are lined up correctly in both bases.
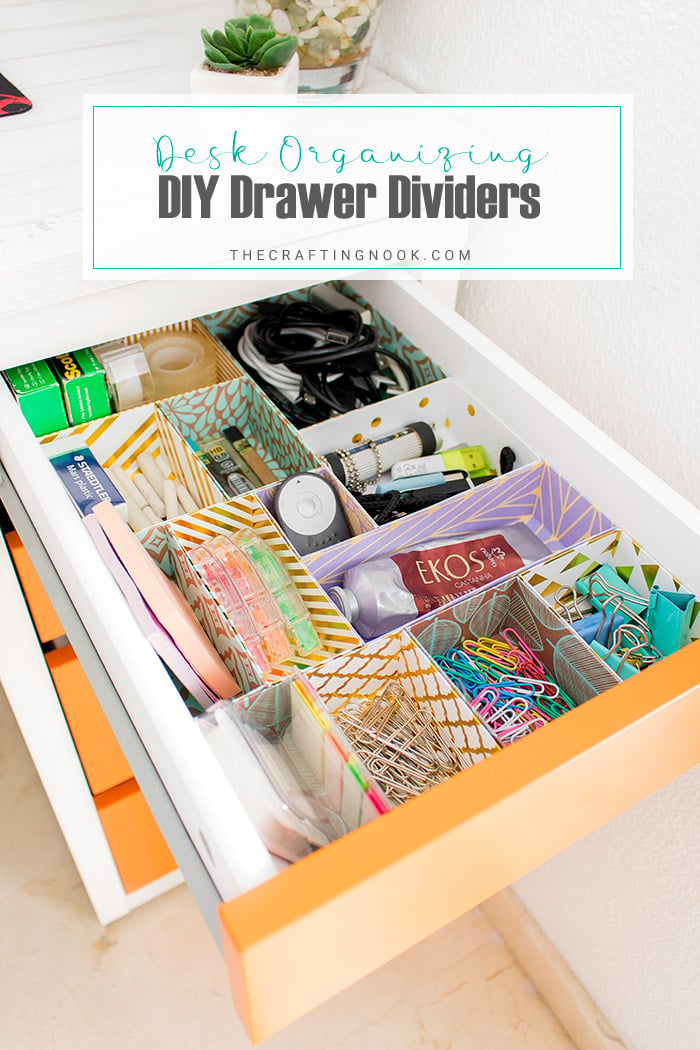
Easy DIY Drawer Dividers For Any Size Drawer The Homes I Have Made
Place your paper with the side you want to appear inside face up. You could also use thick cardboard, but it's not as sturdy. Now it’s time to fold your drawer dividers! Web supplies needed for diy drawer dividers. You’ll be measuring, cutting, and assembling pieces to fit your drawer’s specific dimensions.

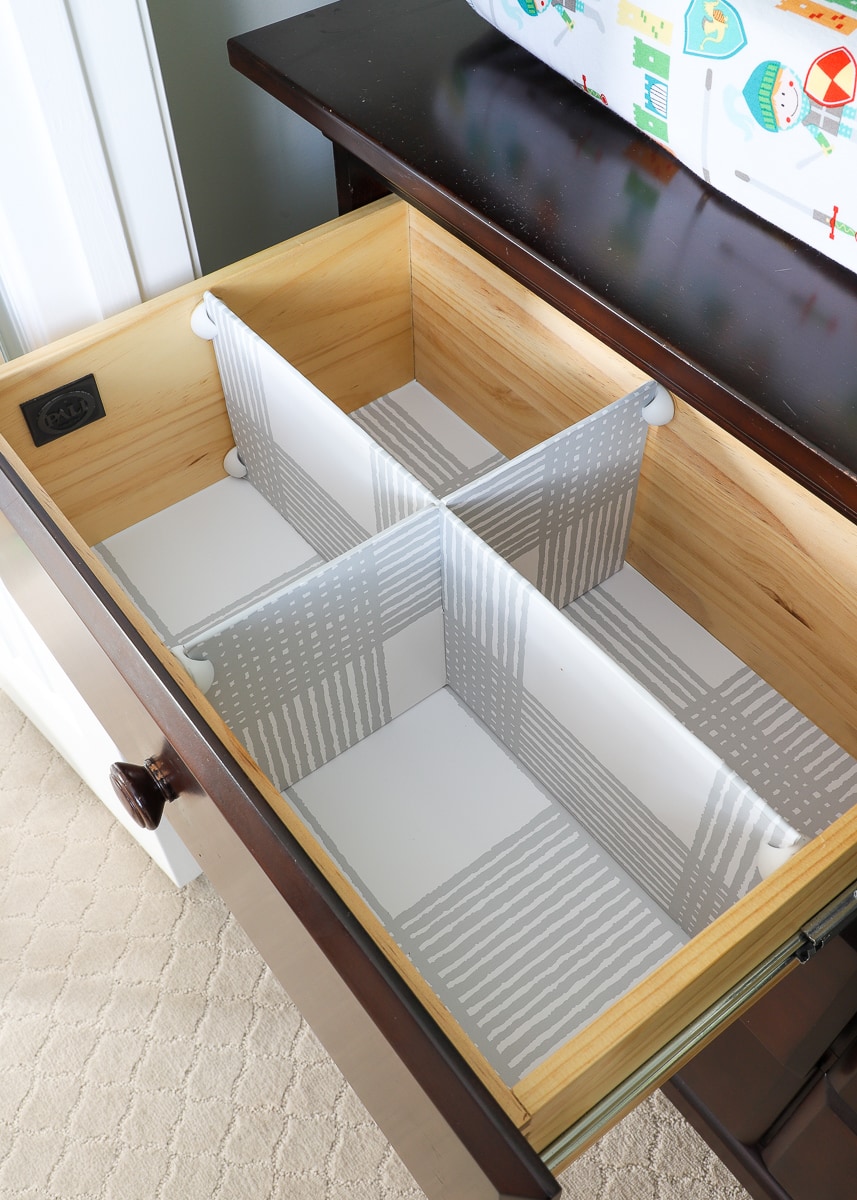
How to Make Durable Drawer Dividers for Pennies Diy
The crime drama has been. 3/16 foam core board or plastic corrugated sign board. Fold your diy drawer divider along the fold lines shown in the above photo. This project was so easy, i made a diy drawer divider. Web having a hard time keeping your things organized in your drawer?
DIY Drawer Dividers in 15 Minutes or Less
One piece height x depth, the other piece height x width. Web i created my dividers’ joints in two ways: Fold one end of the cardboard flap to the right and the other end to the left, making sure it fits snuggly in the drawer. This project requires minimal materials such as a white wood board, wood glue, and a.
Be Sure That Both Ends On The Divider Are Lined Up Correctly In Both Bases.
Next, we need to create divider strips that fit our drawer. Now it’s time to fold your drawer dividers! Web have you ever wanted to make your own corrugated cardboard furniture? Web i created my dividers’ joints in two ways:
Perfect For Any Drawer Needs, These Custom Dividers Are Your Solution To Misplaced Items.
Cut the excess sides along each side of the overlaps. Below is a size b box with the dark pink side up. If you don’t want the overlap then it’s: Web comparatively, diy drawer dividers made from cardboard or foam board range from free (if you use your leftover amazon boxes) to just a few dollars per drawer!
This Project Requires Minimal Materials Such As A White Wood Board, Wood Glue, And A Nail Gun Or Hammer And Nails.
Determine the layout of your diy cardboard drawer dividers that will organize its contents most efficiently. Don’t forget to use the lids in addition to the boxes themselves. Web take out the card stock and use a ruler to draw a final outline, taking 2 mm off each side of the rough outline. Check size in the drawer before you cover your divider and make any necessary adjustments.
Fold Your Diy Drawer Divider Along The Fold Lines Shown In The Above Photo.
3) then mark the middle of each piece and cut a line half way through. One piece height x depth, the other piece height x width. In this instance, we took into account the size of the pairs of socks in length and width. So you've got two rectangles.