Drawing Curly Hair Tutorial
Drawing Curly Hair Tutorial - Web how to draw curly hair. It’s also probably the most complex. So, on a new layer, i’m going to go in with a medium purple and draw shadows gently under the head. So think of a curl as a ribbon. Add more curly lines to fill up the outline you have drawn. Web view the full tutorial on how to draw curly hair. Continue to outline the person's face. Web get the free hair workbook to practice drawing lifelike hair with confidence: For the class you will need: And there you have the lazy “s” sketch for your curly hair!
A sheet of photocopy paper (a4 or letter) (if you are a patron you can download the template below and print that out for the class) set of pencil (2h, h , hb, b, 2b, 4b, 6b, 9b) pen shaped eraser (like a tombow mono) Draw an outline of the hair using curly lines. Web level up your drawings! When you draw the hair that curls over the front a second time, choose an angle that is comparable to the angle you used the first time so that the curls are uniformly spaced. Now, fill in the hair with texture. From the bottom of the oval, draw another curved line to meet the first in a rounded point. Remove highlights gradually with a kneaded eraser. Usually black hair is excluded in the hair tutorials which i have seen so i have gone through it in depth because it’s really not enough to tell. This is going to be the curly hair shadow. Web repeat the first step of drawing hair that curls over the front, use a similar angle to the first curl so that they are evenly spaced.
Take note of the way in which the right side of the example is shown to be winding around the cylinder. To do this, move your pencil to the hair part and draw several lines in the direction of where the hair grows. Web my drawing faces tutorial video: Now, fill in the hair with texture. Learn to draw curly hair in this step by step pencil drawing tutorial. Repeat the third step and draw a curl that goes behind the cylinder once more. The artist behind this sketch teaches others how. A sheet of photocopy paper (a4 or letter) (if you are a patron you can download the template below and print that out for the class) set of pencil (2h, h , hb, b, 2b, 4b, 6b, 9b) pen shaped eraser (like a tombow mono) So, on a new layer, i’m going to go in with a medium purple and draw shadows gently under the head. Add texture to the hair.
How to Draw Curly Hair in 3 Steps Step by Step Tutorial for Beginners
Add more curly lines to fill up the outline you have drawn. Web how to draw curly hair. This way, i don't run the risk of drawing a head that has odd proportions. Keep the skull in mind; Note how in the example you can see the right side curling around the cylinder.

How to Draw Curly Hair Drawing Spiral Curls Tutorial How to Draw
This will help you achieve realistic curls with plenty of volume. Rename this layer “sketch” to keep things organised. Web repeat the first step of drawing hair that curls over the front, use a similar angle to the first curl so that they are evenly spaced. Now, fill in the hair with texture. Gain full access to my exclusive drawing.
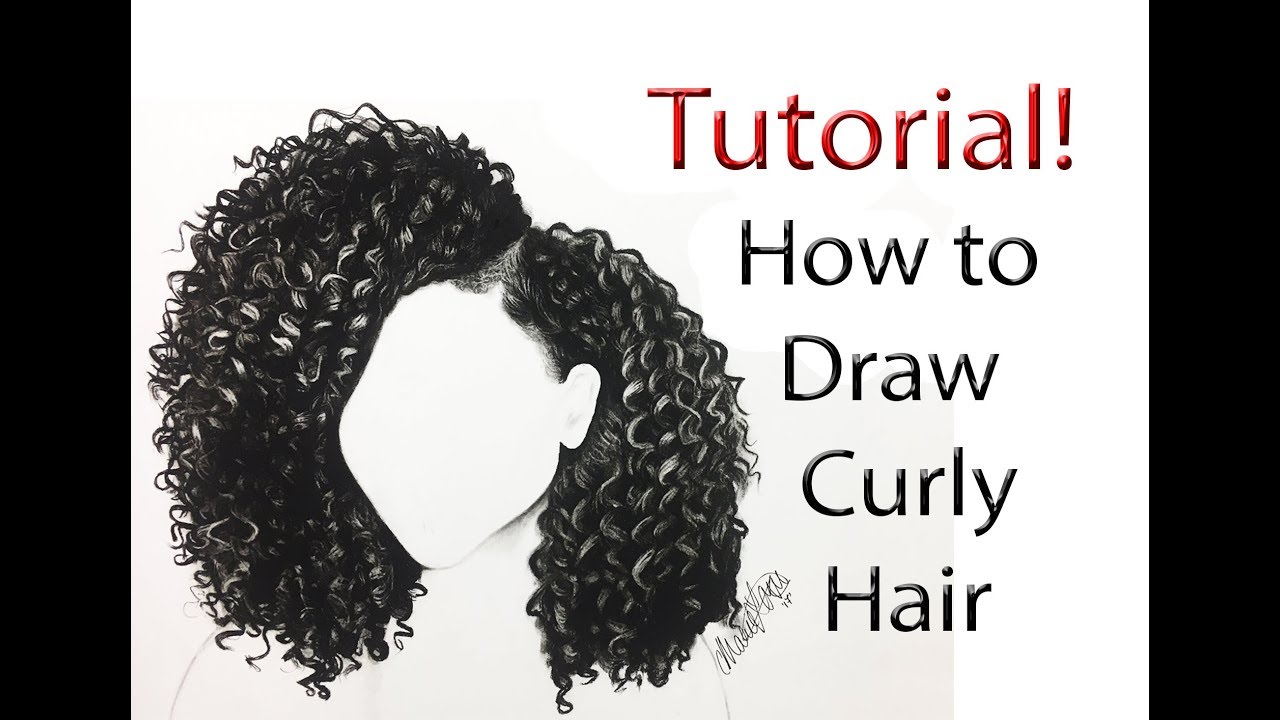
How to draw Curly Hair (from start to finish) tutorial YouTube
Click the link below the picture to access the full tutorial. Draw in the shape of the hair. Draw an outline of the head and shoulders. Usually black hair is excluded in the hair tutorials which i have seen so i have gone through it in depth because it’s really not enough to tell. Keep the skull in mind;
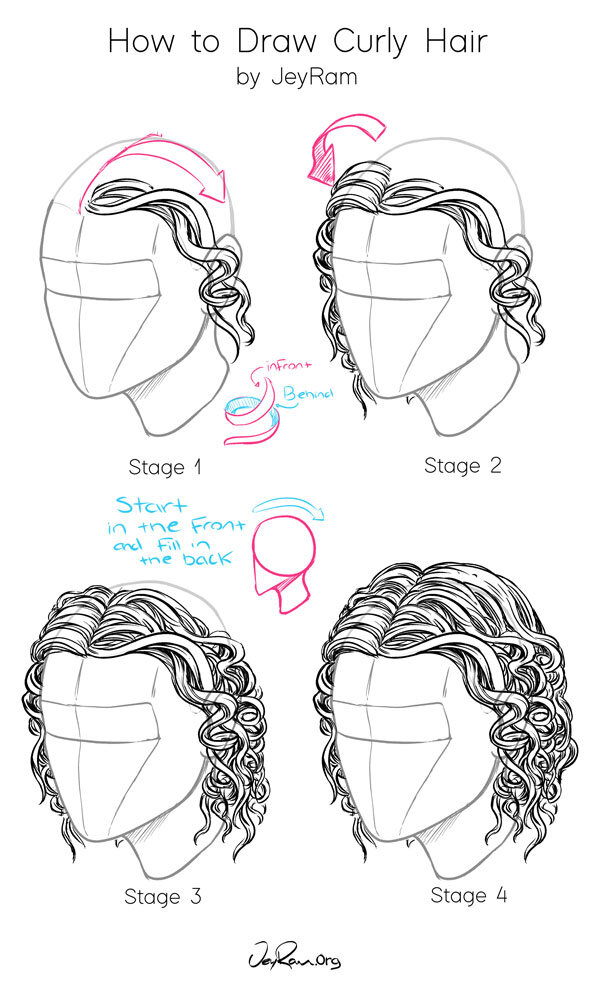
How to Draw Curly Hair Step by Step Art Tutorial JeyRam Spiritual Art
This way, i don't run the risk of drawing a head that has odd proportions. Continue to outline the person's face. Comments are turned off for this pin. Web how to draw curly hair. So, on a new layer, i’m going to go in with a medium purple and draw shadows gently under the head.

9+ Unbelievable Hairstyle Drawing Reference Curly
Start by blocking out the basic features of the facial area. To do this, move your pencil to the hair part and draw several lines in the direction of where the hair grows. Take note of the way in which the right side of the example is shown to be winding around the cylinder. Since voluminous hair can have varied.

How to Draw Curly Hair Step by Step Art Tutorial How to draw hair
Repeat the steps until you are satisfied with the way the hair looks. Establish the hair’s volume using basic shapes, keeping in mind the irregularities due to curls, and ensure these shapes roughly adhere to the head’s contour. To do this, move your pencil to the hair part and draw several lines in the direction of where the hair grows..

How to Draw Curly and Wavy Hair using Procreate
Comments are turned off for this pin. Add shadows and highlights to the curly hair. And there you have the lazy “s” sketch for your curly hair! This will help you achieve realistic curls with plenty of volume. Drawing curly hair is really fun and absolutely great for building confidence when it comes to adding texture.
![How to Draw Curly Hair Realistic with Pencil [ Step by Step Tutorial ]](https://drawanart.com/wp-content/uploads/2021/07/image-5.jpeg)
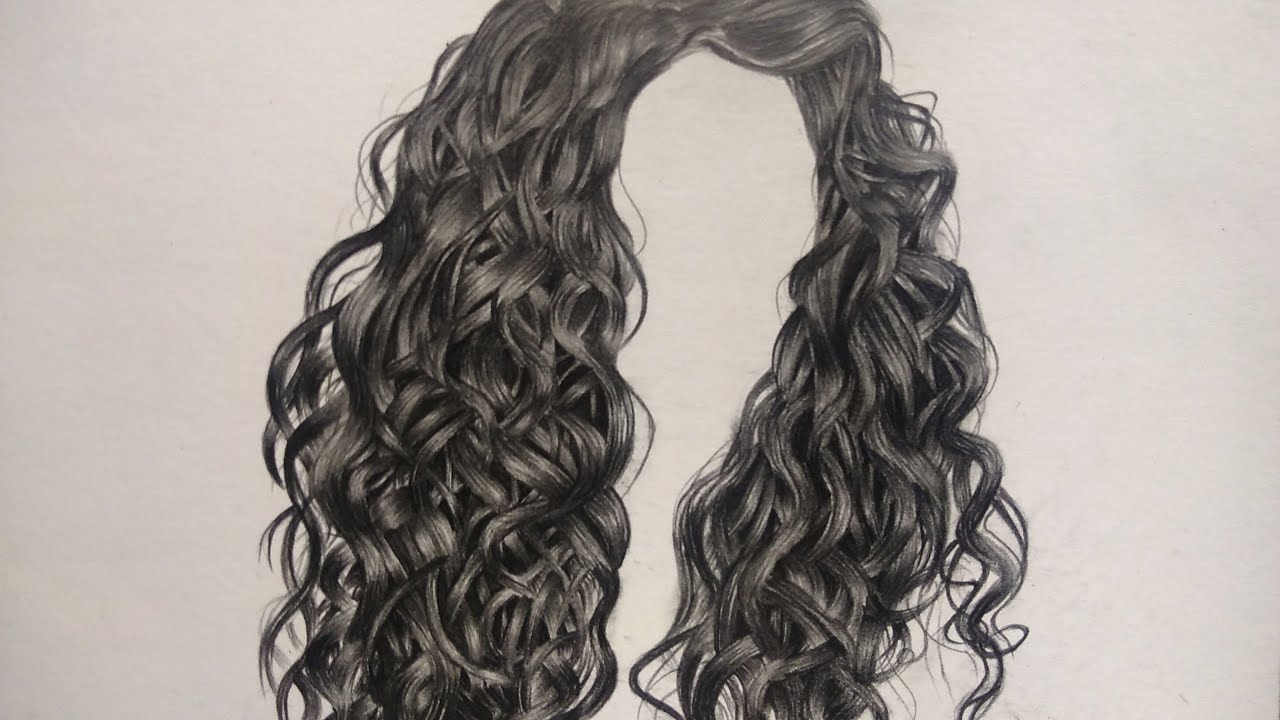
How to Draw Curly Hair Realistic with Pencil [ Step by Step Tutorial ]
Decide on what type of curl you wish for your drawing and which direction the curls fall. Blend the graphite from dark to light in the direction of the curls. Comments are turned off for this pin. This will help you achieve realistic curls with plenty of volume. This is an important step in the process.
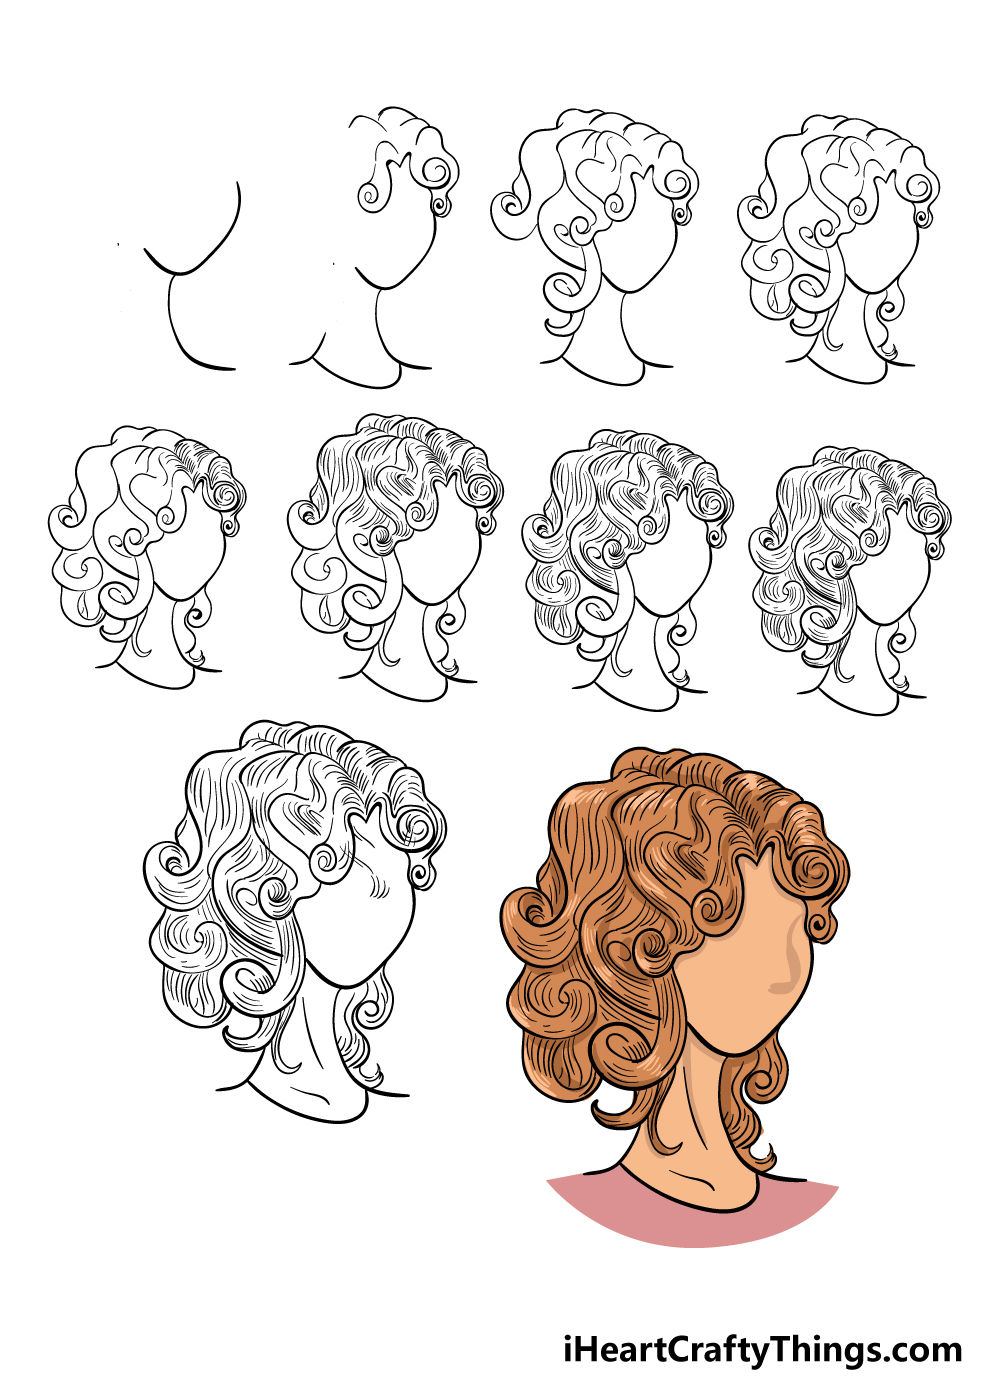
Curly Hair Drawing How To Draw Curly Hair Step By Step
Web initiate your drawing by sketching the head, determining where the hair will be, and finding the center point to guide the hair growth. Web my drawing faces tutorial video: Blend the graphite from dark to light in the direction of the curls. For the class you will need: Keep the skull in mind;

How To Draw Curly Hair With Pencil How To Do Thing
Now, draw in a general shape of where the hair will lay. Repeat the steps until you are satisfied with the way the hair looks. Add shadows and highlights to the curly hair. This is an important step in the process. So, on a new layer, i’m going to go in with a medium purple and draw shadows gently under.
Here, The Hair Is More Dense And Light Doesn’t Hit This Part.
For the class you will need: So think of a curl as a ribbon. And there you have the lazy “s” sketch for your curly hair! Now, fill in the hair with texture.
Web Initiate Your Drawing By Sketching The Head, Determining Where The Hair Will Be, And Finding The Center Point To Guide The Hair Growth.
This is an important step in the process. Once you decide, delete the extra lines. This is going to be the curly hair shadow. Web level up your drawings!
Practice Drawing Curls Using A Cylindrical Shape.
The artist behind this sketch teaches others how. How to draw curly & wavy hair [video] here is a tutorial for drawing both curly and wavy hair. Visualize the type of hairstyle you like. I am offering a 20% discount.
A Sheet Of Photocopy Paper (A4 Or Letter) (If You Are A Patron You Can Download The Template Below And Print That Out For The Class) Set Of Pencil (2H, H , Hb, B, 2B, 4B, 6B, 9B) Pen Shaped Eraser (Like A Tombow Mono)
Extend a long, curved line downward from one side of the circle. Take note of the way in which the right side of the example is shown to be winding around the cylinder. Continue to outline the person's face. To do this, move your pencil to the hair part and draw several lines in the direction of where the hair grows.