Drawing On Plate
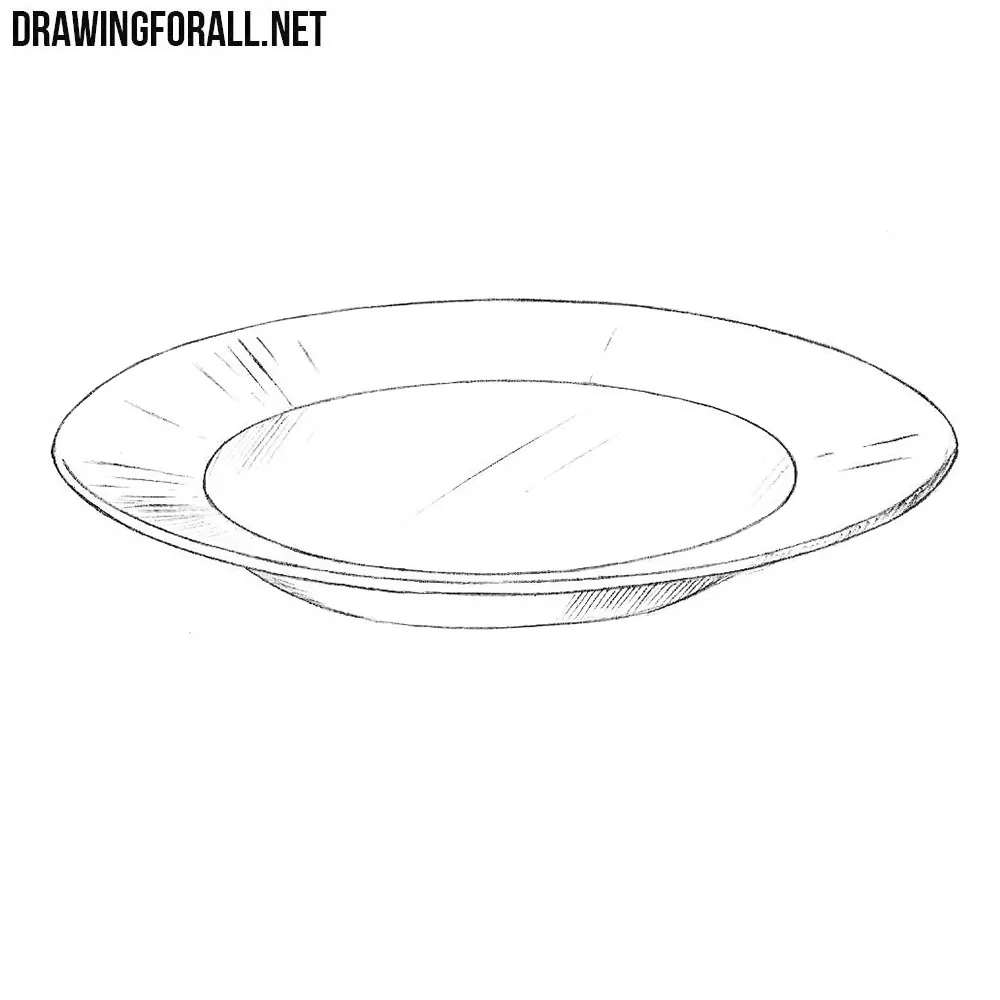
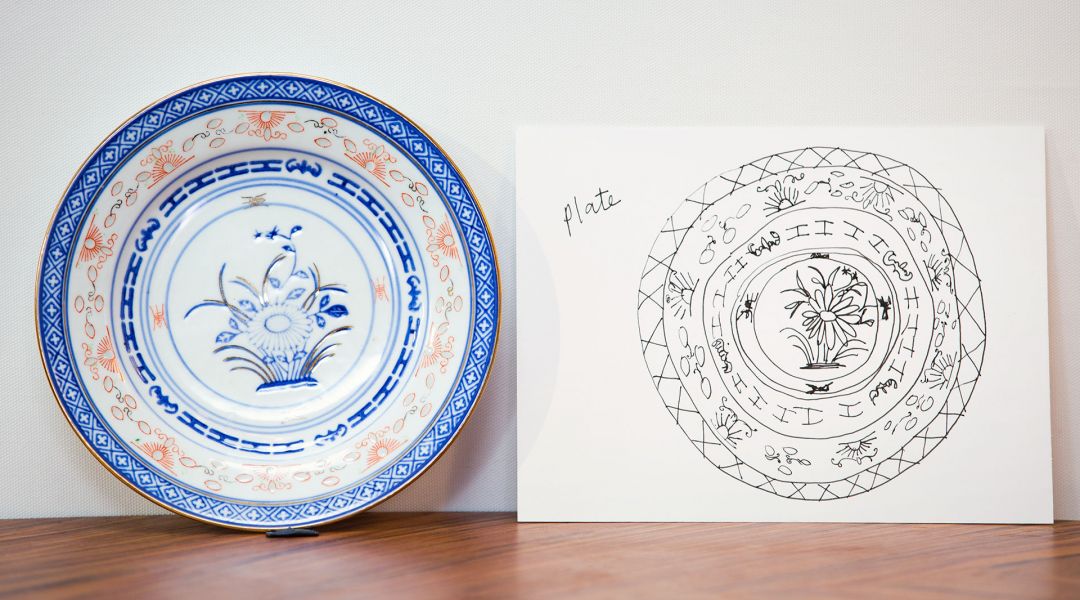
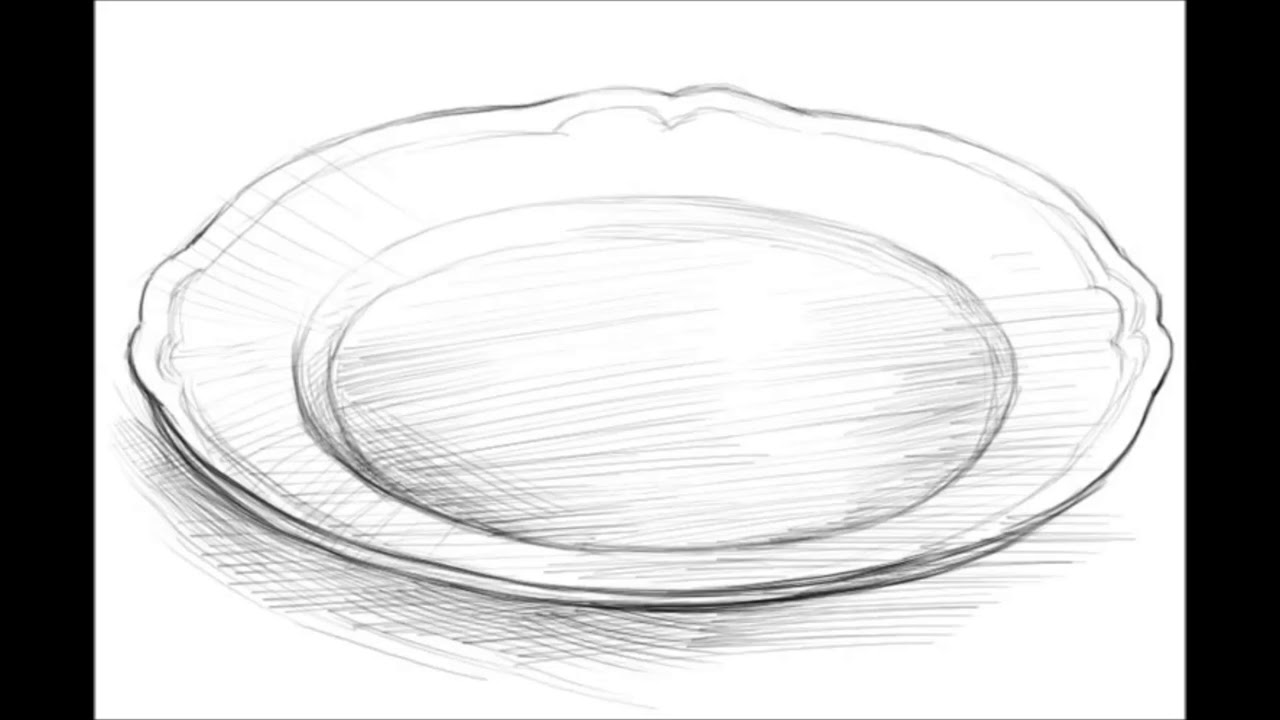
Drawing On Plate - Now draw another oval outer the oval from the first step, and for this, we will draw a half curve line. Find a work area that can tolerate water spills. Web start by drawing an oval shape to outline the plate. Web wipe of the plates clean. With the help of special markers for painting the dishes yourself, you can quickly and simply decorate the ceramic plate with inscriptions, as well as depict a graphic and very detailed picture. To create the plate’s rim, draw a smaller circle inside the first one, following its shape. You can draw freehand, make a stencil or use a purchased stencil for your design. Draw some curved lines connecting the second and third circles to give the plate some depth and a 3d. To ensure a perfect circle, you can use a compass or trace a circular object such as a lid or a small plate. Once the plates are dry, you can add another level to this project by adding lines with marker.
Have the kids draw, scribble and doodle away! We hope you have as much fun with this project as we did. Web place the finished plates in the oven set at 350 degrees for 30 minutes. Draw a thin, rounded line inside the plate. Sketch out a smooth, thin line on the left side. We are unable to offer rush processing at this time. Place the plates in a cold oven, set the temperature to 425 degrees for 30 minutes. Allow the ink on the plates to dry completely. Then, divide the plate into two or three sections by drawing additional curved lines that intersect the centerline. Make sure to leave some space around the edge for the food.
Web start by drawing an oval shape to outline the plate. Web how to draw a plate easy step by step for beginners. Then, divide the plate into two or three sections by drawing additional curved lines that intersect the centerline. Draw the first prong on the left side by drawing two straight lines of similar length and making the ends meet at the top. Add the centerline and divide the plate. The head of the fork which is used in scooping up food is known as a prong. With the help of special markers for painting the dishes yourself, you can quickly and simply decorate the ceramic plate with inscriptions, as well as depict a graphic and very detailed picture. Web depict the bottom outline of the plate. Sketch out a smooth, thin line on the left side. Plate is 10 and mug holds 12 ounces.

drawing on plates Drawing on plates, Ceramic painting, Ceramic art
Turn off the oven and leave the pates in the oven for a full 24 hours before removing. Designs made with paint pens will last longer. Painting on plates with markers. Follow my step by step drawing tutorial and make your own plate drawing easy!👇 s. Web depict the bottom outline of the plate.
How to Draw a Plate
Repeat the previous step and draw an inner path on. The cubs draw six walks with the bases loaded and mike. Make sure to leave some space around the edge for the food. Allow the ink on the plates to dry completely. A lot of the colors had changed quite drastically.

How to Draw a Plate Easy Drawings YouTube
Have the kids draw, scribble and doodle away! Web how to draw a plate | plate of food easy draw tutorialmalt shop bop by kevin macleod is licensed under a creative commons attribution 4.0 license. This oval should be slightly outer than the center of the first oval. Rule changes probable pitchers starting lineups. We hope you have as much.

Children's Drawing on a plate Childrens drawings, Hand painted
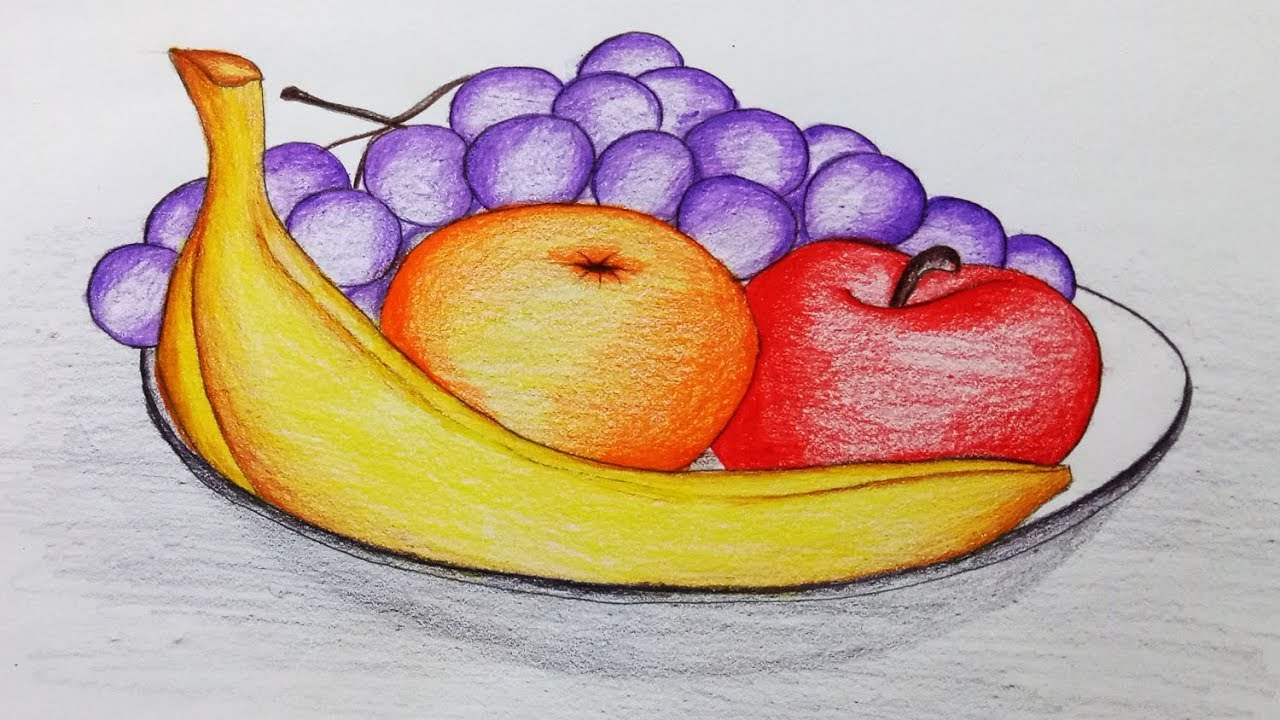
Web ️ ️ ️ ️ get 2 months of skillshare free: Of course, the simple line drawings also work but not effective as complete color filling drawings. Have the kids draw, scribble and doodle away! The head of the fork which is used in scooping up food is known as a prong. Poet laureate ada limón, the drake equation handwritten.

Drawing on plates YouTube
To make your art creation float you need just white board makers, a plate and s. We used sharpie permanent markers because the color is bold and they write well on just about any surface. Web start by drawing a large circle for the body of the plate. Rule changes probable pitchers starting lineups. Turn off the oven and leave.
Food Plate Drawing at Explore collection of Food
Please like comment subscribe to my channel to see more interesting videos ! Then, divide the plate into two or three sections by drawing additional curved lines that intersect the centerline. Of course, the simple line drawings also work but not effective as complete color filling drawings. Plate is 10 and mug holds 12 ounces. Have the kids draw and.
How to Draw a Decorative Plate by Molly Hatch Creativebug
Web the cubs draw six walks with the bases loaded and mike tauchman hits an rbi single to score seven runs in the top of the 5th. Web how to draw a plate easy step by step for beginners. Now, let your children draw their own drawings on the ceramic plate. Put the plates in the oven and set the.
How To Draw A Plate YouTube
Web about this item. Have the kids draw, scribble and doodle away! Allow the ink on the plates to dry completely (24 hrs). Once the plates are dry, you can add another level to this project by adding lines with marker. Sketch out a smooth, thin line on the left side.

Draw on plates with permanent markers and bake on 300 for 20 minutes
Add a third, even smaller circle inside the second one to create the base of the plate. Draw a thin, rounded line inside the plate. Follow my step by step drawing tutorial and make your own plate drawing easy!👇 s. Web wipe of the plates clean. Web the make a plate art kit has successfully provided art projects and fundraisers.

Plate Drawing, Painting, Coloring for Kids & Toddlers How to Draw
Now draw another oval outer the oval from the first step, and for this, we will draw a half curve line. The permanent marker drawing should have remained stuck to the plate. Rule changes probable pitchers starting lineups. Plate is 10 and mug holds 12 ounces. Continue to draw the outline and draw a smooth, rounded line at the bottom.
You Can Draw Freehand, Make A Stencil Or Use A Purchased Stencil For Your Design.
We are unable to offer rush processing at this time. Draw the first prong on the left side by drawing two straight lines of similar length and making the ends meet at the top. Place the plates in a cold oven, set the temperature to 425 degrees for 30 minutes. Web the vault plate was installed on nasa's europa clipper spacecraft on may 3, 2024.
Web There It Was Floating And Moving As If It Were Alive!
Again, this difference is due to the special polymer in the dry erase marker ink. Of course, the simple line drawings also work but not effective as complete color filling drawings. Web place the finished plates in the oven set at 350 degrees for 30 minutes. Web subscribe to my channel and wait for alex’s space adventure floating drawing!
A Little Above The Middle Of The Oval, We Mark The.
To make your art creation float you need just white board makers, a plate and s. We used sharpie permanent markers because the color is bold and they write well on just about any surface. Place the plates in a cold oven, set the temperature to 425 degrees for 30 minutes. Add the centerline and divide the plate.
Continue To Draw The Outline And Draw A Smooth, Rounded Line At The Bottom.
After 30 minutes, i turned the oven off but left the plates inside to cool, leaving them there for several hours. Allow the ink on the plates to dry completely. Follow my step by step drawing tutorial and make your own plate drawing easy!👇 s. Cubs plate seven runs in the 5th cubs @ pirates.