Drawing Perspective Room
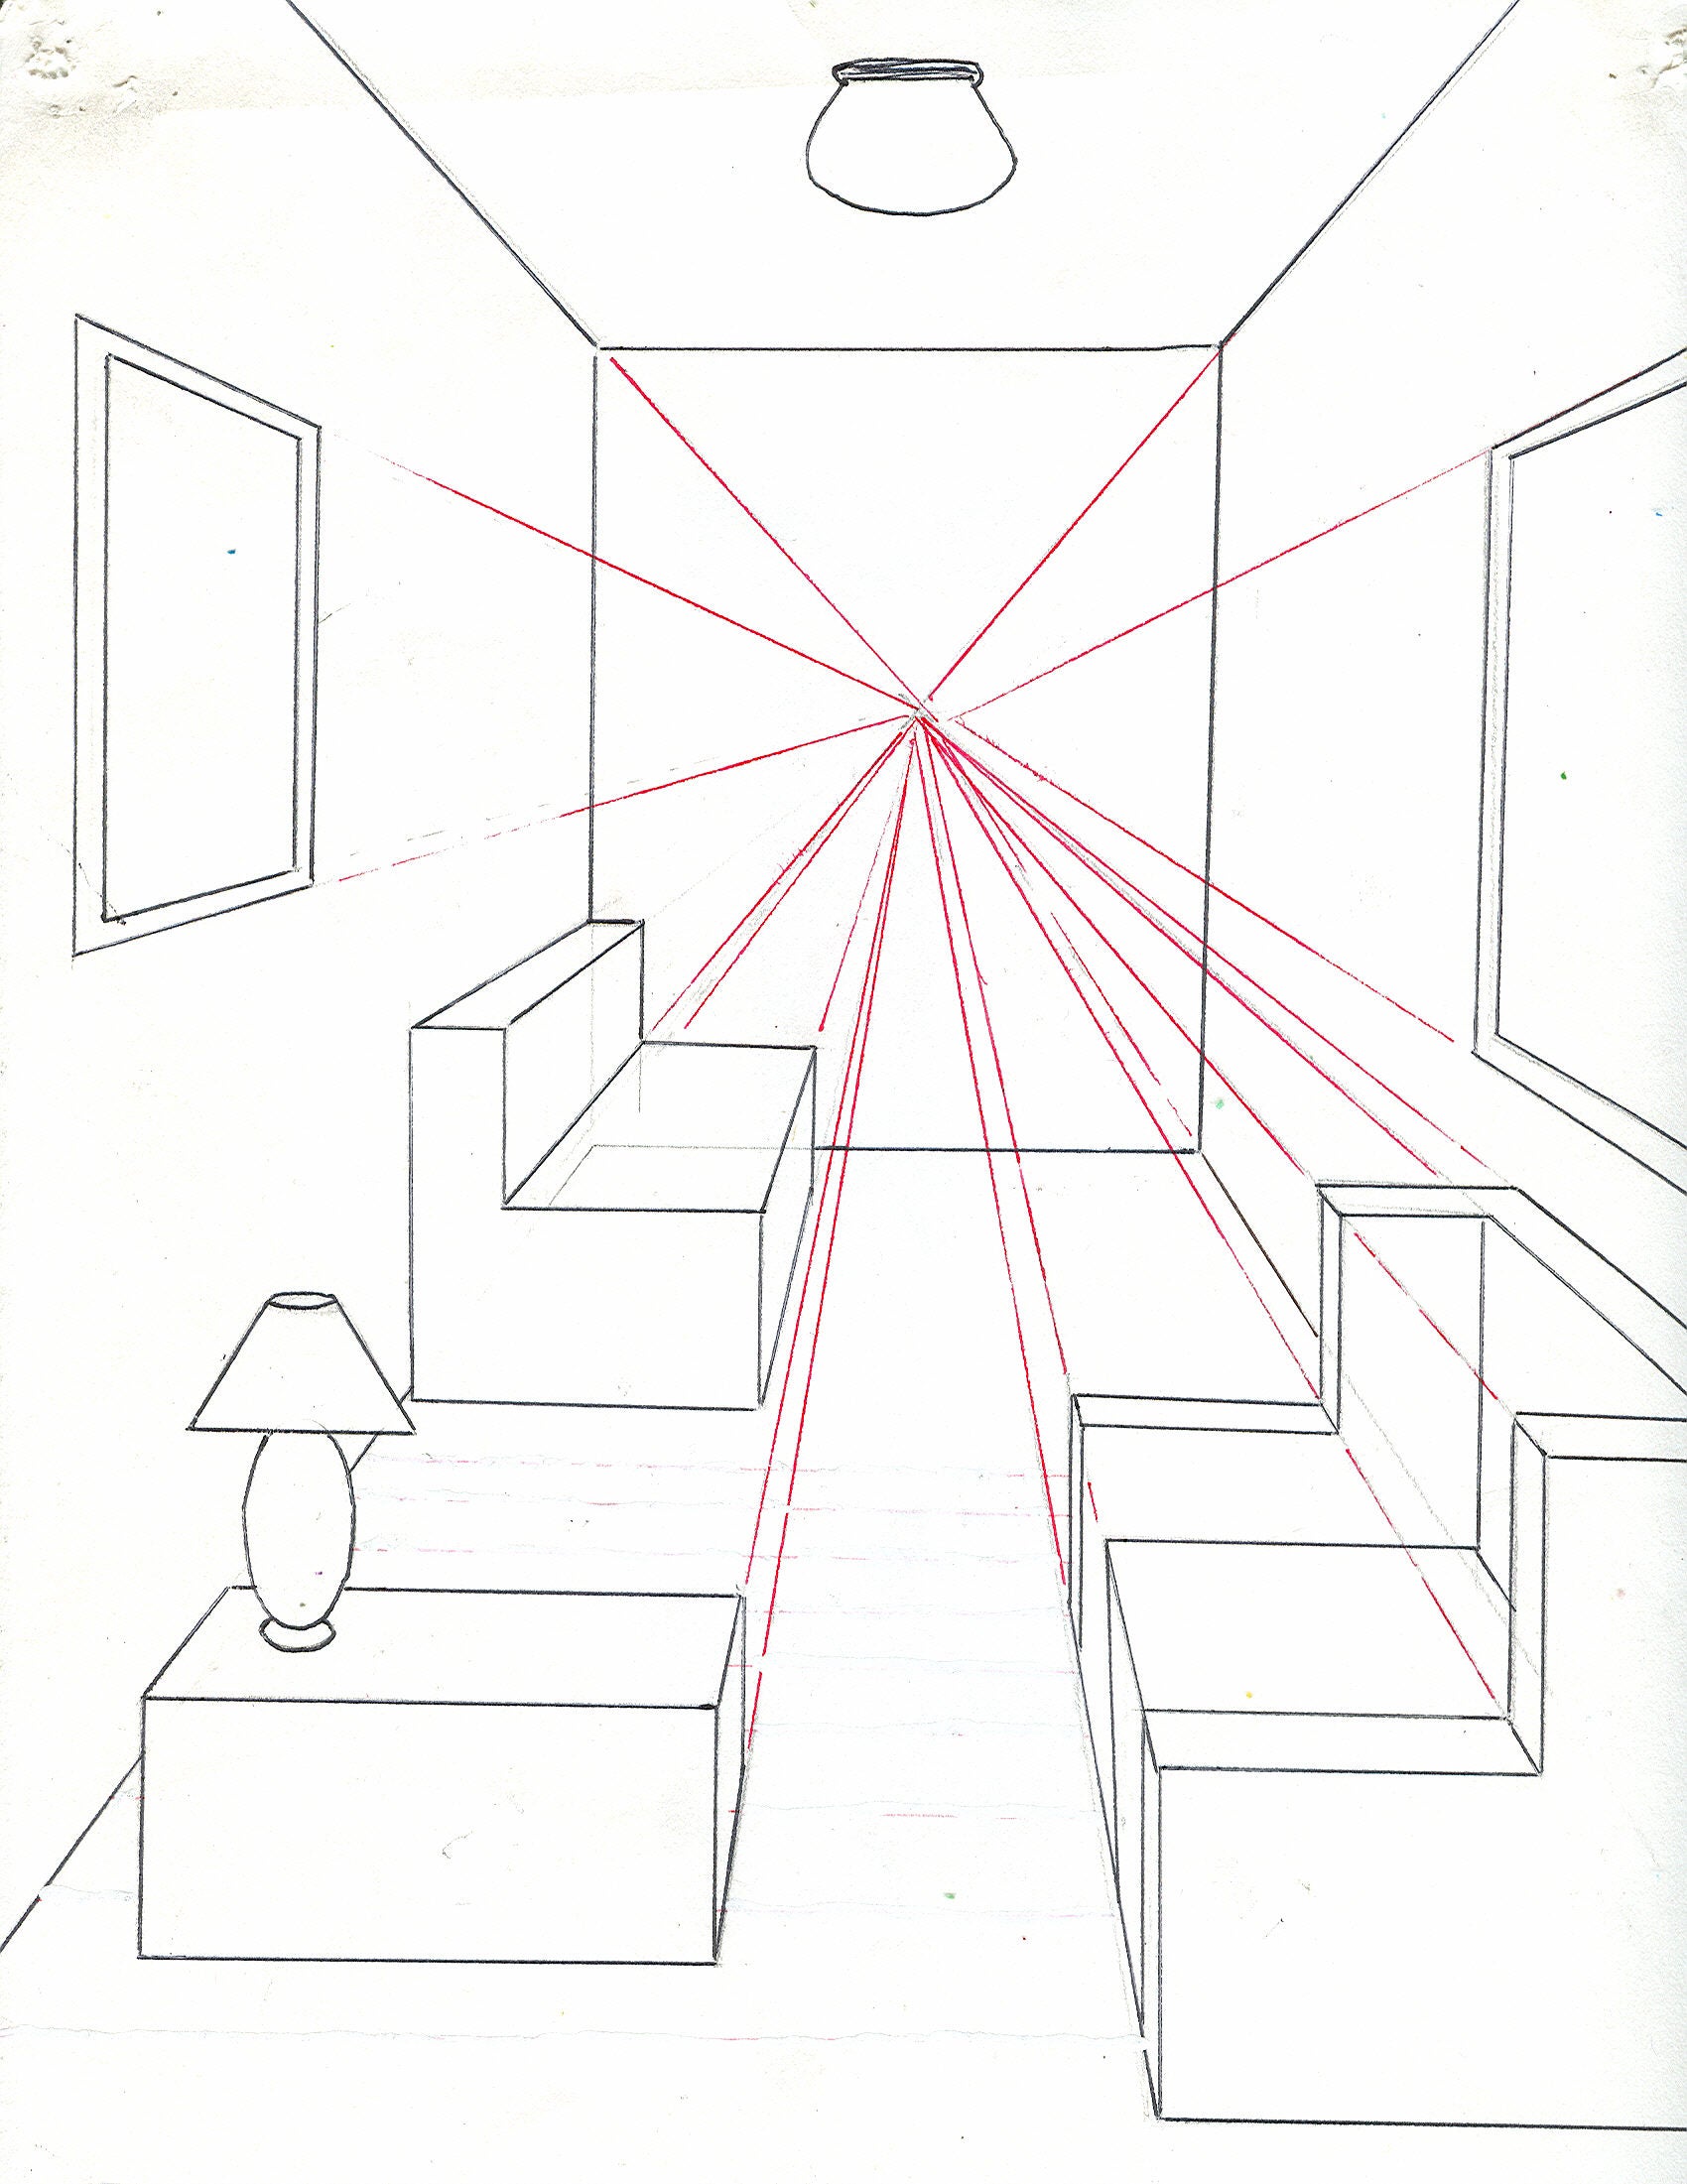
Drawing Perspective Room - The vanishing point for this perspective drawing will be in the middle of the ‘x.’. It’s like an illusion you can create to transform your flat drawing into something more 3d. Web the art academy. This 2pt drawing method is defined by 2 vanishing points that represent 2 convergence points. With your ruler, draw lines intersecting at this point. Now, draw the back wall of your room, using only horizontal and vertical lines, making sure at least part of it overlaps the hl. Draw your horizon line first, anywhere on the page, though closer to middle works best for this exercise. / circlelineartschool learn how to draw a room in perspective : Web how to draw a room in 2 point perspective: Holabird and roche (architect) title.
(for details instructs on the drawing, please refer to the video above) Lightly draw a rectangle to create the back wall. 18k views 2 years ago town drawings. Web 21 steps to complete a 1 point perspective room interior drawing. With your ruler, draw lines intersecting at this point. / circlelineartschool learn how to draw a room in perspective : Surfaces that face the viewer are drawn using their true shape. Web the art academy. This 2pt drawing method is defined by 2 vanishing points that represent 2 convergence points. If you think about it, drawing any kind of space is like creating an illusion, the reason for this is that you are making it look like there is a 3d space with depth on a completely flat drawing surface.
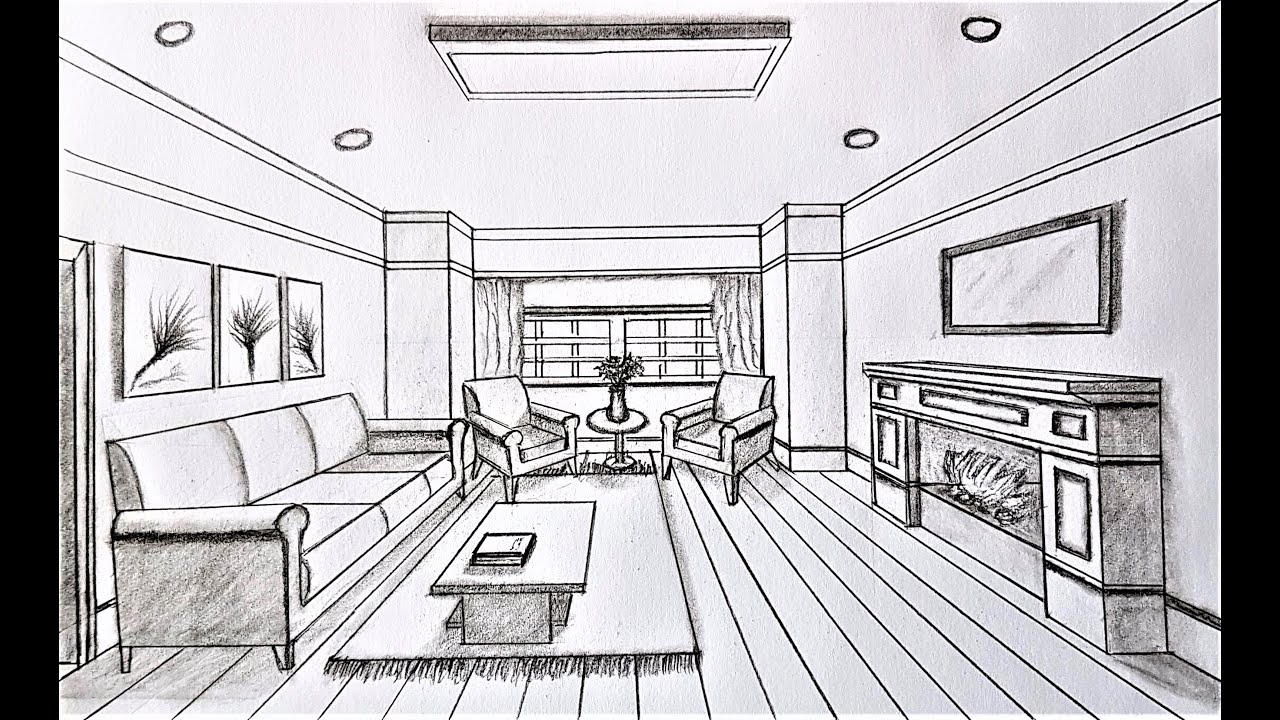
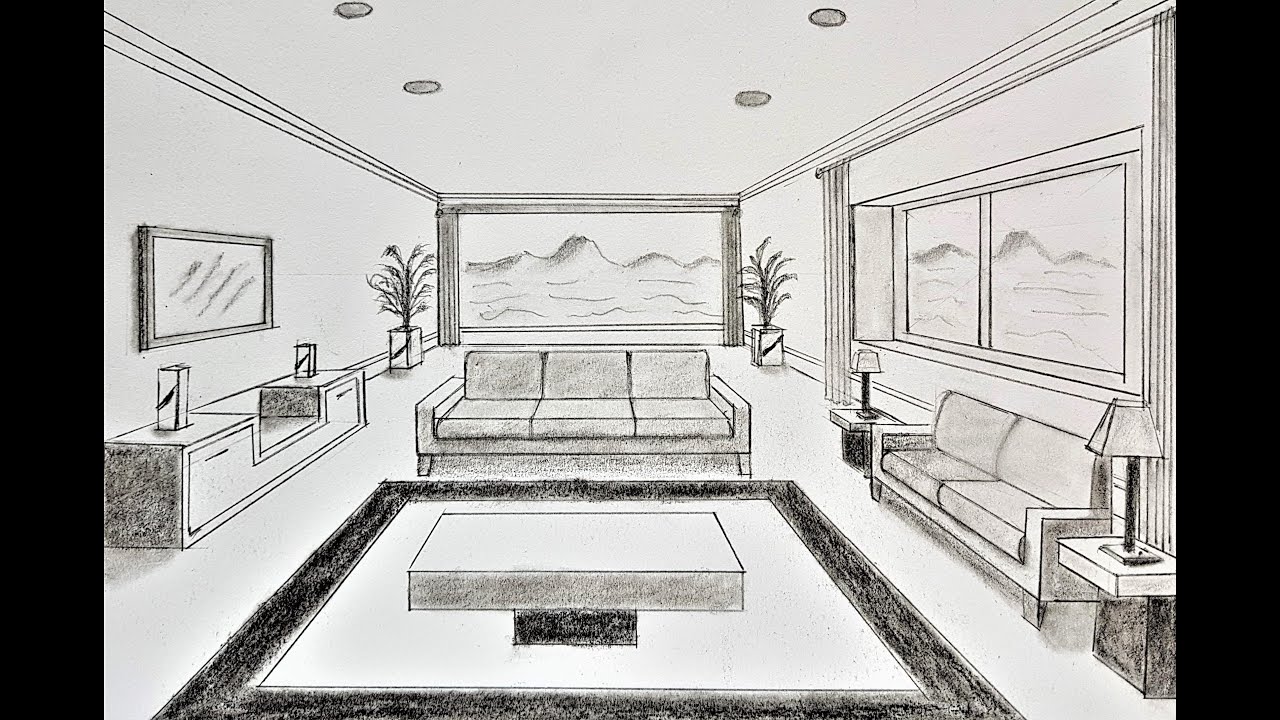
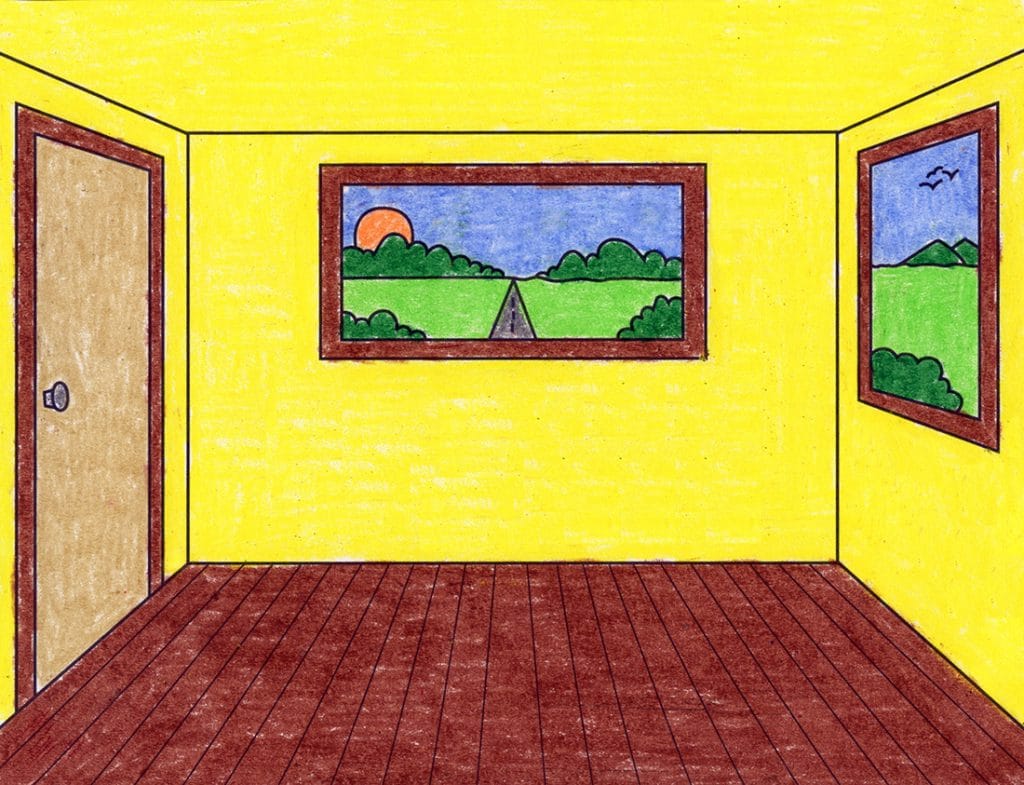
Be sure all corners are straight 90 degree angles. Draw your horizon line first, anywhere on the page, though closer to middle works best for this exercise. 57 × 80 cm (22 7/16 × 31 1/2 in.) credit line. Let’s start with the wall that’s facing us directly. Lightly draw an ‘x’ from corner to corner to define the four walls. So in today’s lesson, we are going to go put the finishing touches on our perspective room drawing and also shade it. Web 21 steps to complete a 1 point perspective room interior drawing. Use a ruler to draw a straight horizon line with a vanishing point that you can see clearly. After you are complete your drawing will look something like this: Web the art academy.

How to draw a room in 1 point perspective easy step by step drawing
Use a ruler to draw a straight horizon line with a vanishing point that you can see clearly. Draw your horizon line first, anywhere on the page, though closer to middle works best for this exercise. Graphite, watercolor, and gouache on illustration board. This 2pt drawing method is defined by 2 vanishing points that represent 2 convergence points. Empire room,.
How to Draw a Room Using One Point Perspective 11 Steps Instructables
Surfaces that face the viewer are drawn using their true shape. Now, draw the back wall of your room, using only horizontal and vertical lines, making sure at least part of it overlaps the hl. By caroline september 4, 2022, 2:21 am. The vanishing point for this perspective drawing will be in the middle of the ‘x.’. 18k views 2.

Technical drawing Dream house drawing, Perspective room, Perspective
Web 21 steps to complete a 1 point perspective room interior drawing. It’s like an illusion you can create to transform your flat drawing into something more 3d. 18k views 2 years ago town drawings. In this video, i am using a prismacolor ebony. / circlelineartschool learn how to draw a room in perspective :
Drawing A Living Room In One Point Perspective
Empire room, palmer house hotel, chicago, illinois, interior perspective. So in today’s lesson, we are going to go put the finishing touches on our perspective room drawing and also shade it. To begin your room in one point perspective.using a pencil and a ruler, lightly make an x by connecting the right top corner to the left bottom corner of.

How to Draw a Room in 1Point Perspective for Beginners, a Circle Line
Web the art academy. March 22, 2024 | published on: Holabird and roche (architect) title. About slow looking and complexity; 212k views 3 years ago #theartacademy #howtodraw.
How to draw a living room one point perspective YouTube
With your ruler, draw lines intersecting at this point. So in today’s lesson, we are going to go put the finishing touches on our perspective room drawing and also shade it. Lightly draw a rectangle to create the back wall. Don’t establish a vp just yet. Surfaces that travel away from the viewer converge towards a single vanishing point.
How to Draw a Room in One Point Perspective · Art Projects for Kids
Be sure all corners are straight 90 degree angles. 18k views 2 years ago town drawings. March 22, 2024 | published on: 57 × 80 cm (22 7/16 × 31 1/2 in.) credit line. Make sure the vanishing point is somewhere inside of it.

1pt perspective room Linear Perspective Drawing, Perspective Drawing
Lightly draw a rectangle to create the back wall. After you are complete your drawing will look something like this: Learn how to create depth using linear, or mathematical, perspective! 1.3m views 7 years ago how to draw a house playlist. This 2pt drawing method is defined by 2 vanishing points that represent 2 convergence points.
How to Draw a Living Room using 1Point Perspective step by steps YouTube
/ circlelineartschool learn how to draw a room in perspective : Make sure the vanishing point is somewhere inside of it. Be sure all corners are straight 90 degree angles. It’s like an illusion you can create to transform your flat drawing into something more 3d. Graphite, watercolor, and gouache on illustration board.

How to Draw a Room Using 1Point Perspective (StepbyStep Tutorial for
Would you like to learn to draw from scratch? Surfaces that face the viewer are drawn using their true shape. 1.3m views 7 years ago how to draw a house playlist. In this video, i am using a prismacolor ebony. Don’t establish a vp just yet.
18K Views 2 Years Ago Town Drawings.
About slow looking and complexity; Don’t establish a vp just yet. Graphite, watercolor, and gouache on illustration board. Surfaces that face the viewer are drawn using their true shape.
Web Room Perspective Drawing In Just 6 Easy Steps!
Lightly draw an ‘x’ from corner to corner to define the four walls. After you are complete your drawing will look something like this: So in today’s lesson, we are going to go put the finishing touches on our perspective room drawing and also shade it. Use a ruler to draw a straight horizon line with a vanishing point that you can see clearly.
It’s Like An Illusion You Can Create To Transform Your Flat Drawing Into Something More 3D.
Use your ruler to draw a rectangle (transversal lines). / circlelineartschool learn how to draw a room in perspective : 57 × 80 cm (22 7/16 × 31 1/2 in.) credit line. Lightly draw a rectangle to create the back wall.
Empire Room, Palmer House Hotel, Chicago, Illinois, Interior Perspective.
Web the davis street drawing room is about invention and critical thinking; March 22, 2024 | published on: Let’s start with the wall that’s facing us directly. To begin your room in one point perspective.using a pencil and a ruler, lightly make an x by connecting the right top corner to the left bottom corner of your paper and by connecting the top left corner to the bottom right.