Eyes Draw Step By Step
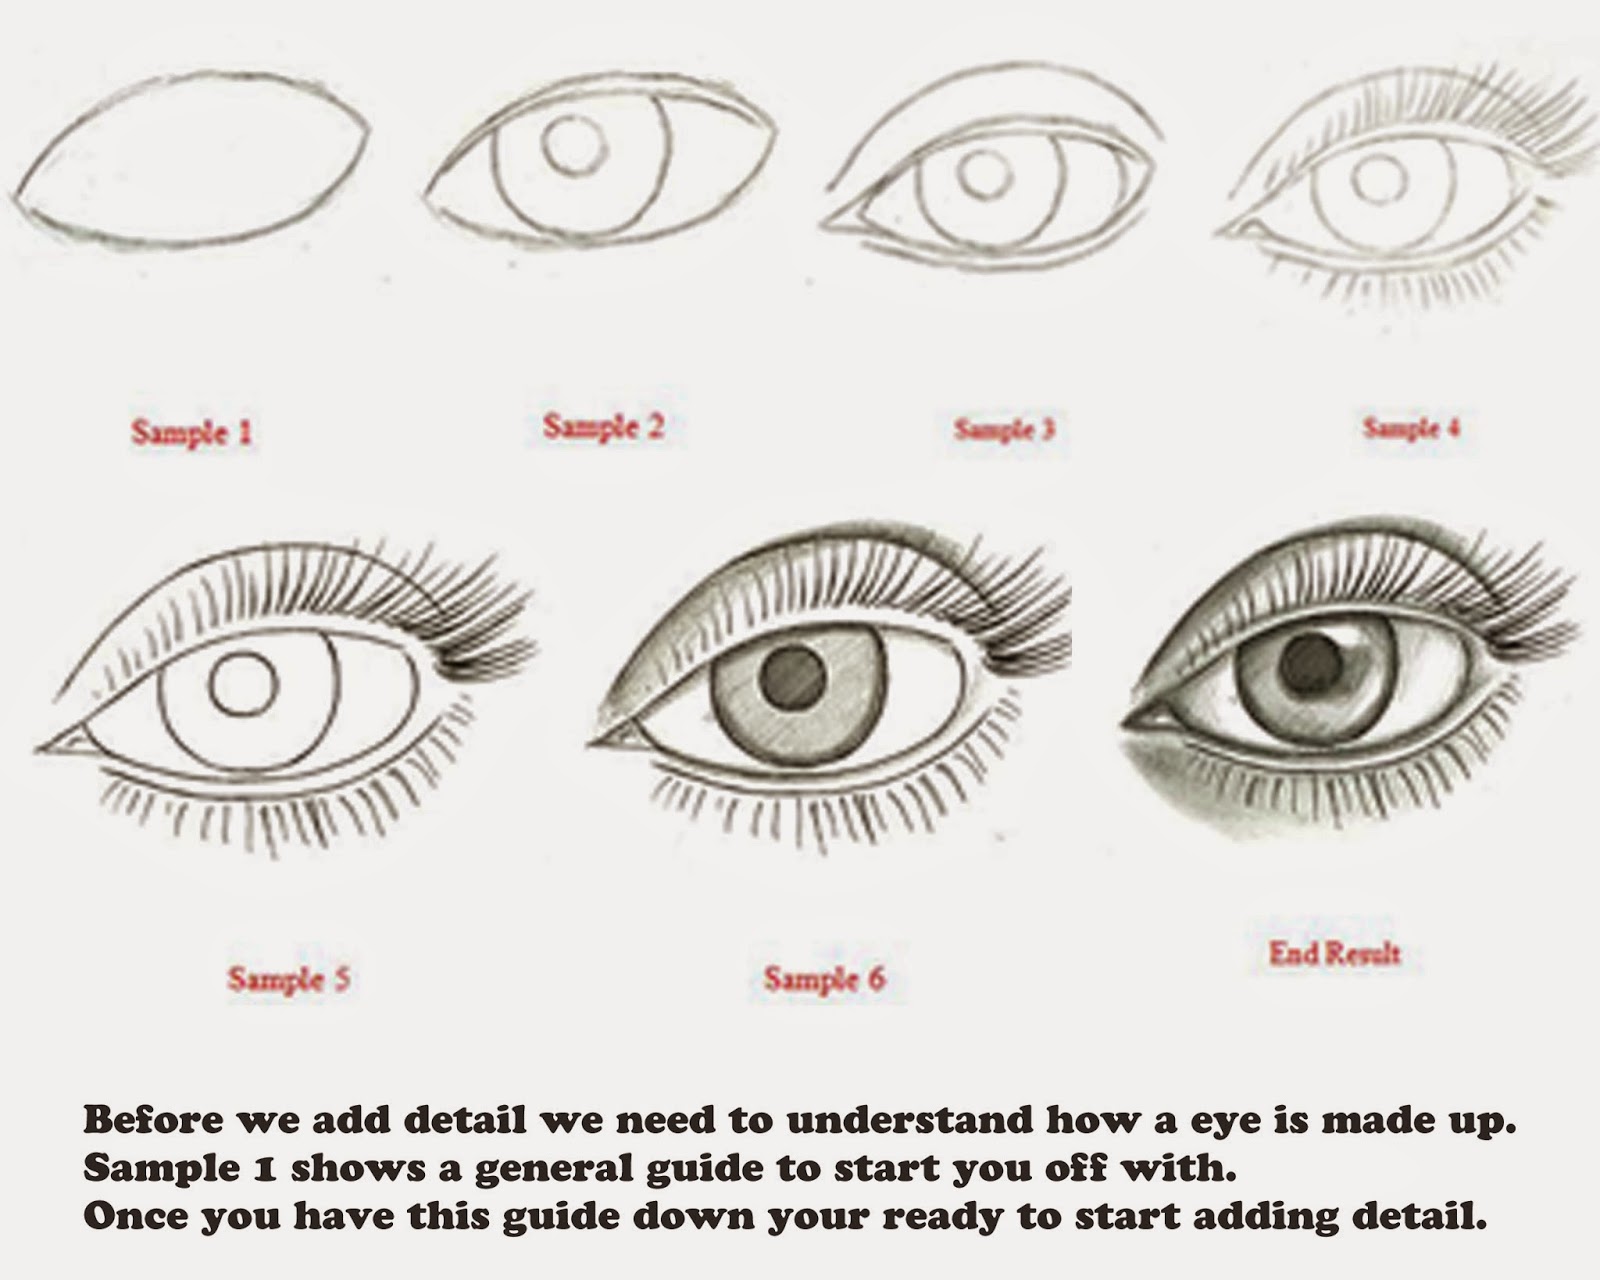
Eyes Draw Step By Step - Web this tutorial gives you a basic look at the shapes and anatomy needed for drawing realistic eyes. Sketch almond shape for the eye. Draw an almond shape with one corner tapering downwards. Master the art of drawing: 2 simple steps to drawing eyes. This tutorial shows an easy way to draw a realistic looking eye in nine steps. Cross the oval with two curves that will make the eyelids. Make sure the circle is slightly hidden by the eyelid, which will give the eye a sense of depth. Web how to draw realistic eyesstep 1: Draw the round iris, the pupil in the middle, a shape of the reflection, and the corners of the eye.
Draw the round iris, the pupil in the middle, a shape of the reflection, and the corners of the eye. 2 simple steps to drawing eyes. Use two curved lines, allowing them to meet at a point on the outer edge. My method is aimed to help even the most complete beginner draw something they once thoug. This tutorial shows an easy way to draw a realistic looking eye in nine steps. When working from the outside in, i start by creating an envelope, or a general shape around the entire eye socket area. The eyes you’re going to draw: Draw a bigger circle for the eyeball. Shade most of the center circle in to make it black, but leave a tiny. Cross the oval with two curves that will make the eyelids.
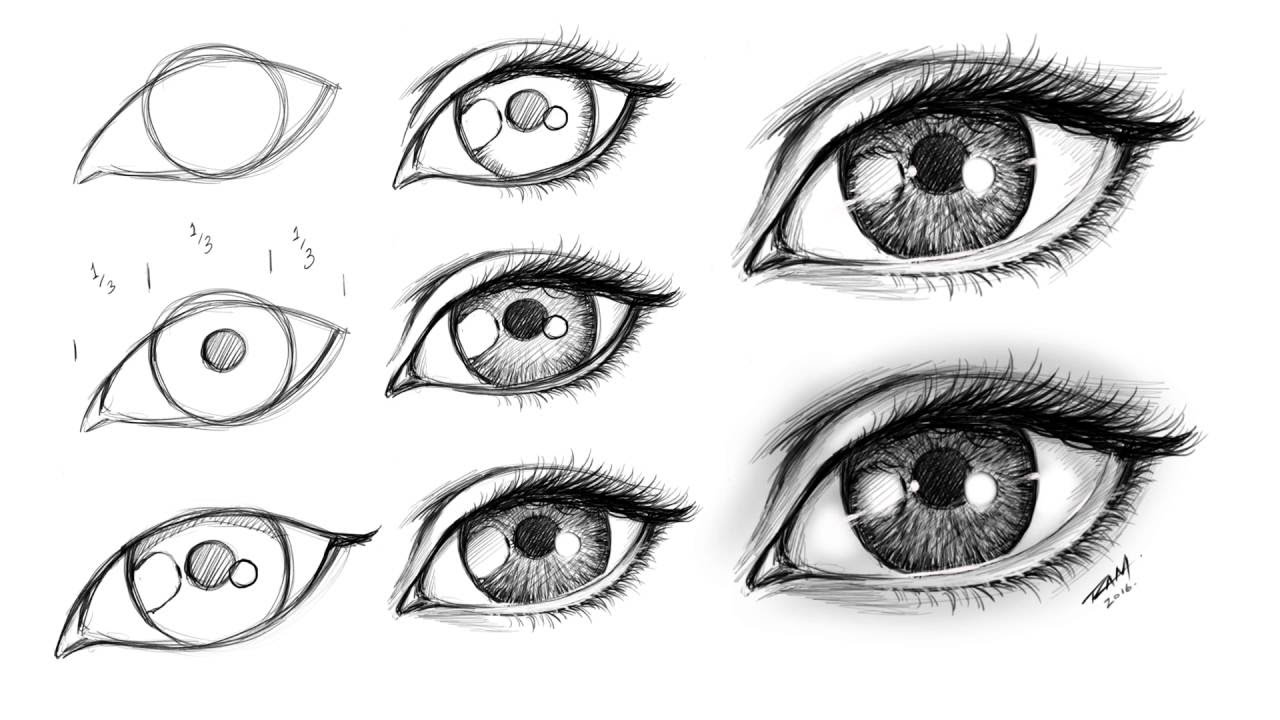
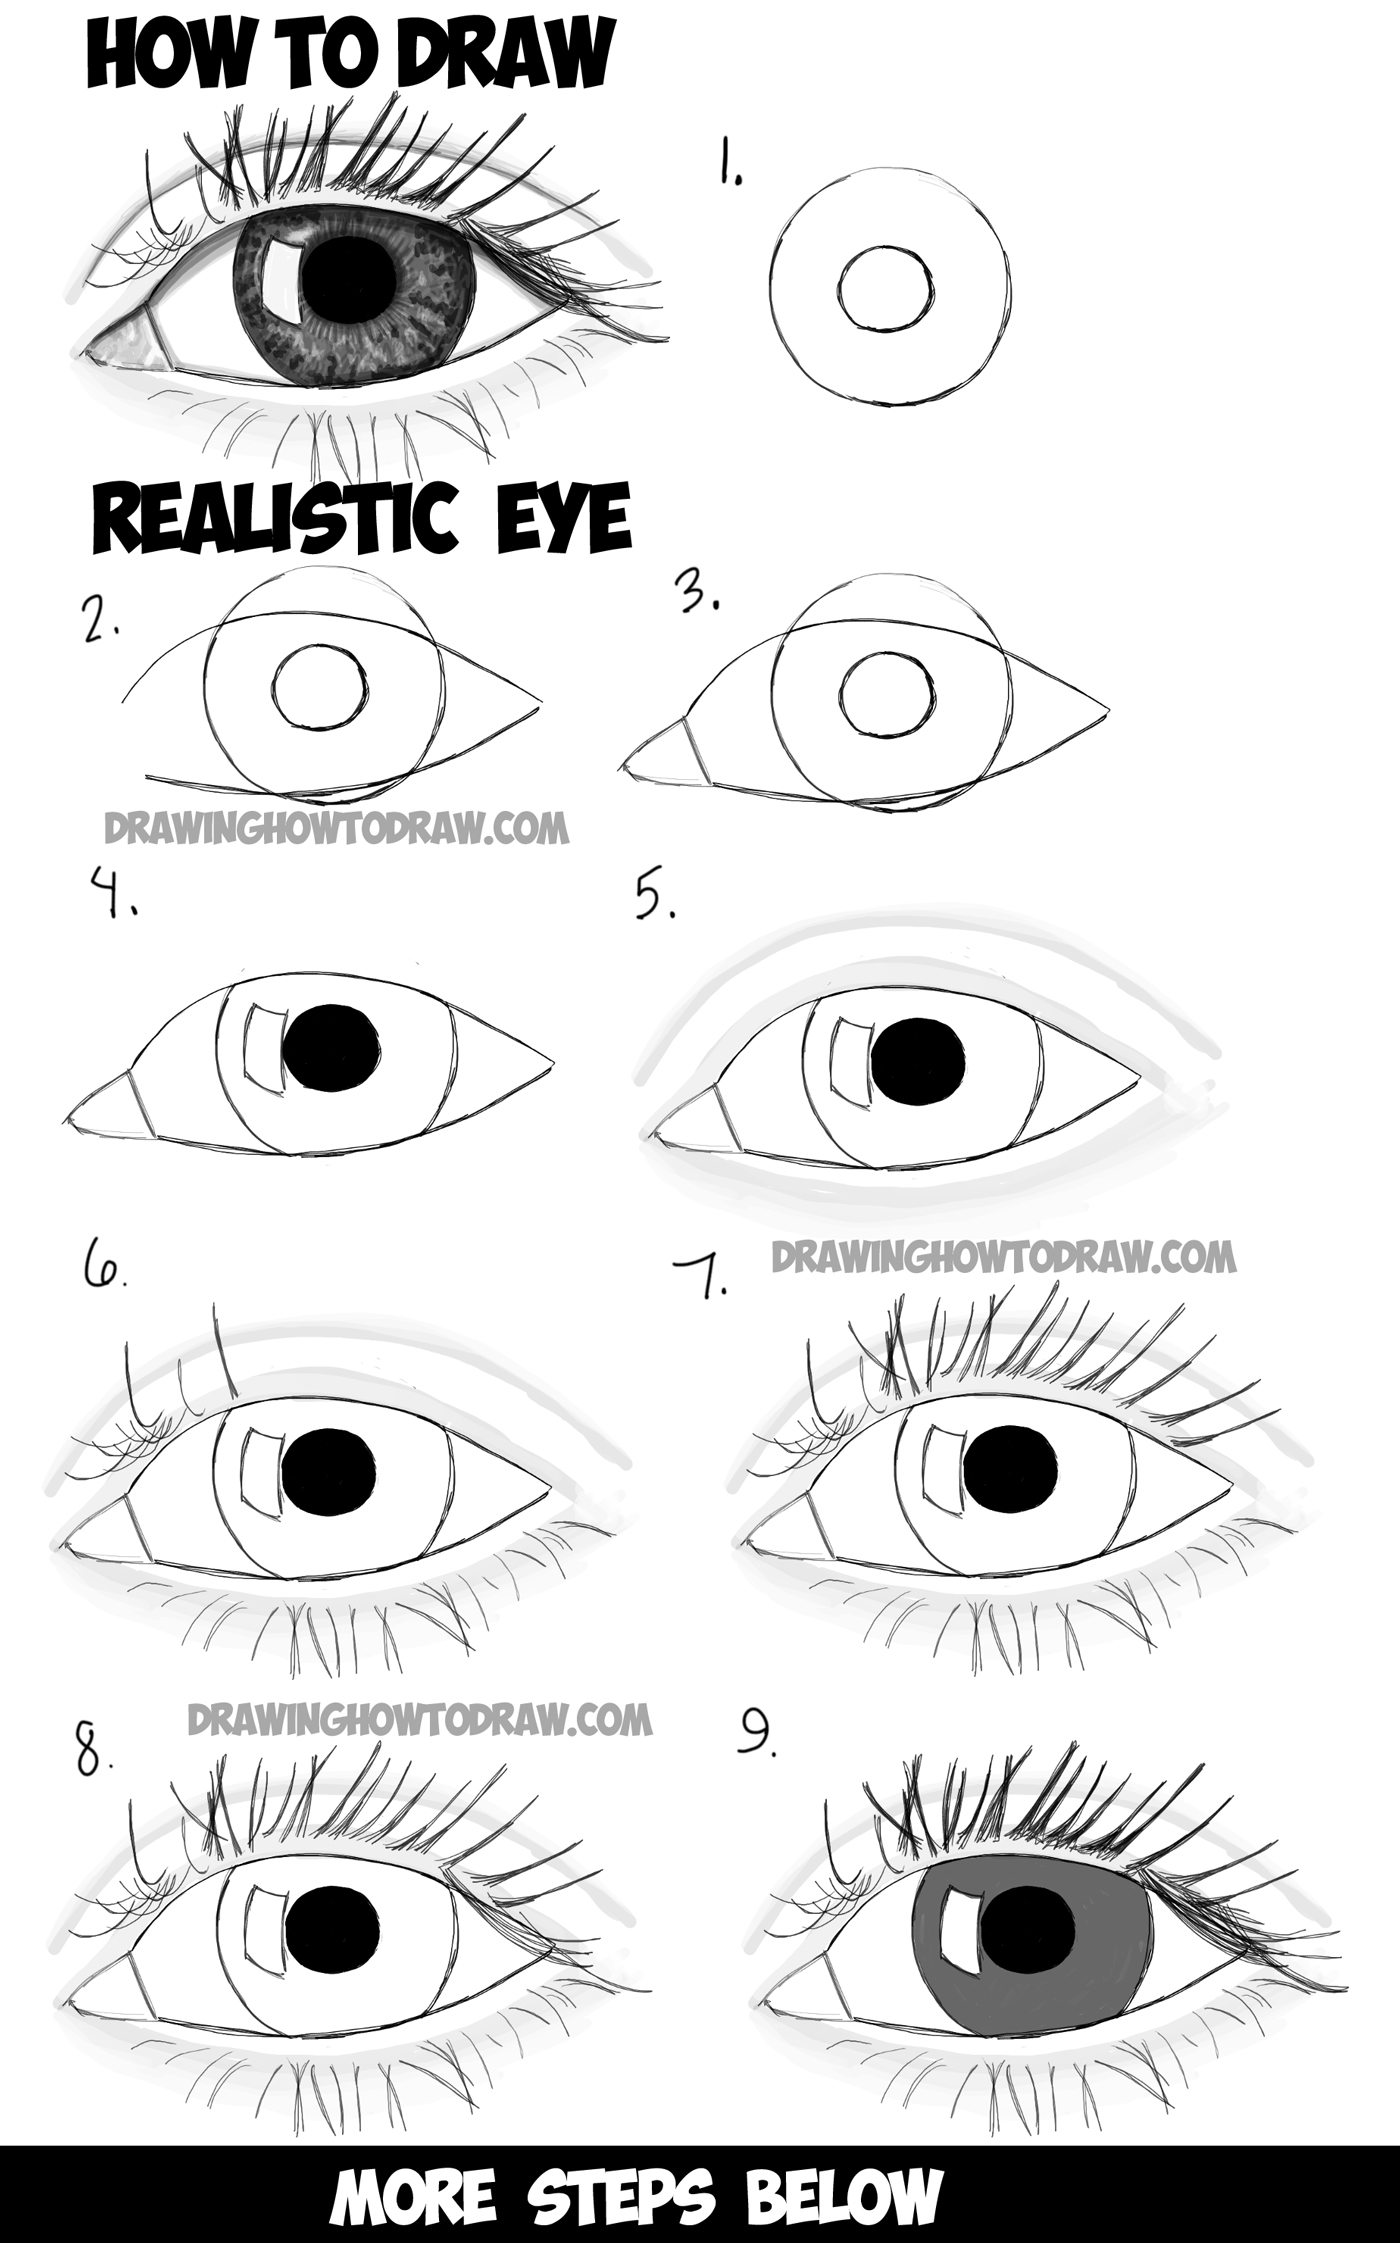
How to draw an iris. Web follow my simple, detailed steps to draw a realistic eye in pencil. Take the hb pencil and sketch a rough oval very lightly. Next, draw a circle inside the eye with a smaller circle in its center for the iris and pupil. Find out how to give your eyes depth and life with this detailed tutorial. Use the 5 lines to work out your basic shape. A preview of the different drawing stages for the eye is shown in the image above. “if you want to get good at eyes, you have to get good at all the parts that surround the eye,” says illustrator and comic artist jonathan case. Working from the outside in. In this drawing i use hb , 4b 10b ,normal pencil, normal eraser, hardtmuth pencil, black.
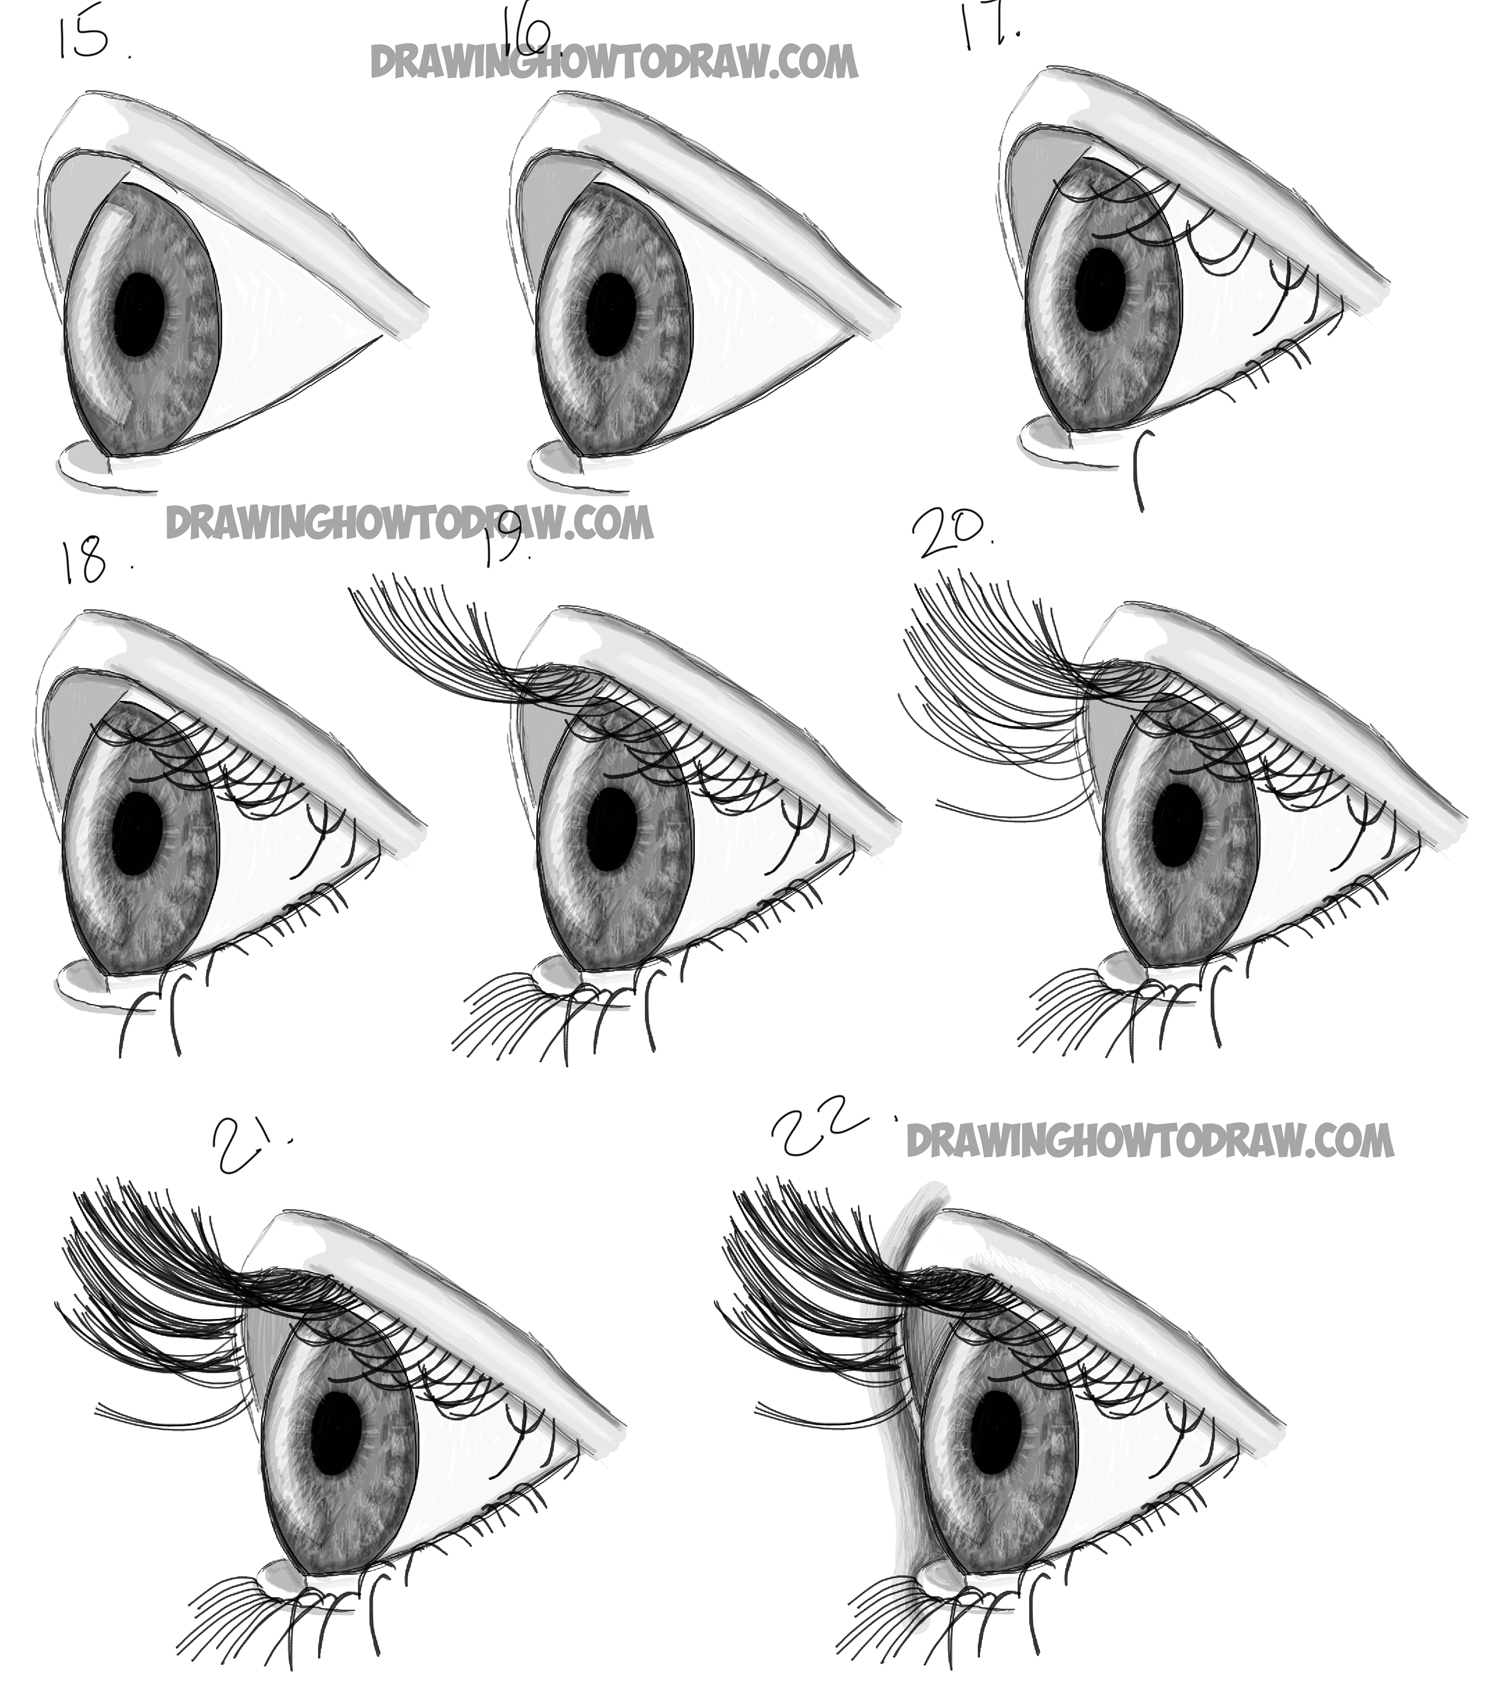
How to Draw Realistic Eyes from the Side Profile View Step by Step
Web seeking instructions for a specific part of the eye? 2 simple steps to drawing eyes. “if you want to get good at eyes, you have to get good at all the parts that surround the eye,” says illustrator and comic artist jonathan case. When working from the outside in, i start by creating an envelope, or a general shape.

How to Draw an Eye (Realistic Female Eye) Step by Step Drawing Tutorial
Use two curved lines, allowing them to meet at a point on the outer edge. Web how to draw realistic eyesstep 1: Outline the iris of the eye, enclosing a partial circle shape. Sketch almond shape for the eye. Let’s get some basic theory here, if you have a piece of paper by hand i recommend you to draw along.

25 Eye Drawings to Teach You How to Draw Eyes Beautiful Dawn Designs
There are two ways in which i tend to begin eye drawings: Make sure the circle is slightly hidden by the eyelid, which will give the eye a sense of depth. Method 1 for starting an eye drawing: The eyelids have a certain thickness, so add rims to them. Web this tutorial gives you a basic look at the shapes.
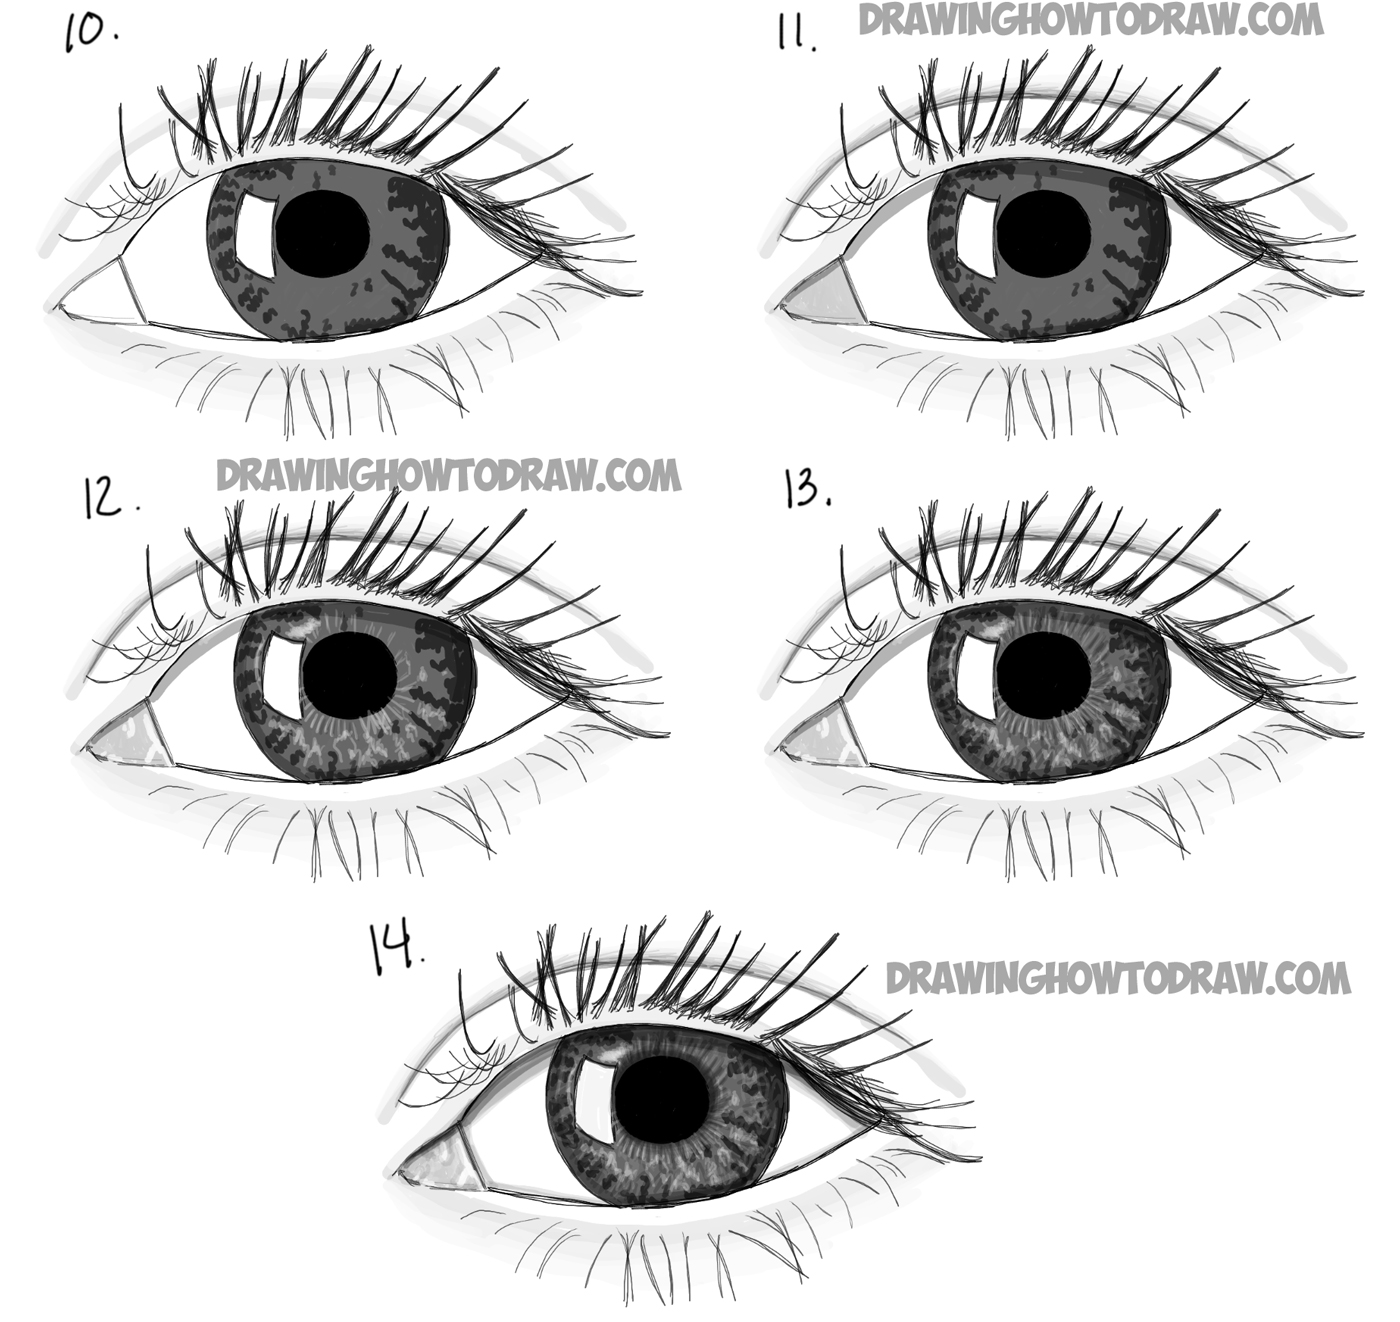
How to Draw Realistic Eyes with Step by Step Drawing Tutorial in Easy
A preview of the different drawing stages for the eye is shown in the image above. Make sure the circle is slightly hidden by the eyelid, which will give the eye a sense of depth. First off, begin by roughly drawing the outer shape of the eye. Draw another almond shape of the same size. Draw the round iris, the.
How to Draw an Eye (Realistic Female Eye) Step by Step Drawing Tutorial
When working from the outside in, i start by creating an envelope, or a general shape around the entire eye socket area. So with that said, it’s time to start drawing. This tutorial shows an easy way to draw a realistic looking eye in nine steps. Basic structure of the eye. Skip to one of these steps:
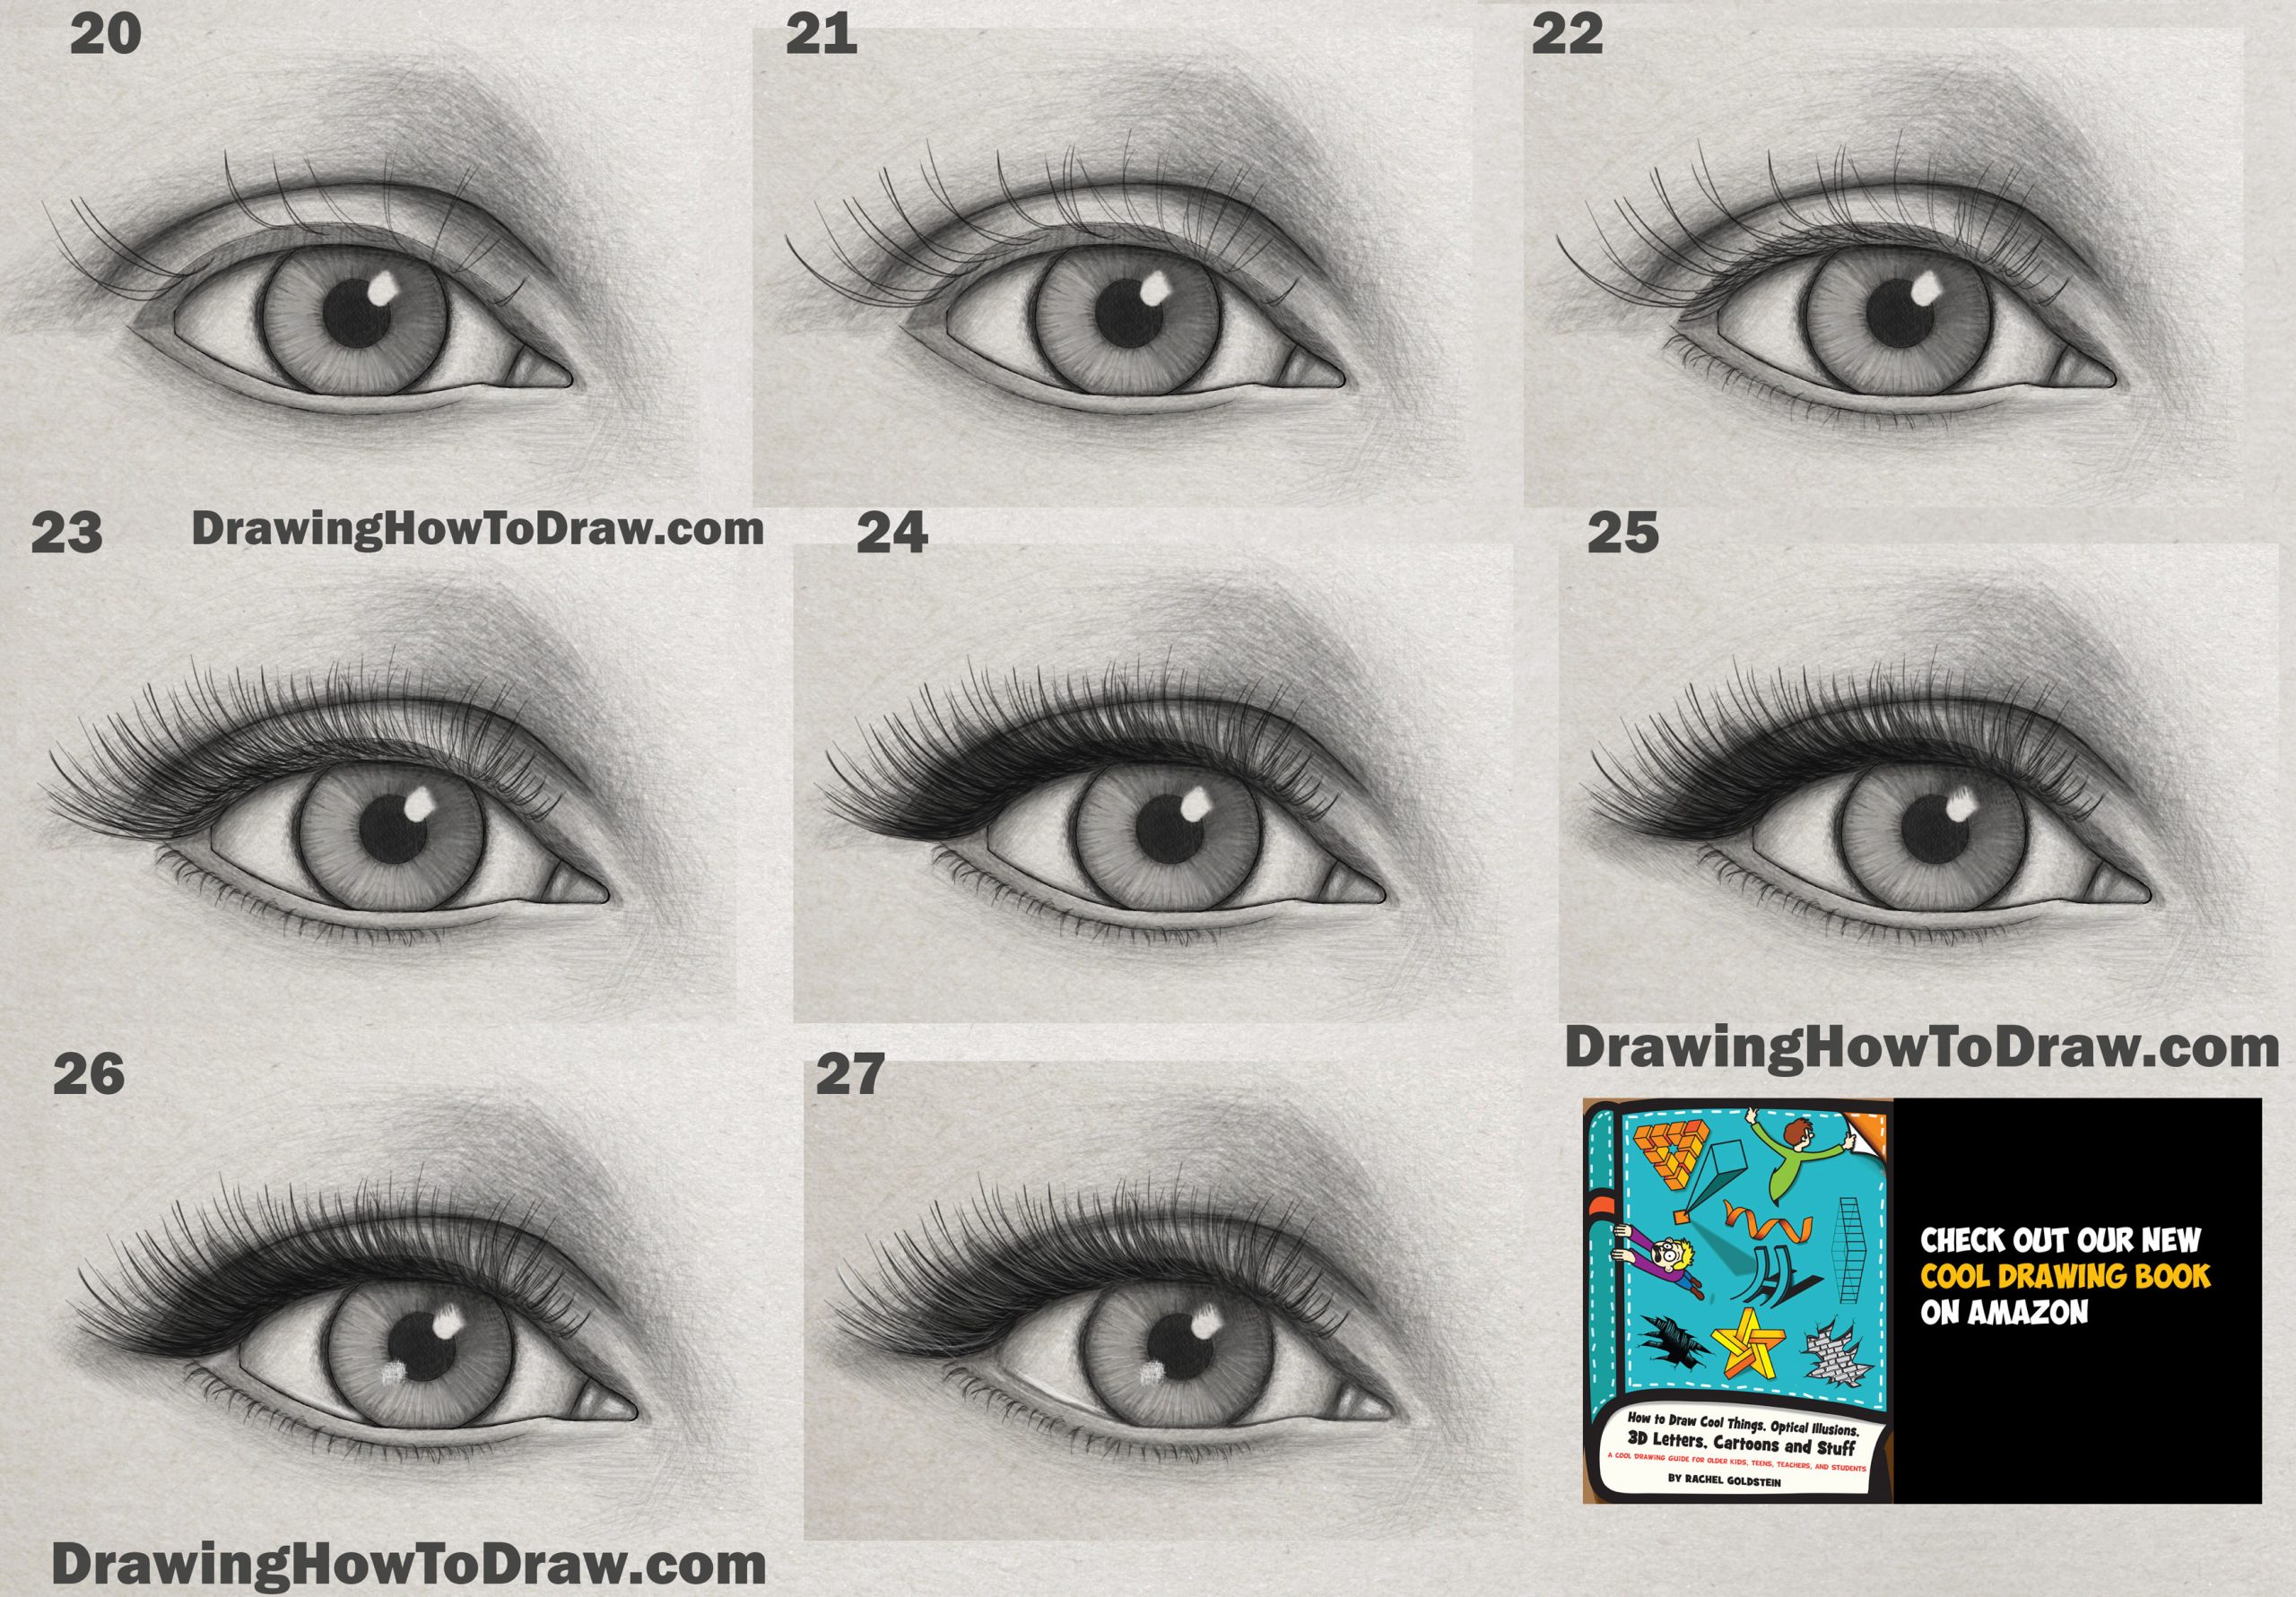
How To Draw Eyes Step By Step For Beginners Howto Techno
Since each component is necessary for the process of drawing eyes, we should have them all ready to go. My method is aimed to help even the most complete beginner draw something they once thoug. Draw an almond shape with one corner tapering downwards. Next, draw a circle inside the eye with a smaller circle in its center for the.
How to draw eye step by step Realistic Hyper Art, Pencil Art, 3D Art
In this drawing i use hb , 4b 10b ,normal pencil, normal eraser, hardtmuth pencil, black. Drawing the eye’s basic shape. Web follow my simple, detailed steps to draw a realistic eye in pencil. There are two ways in which i tend to begin eye drawings: Erase the guidelines and draw a circle inside each of the eye shapes.
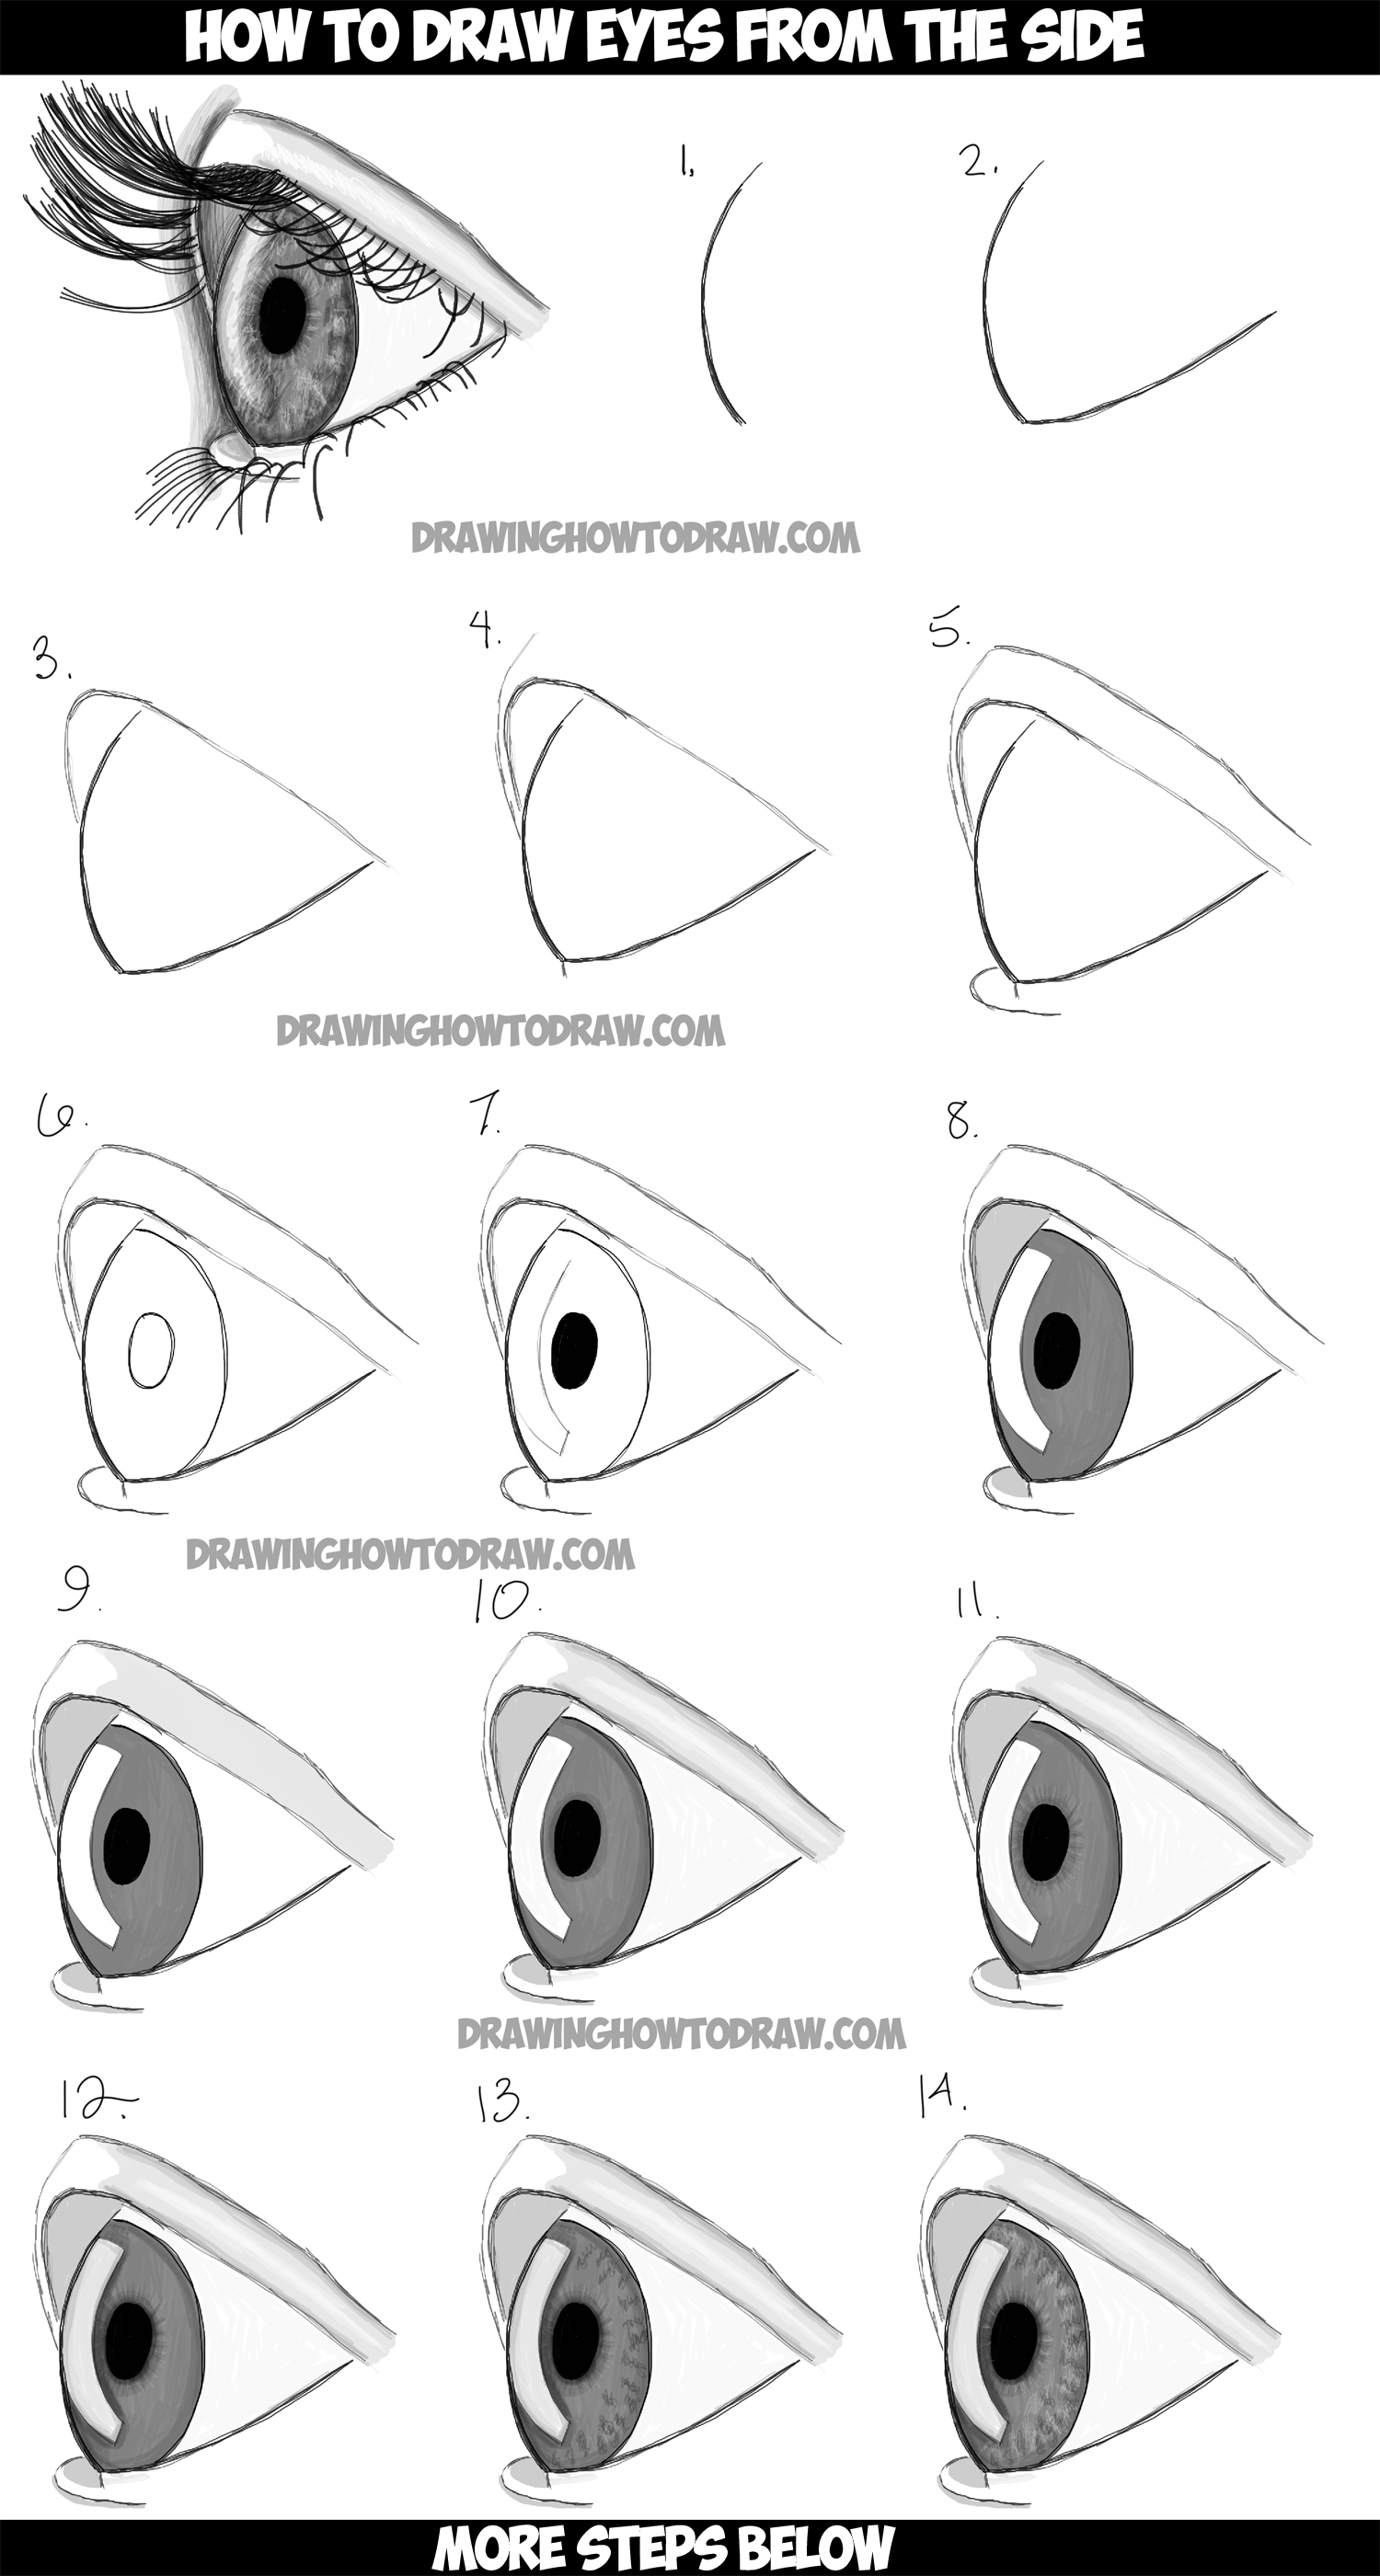
How to Draw Realistic Eyes from the Side Profile View Step by Step
First off, begin by roughly drawing the outer shape of the eye. In this drawing i use hb , 4b 10b ,normal pencil, normal eraser, hardtmuth pencil, black. 10k views 3 months ago training series. Web 1 locating the eyes on the face. Find out how to give your eyes depth and life with this detailed tutorial.
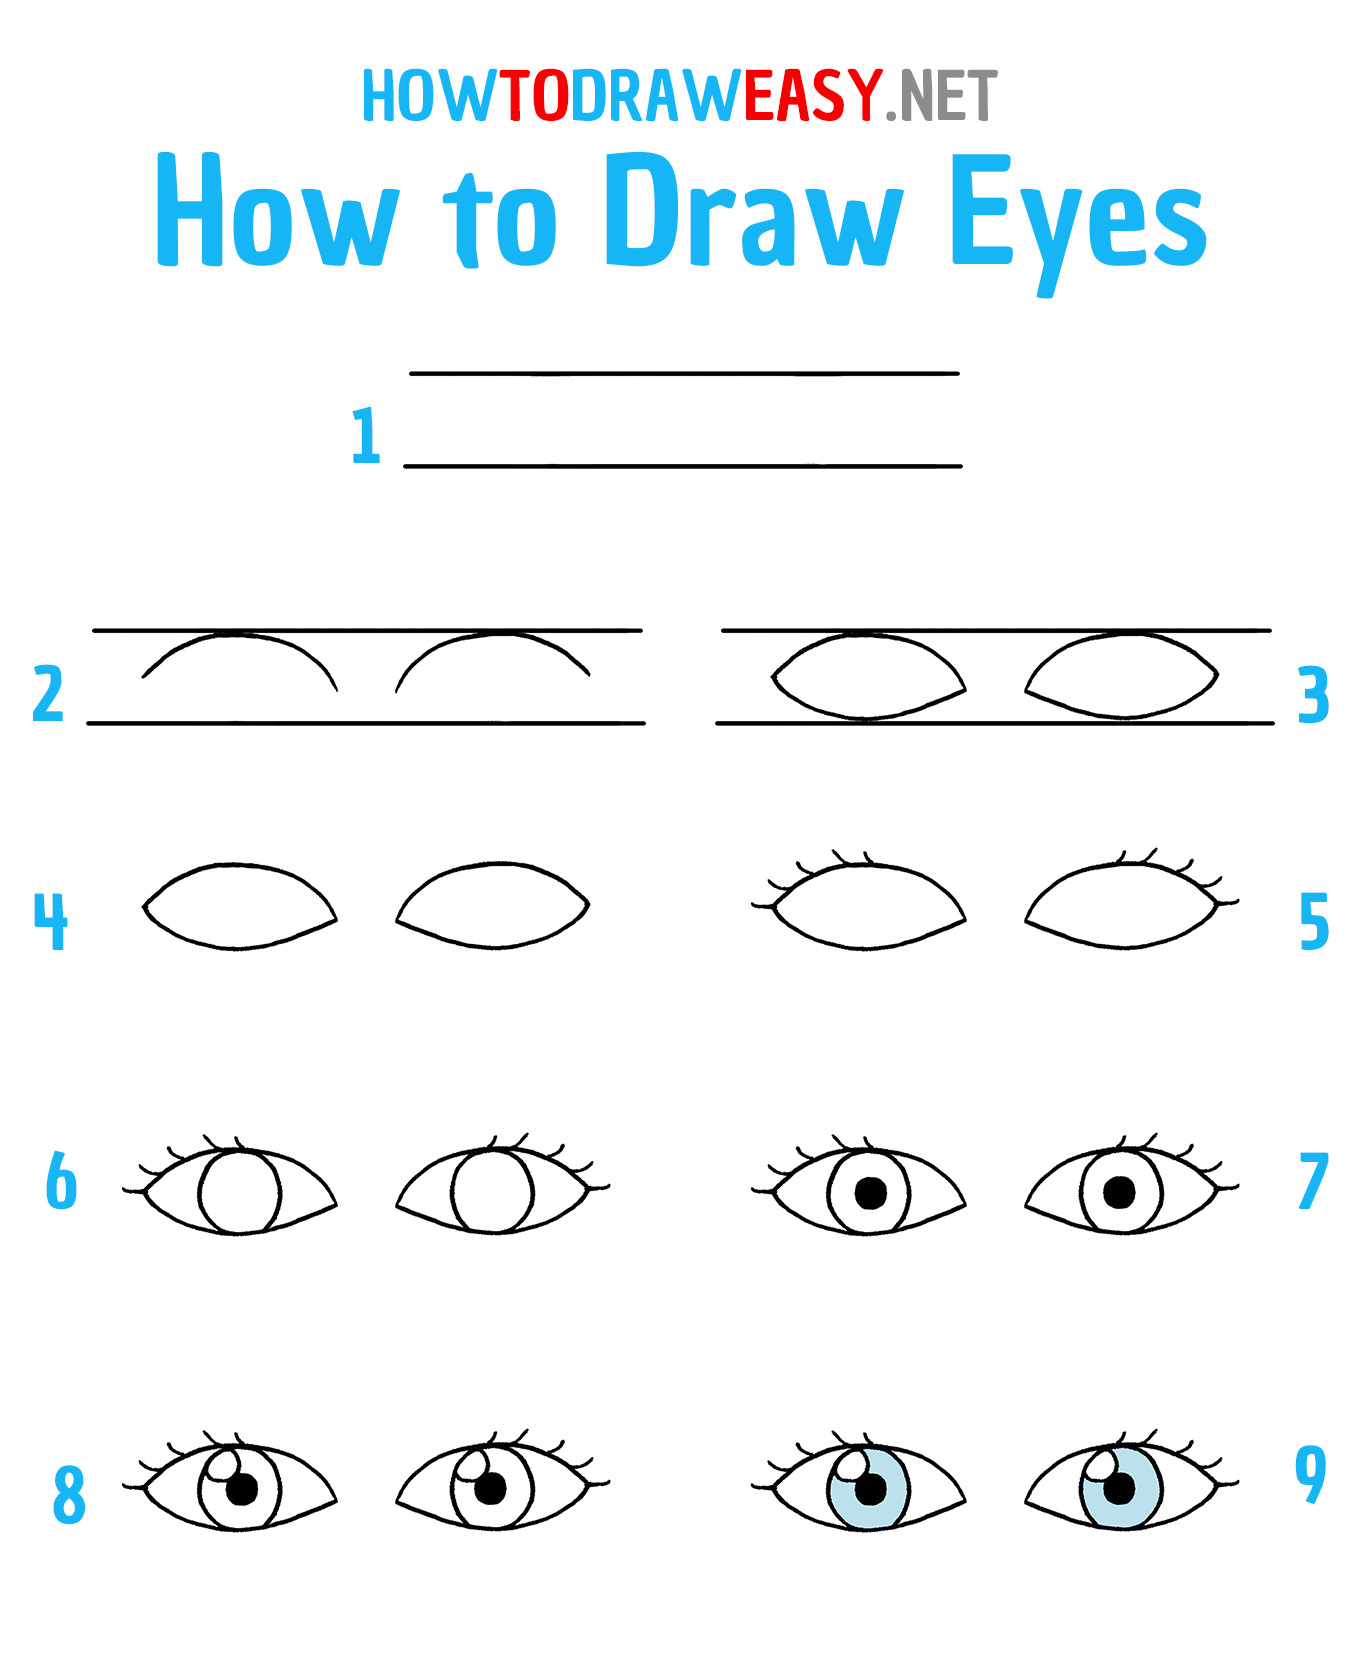
How to Draw Eyes for Kids How to Draw Easy
Web 2273 likes, tiktok video from 🕷 (@sorswy): So with that said, it’s time to start drawing. Next draw a pair of lines that will help you determine the angle of each eye. Sketch almond shape for the eye. Begin the eyes outline by sketching the outside of one eye.
How to Draw Realistic Eyes with Step by Step Drawing Tutorial in Easy
Next, lightly sketch in a circle that takes up about half of the eyeball to create the iris. Skip to one of these steps: And these are all the steps we’ll walk you through! The lines shouldn’t meet at the inner corner, but connect them with a short line. Web these steps will help you start to explore how to.
Use Two Curved Lines, Allowing Them To Meet At A Point On The Outer Edge.
Make sure to watch my other tutorials on facial features! First off, begin by roughly drawing the outer shape of the eye. Next draw a pair of lines that will help you determine the angle of each eye. A preview of the different drawing stages for the eye is shown in the image above.
Web How To Draw Realistic Eyesstep 1:
Draw the round iris, the pupil in the middle, a shape of the reflection, and the corners of the eye. When working from the outside in, i start by creating an envelope, or a general shape around the entire eye socket area. Next, lightly sketch in a circle that takes up about half of the eyeball to create the iris. Master the art of drawing:
Working From The Outside In.
So with that said, it’s time to start drawing. Skip to one of these steps: In this drawing i use hb , 4b 10b ,normal pencil, normal eraser, hardtmuth pencil, black. Web follow my simple, detailed steps to draw a realistic eye in pencil.
Now, Around The Midpoint Of The Almond Shape Make A Circle With A Bit Of The Top Of The Circle Outside The Almond.
There are two ways in which i tend to begin eye drawings: Take the hb pencil and sketch a rough oval very lightly. Web seeking instructions for a specific part of the eye? Web learn how to draw a realistic eye using these easy step by step instructions.