Foot Step Drawing
Foot Step Drawing - Web the foot rest‘s fabric is enduring that ensures the foot rest cannot be destroyed even after many uses and washes. The process begins by deconstructing the foot into three fundamental geometric shapes. The tendons are usually visible on the top of the foot, extending towards the ankle. This step is about bringing the shapes together. Then, a bean shape for the sole of the foot. Draw a curved line on the foot. “in a world where the future of creativity. Web start by drawing the sole of the foot and the heel, then move on to the toes before finishing with the ankle. Battle creek — those on the hunt for live entertainment might want to mark the first friday of every month in downtown battle creek on their calendar. If you’re comfortable doing so, you can start directly with this step:
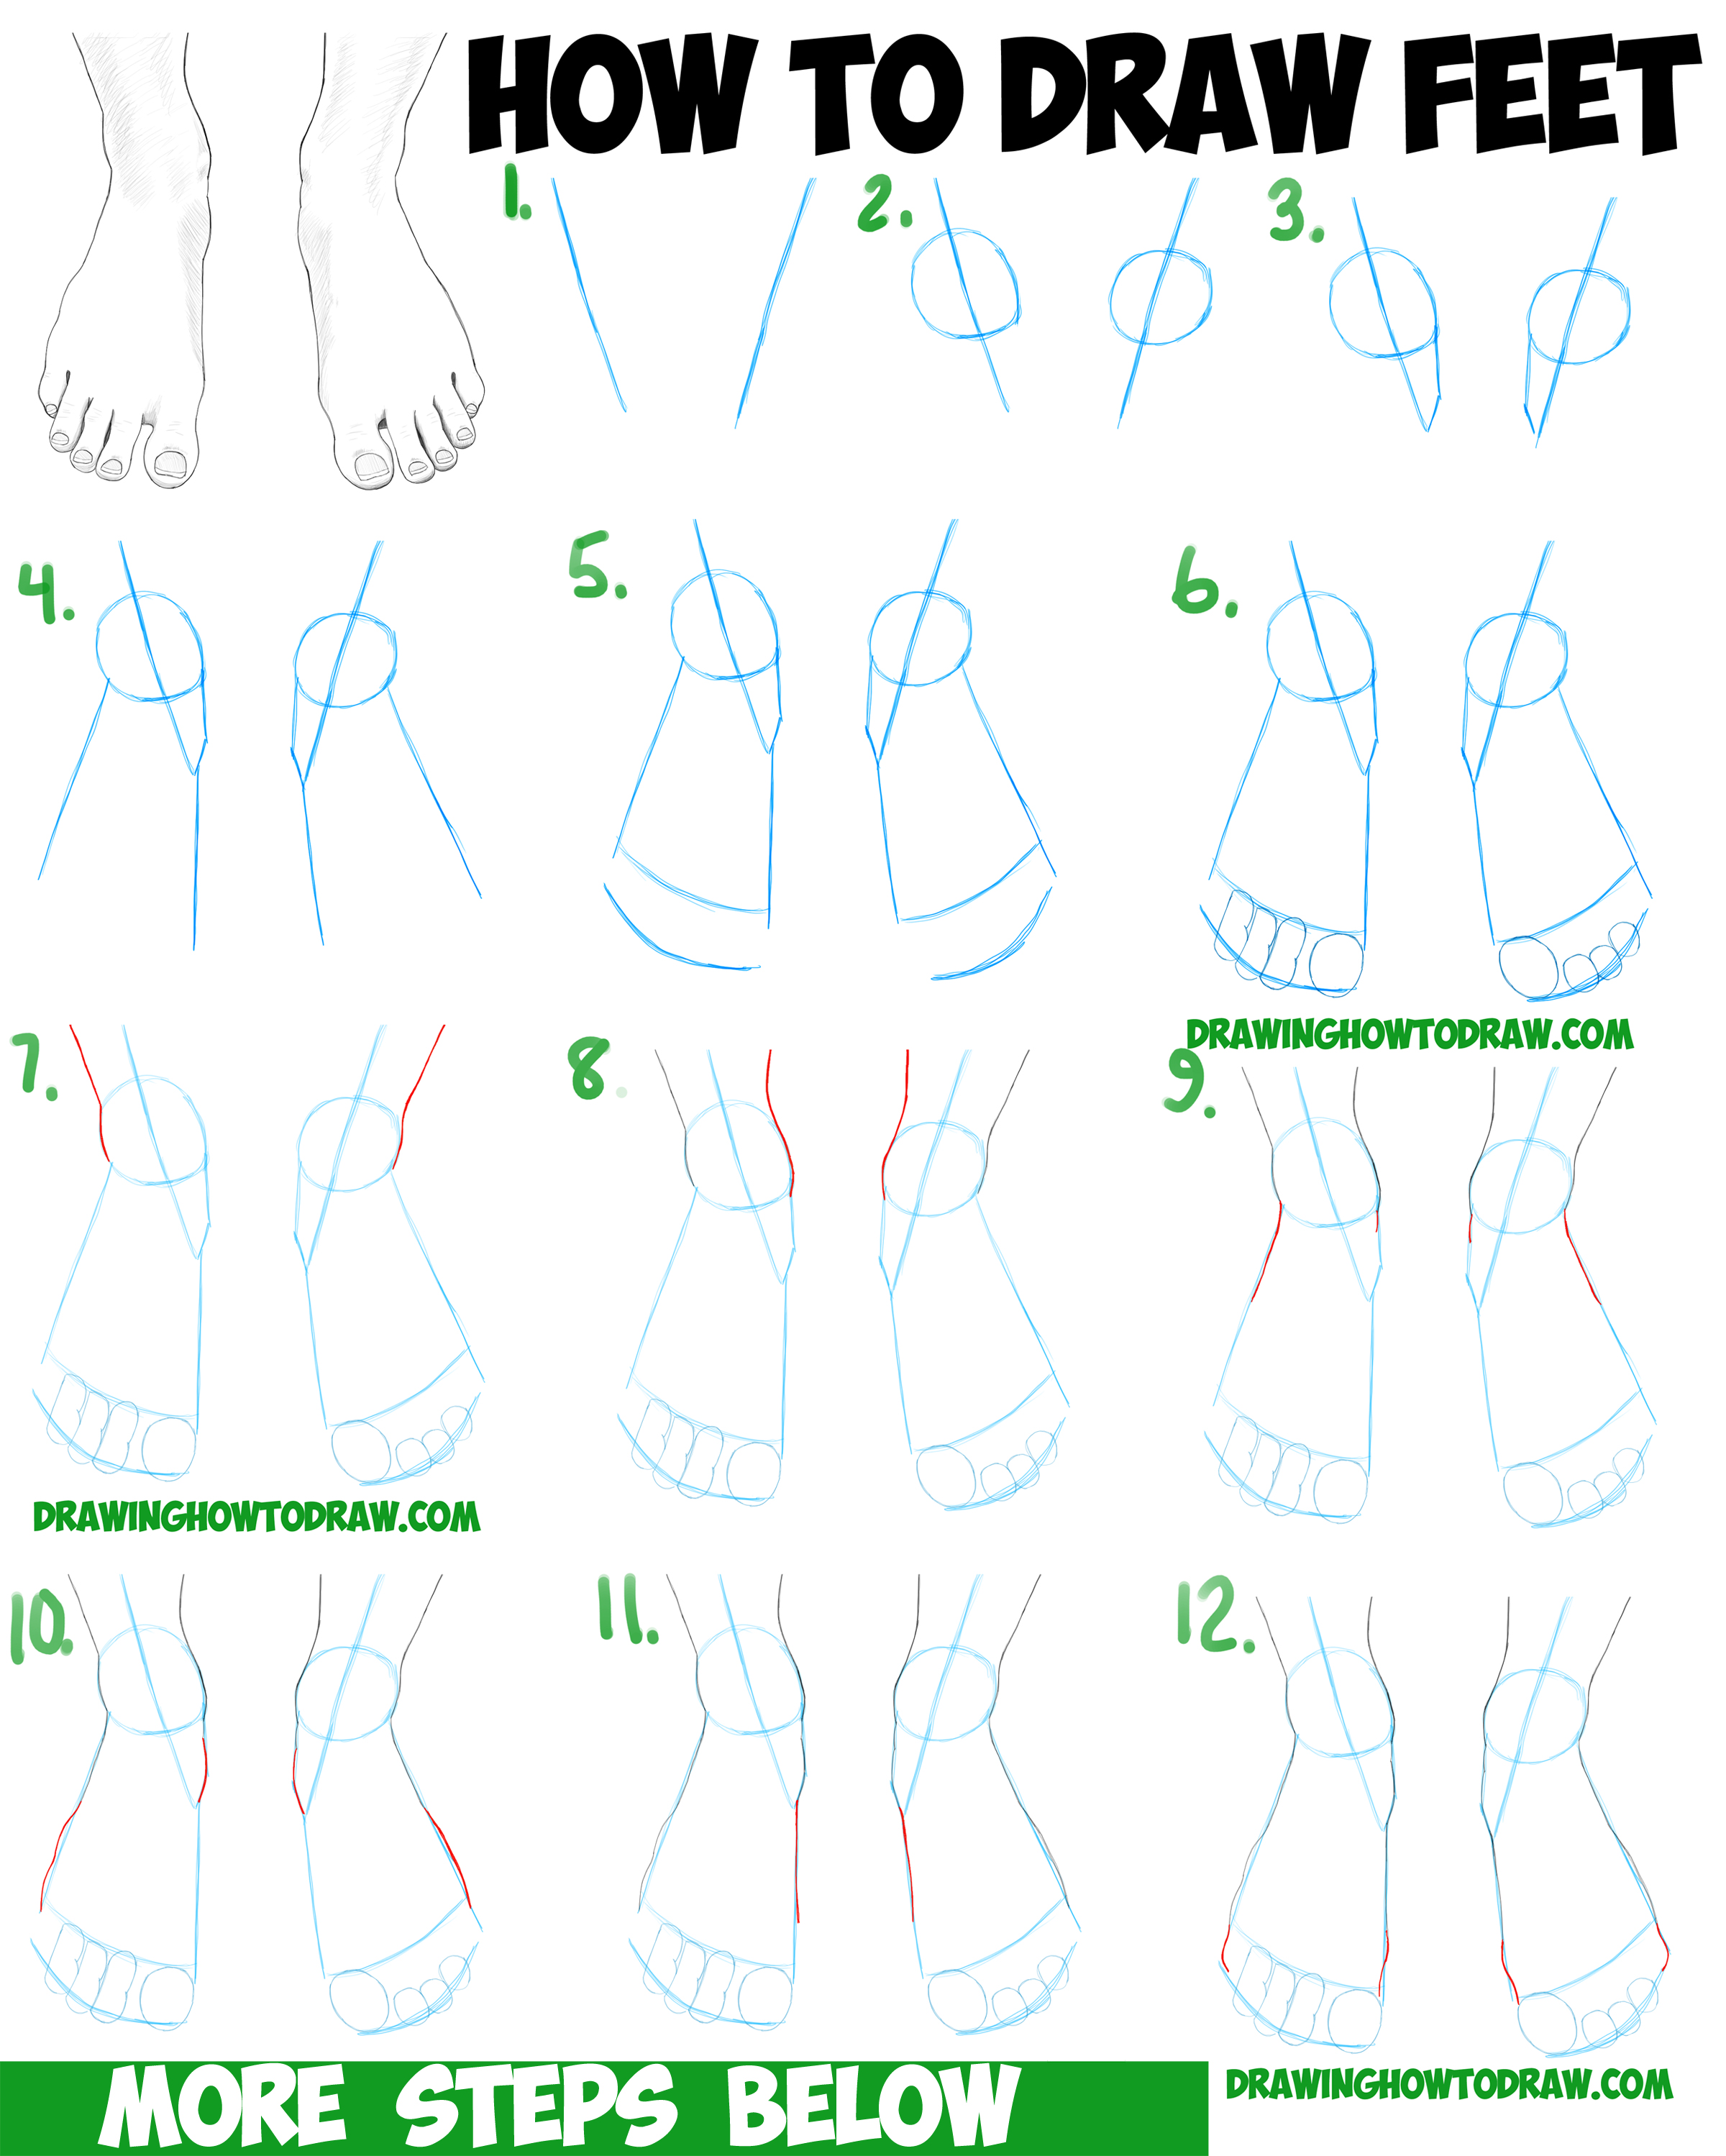
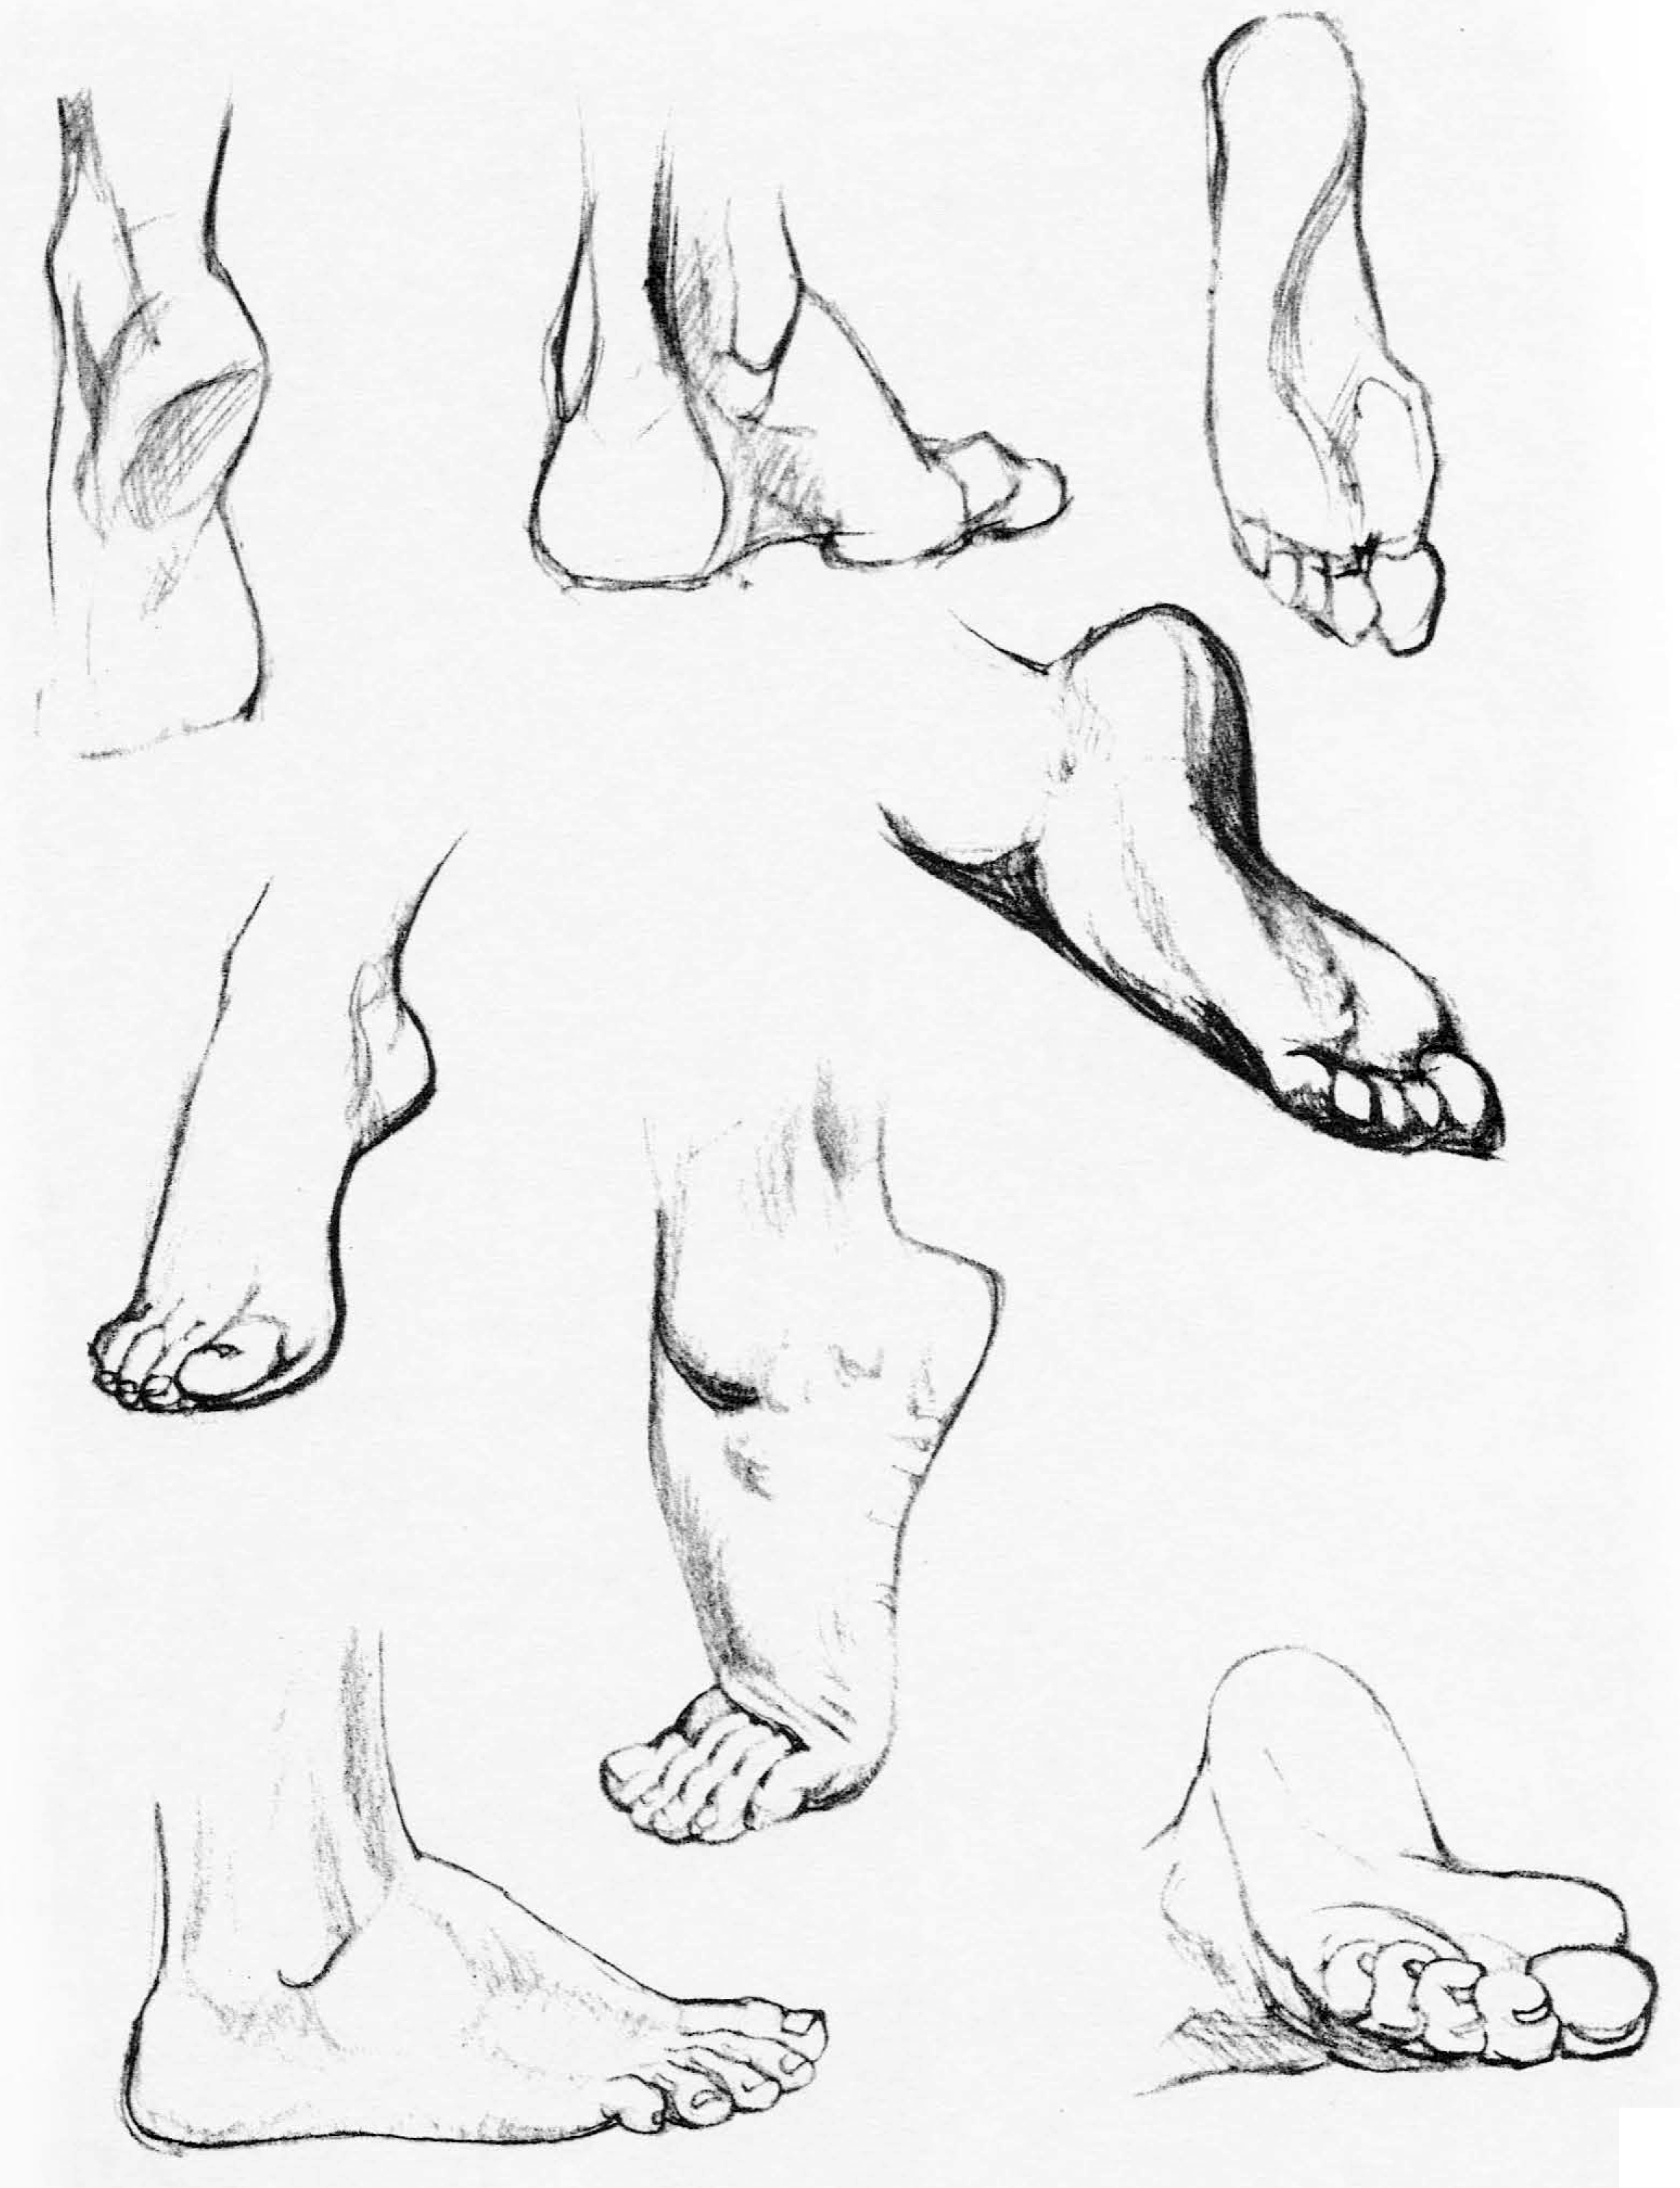
Additional examples of the structure of the foot. Web we were stuck, selleck writes. When you first start practicing i would. You can see the ankle protruding out to each side and the foot sticking out in front. From now on in this tutorial, you will be drawing lines that we will keep. Web these executives said the new ad hit a particularly deadening tone for those in the creative industries already facing a threat to their jobs from ai. Draw a foot from different angles, focusing on the top of the foot in some sketches and the heel of the foot in others. The process begins by deconstructing the foot into three fundamental geometric shapes. You'll soon be able to draw feet from the front, side, or back!for access to exclusive. Draw a box for the heel, sphere for the ankle and a tapered box (slightly triangular) for the front of the foot.
The middle foot box a.k.a. Medial drawing of the foot by gvaat. In order to build this shape, we must first set the perspective right. Touching the other toes, draw two more oval toes. Have a go at drawing feet by following the steps below. How to draw both feet. Do the same for the other foot, and make sure to shade the visible part of the calf as well. Web we were stuck, selleck writes. No toes, no arches, just the basic shape. Once we have placed our shapes on the paper we will now use the blue pencil to merge the shapes.
Foot Drawing How To Draw A Foot Step By Step
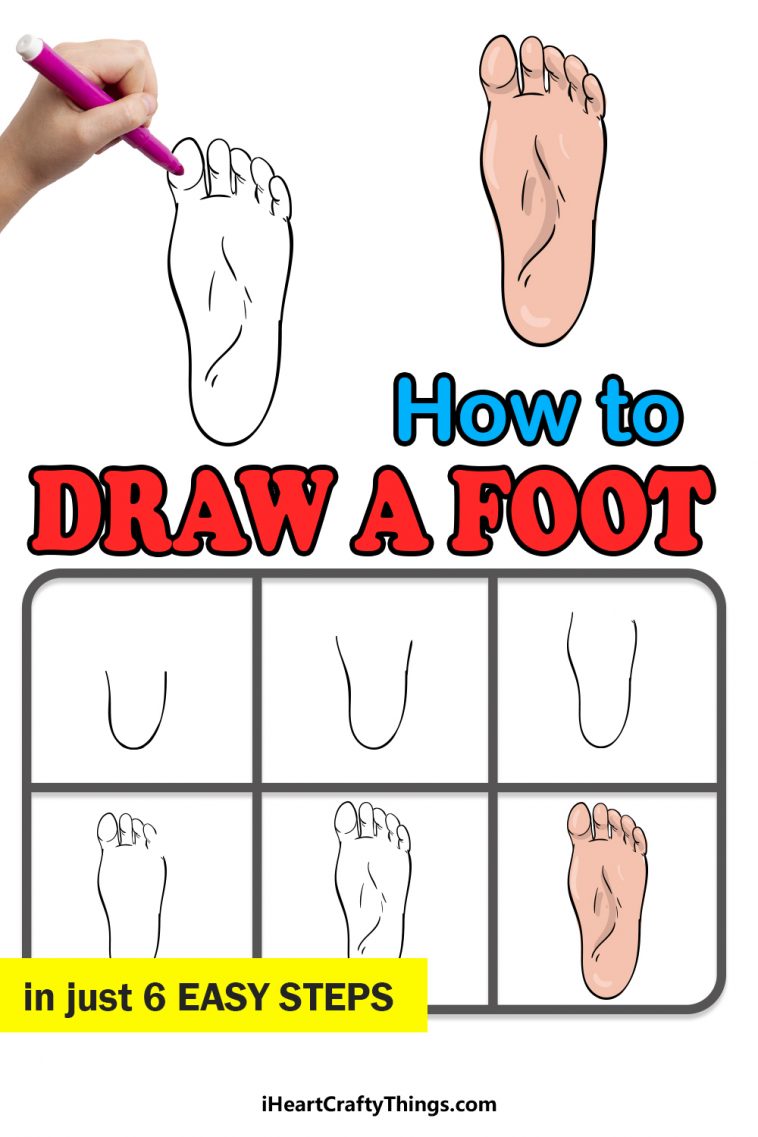
Make the details on the bottom of the foot with 4 lines. Then continue your figure drawing with side views of the foot. Outline footprint icon in vector. Use a 't' shape for foot direction. Camilo perez, the pastor of.
How to Draw Feet / the Human Foot with Easy Step by Step Drawing
In order to build this shape, we must first set the perspective right. Think of this process as an outlining process, when we outline around our shapes they begin to. Finally, draw a big, rounded rectangle for the big toe and four similar but smaller shapes for. It’s time to learn how to draw a foot! Then, add the detail.

How to Draw Feet Really Easy Drawing Tutorial Drawing tutorial easy
Web join me on patreon for background information, drawing videos, step by steps and happy mails💌 link in bio 🗒. First, draw an oval shape for the main part of the foot. Finish the toes with the middle one. Once we have placed our shapes on the paper we will now use the blue pencil to merge the shapes. Dave.

How to Draw Footprints 11 Steps (with Pictures) wikiHow
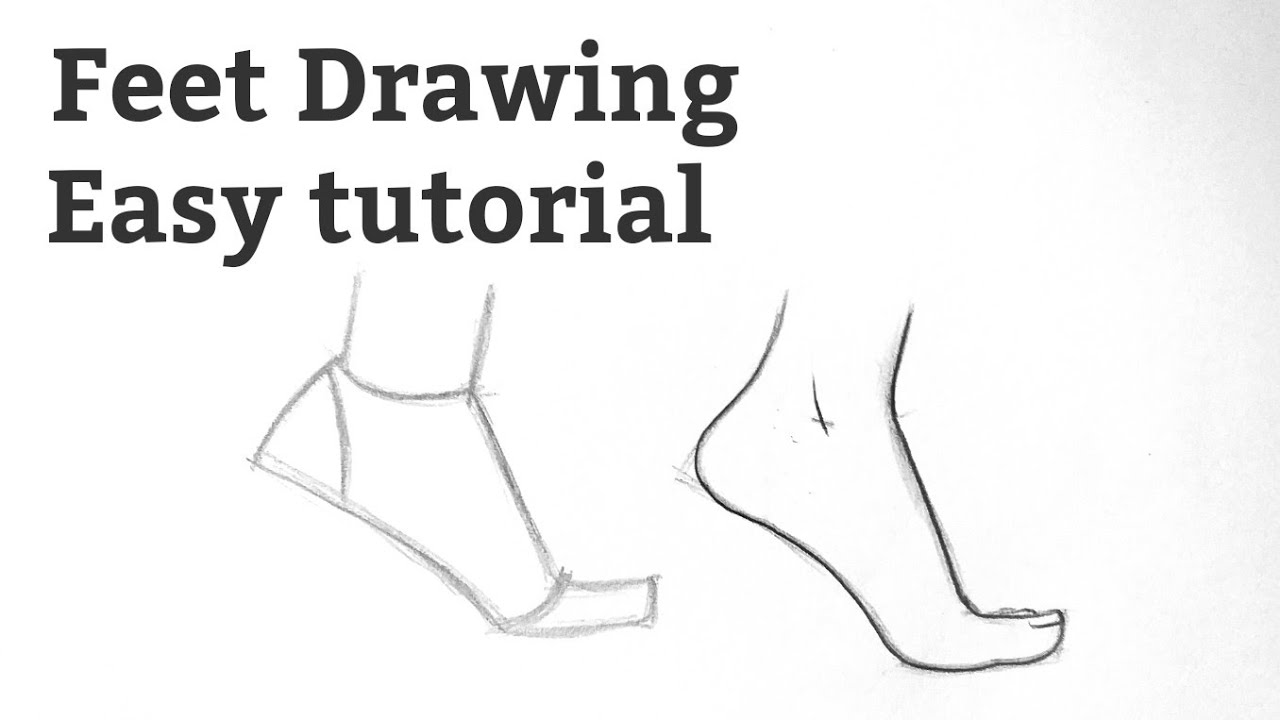
Web start by drawing a circle for the bottom of the heel. Then continue your figure drawing with side views of the foot. Web republicans have spent years drawing latino evangelicals into their fold. The next step is to make a small adjustment to the shape, cutting off a corner to get closer to the foot’s natural shape. In order.
How to draw a feet drawing easy Basic drawing tutorial for beginners
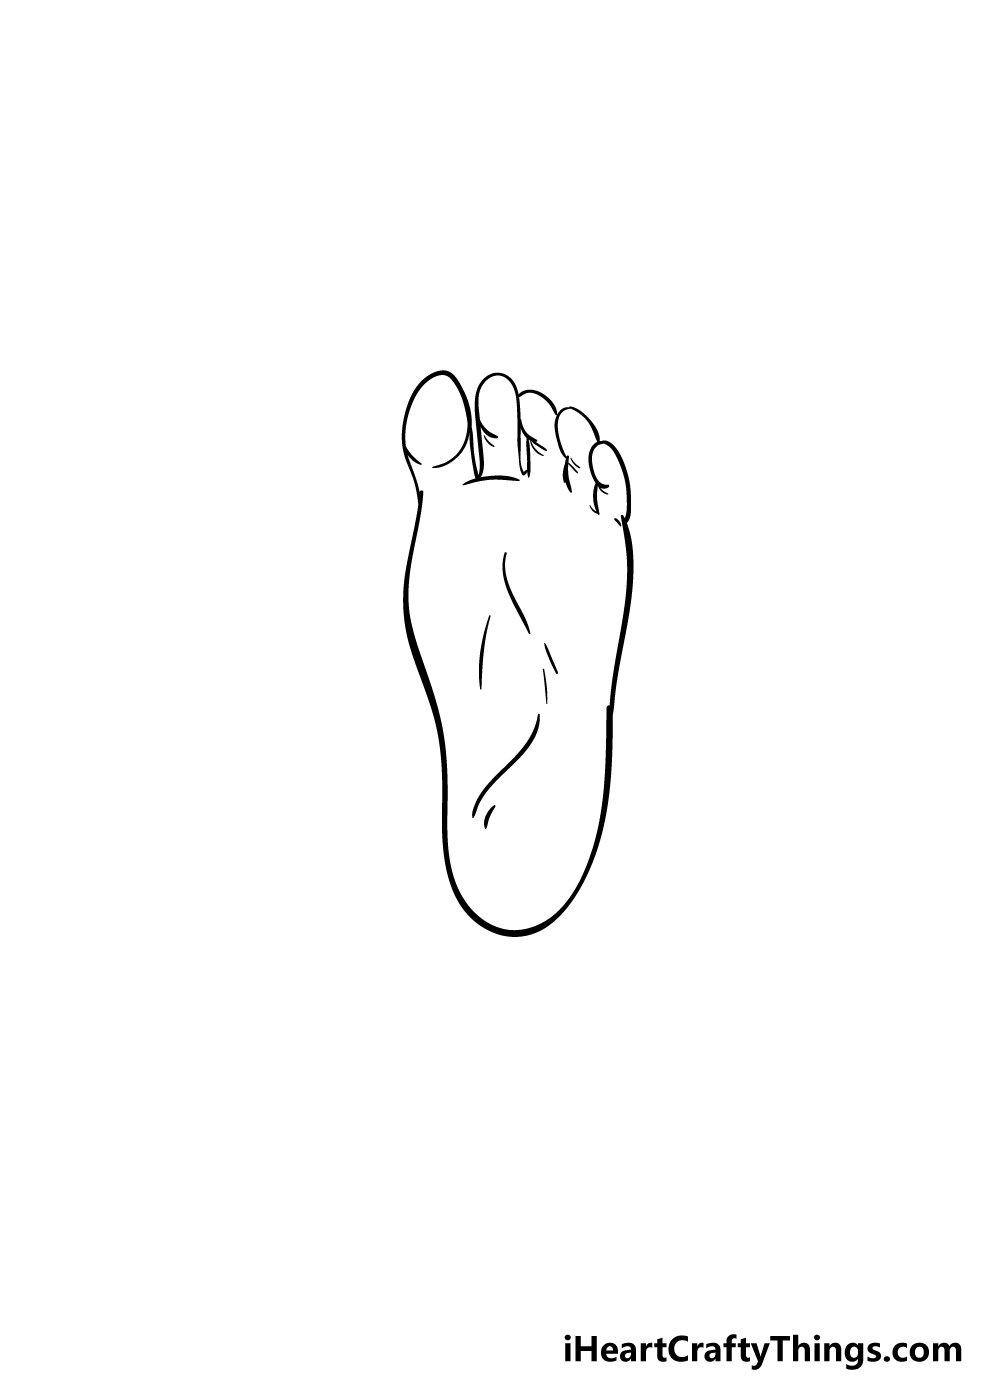
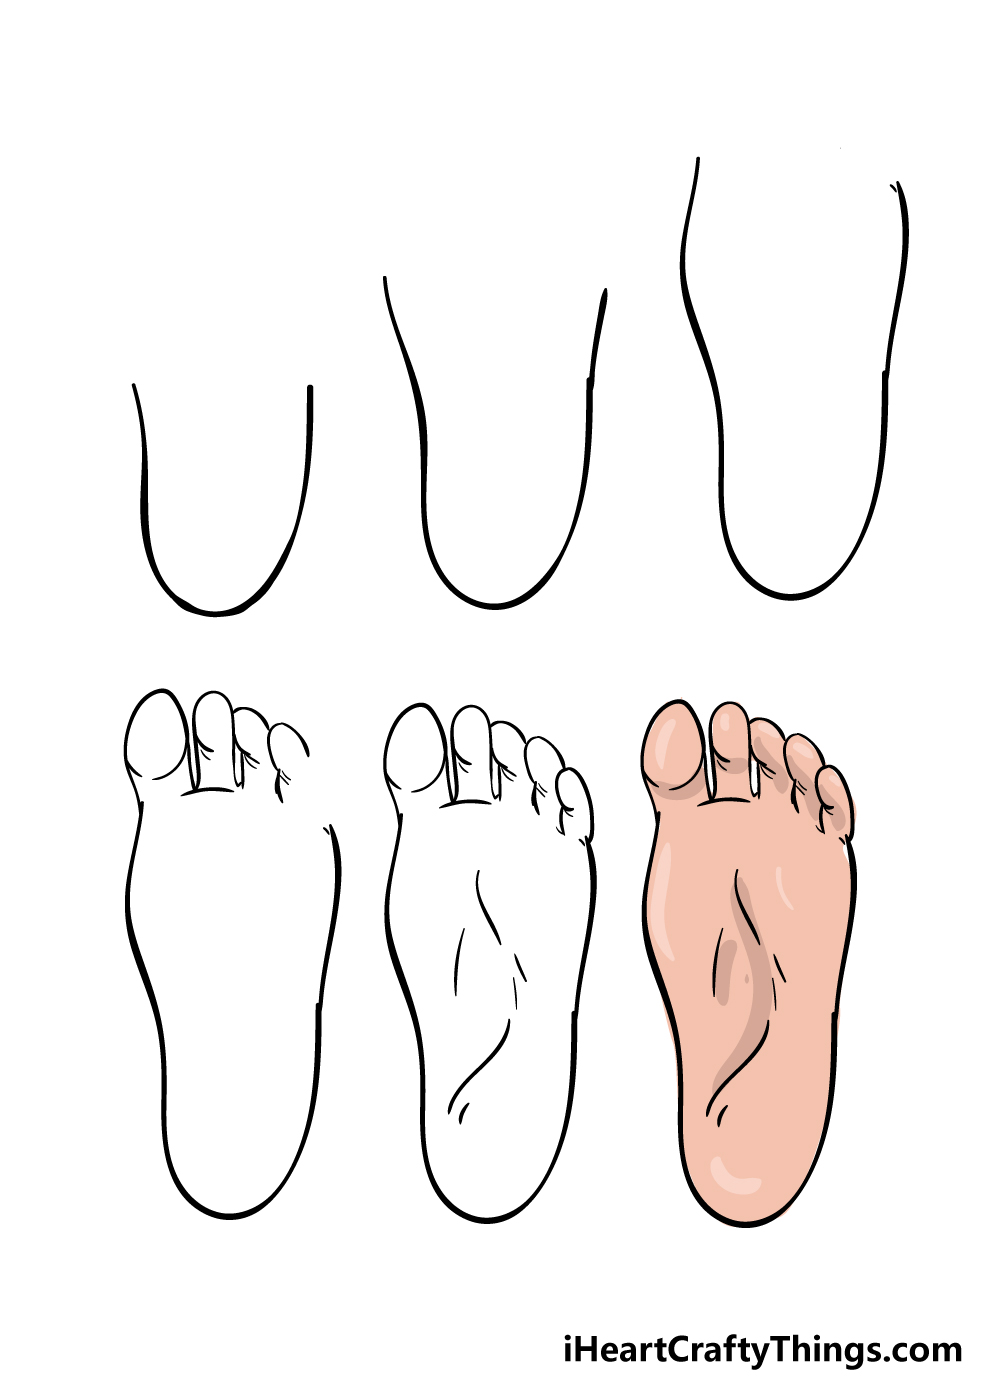
How to draw a foot: Define the shape of the legs and ankles, allowing the curved lines to cross into the circles. Draw letter ‘b’ shapes on the left foot. Additional examples of the structure of the foot. A simple way to draw feet is to begin by drawing the sole of the foot.
Foot Drawing How To Draw A Foot Step By Step
Then continue your figure drawing with side views of the foot. Draw a line connecting the top oval to the bottom. In this last body part of the anatomy course you’ll learn how to construct the foot with basic forms, l. (step 08) draw a “j” shape on each foot (for toes), draw some lines as well. You can see.

How to Draw Feet / the Human Foot with Easy Step by Step Drawing
At one growing church in the las vegas suburbs, donald j. How to draw a foot: Now’s the time to start drawing the middle part of your foot that goes from your heel to your toes. In this last body part of the anatomy course you’ll learn how to construct the foot with basic forms, l. “in a world where.
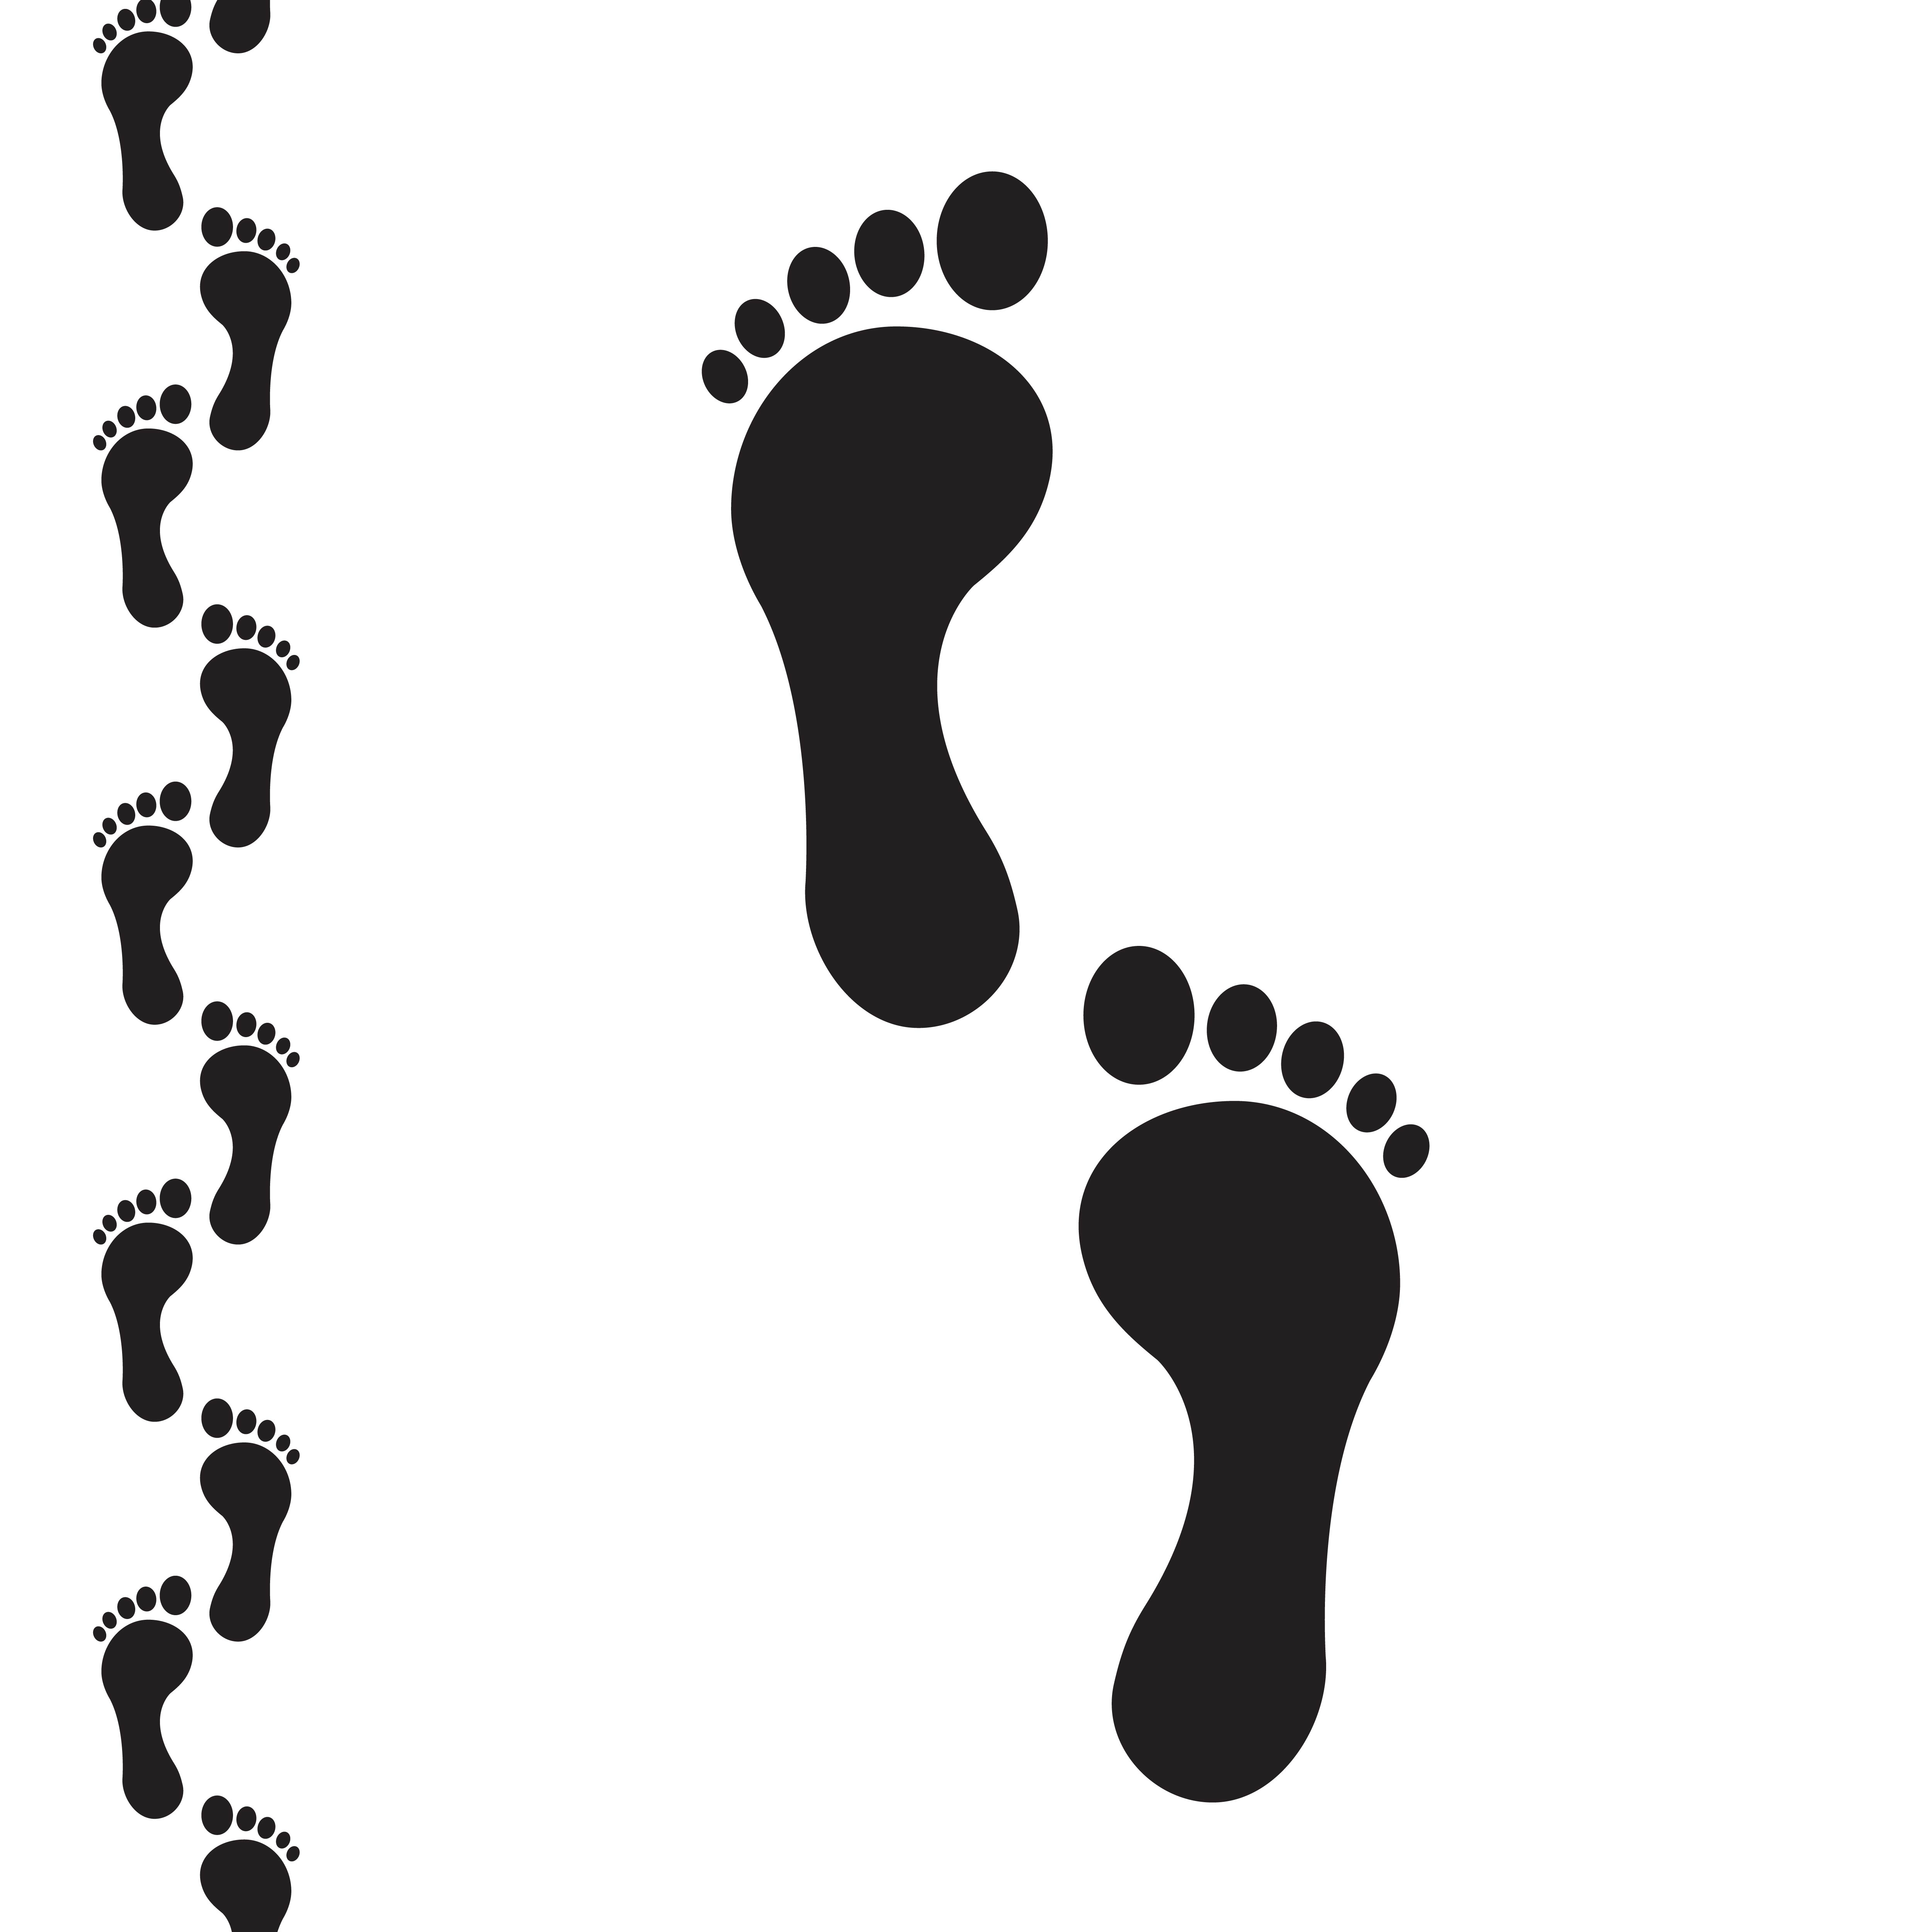
Footprints Vector Art, Icons, and Graphics for Free Download
“in a world where the future of creativity. Silhouettes of sneakers for human male and female shoes vector printing pictures footprint texture. The process begins by deconstructing the foot into three fundamental geometric shapes. On the opposite side, draw a line connecting them. (step 07) draw a “c” shape for the back toe.
How to Draw the Foot Drawing Feet and the Anatomy of them Reference
Web 5 back of the foot. Outline footprint icon in vector. When you first start practicing i would. Draw an oval for the thumb on the left foot. Web browse 11,800+ foot step drawing stock photos and images available, or start a new search to explore more stock photos and images.
Foot Drawing How To Draw A Foot Step By Step
To make it easier to practice we can break the foot into 3 major parts. “in a world where the future of creativity. Draw a bunch of lines on the back of the foot. Then for the rounded part, you can draw a shape that looks like an oval with a small gap at the. Web start by drawing the.
“In A World Where The Future Of Creativity.
Web we were stuck, selleck writes. In response to feedback from downtown. Black human footprints pathway isolated on white background. Draw a line connecting the top oval to the bottom.
Draw A Foot From Different Angles, Focusing On The Top Of The Foot In Some Sketches And The Heel Of The Foot In Others.
Then, add the detail of toes to the tip of the foot. The arch should be drawn on the inner side of the foot! The tendons are usually visible on the top of the foot, extending towards the ankle. (step 09) draw another “c” shape for one of the toes.
In Order To Build This Shape, We Must First Set The Perspective Right.
Use a 't' shape for foot direction. Also, draw a curved line. First, let’s draw the part that’s the closest to your heel — that’s where your talus bone is. (step 7) draw upside down ‘?’ shape on each foot.
Touching The Other Toes, Draw Two More Oval Toes.
Web (step 5) draw 2 curved lines on each foot. Silhouettes of sneakers for human male and female shoes vector printing pictures footprint texture. Web learn how to draw feet. Doodle baby footprints icon in vector.