How To Draw A Honeycomb
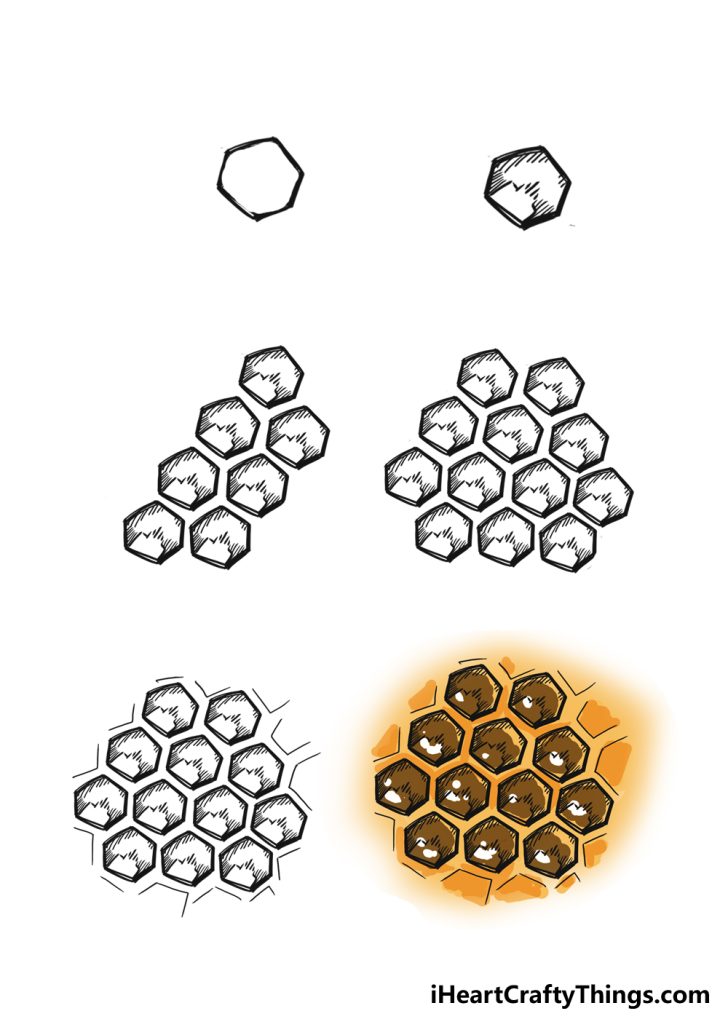
How To Draw A Honeycomb - Remember to use a ruler or straight edge to ensure straight lines. Now you have the hang of the basics of everything we will need for this design. Draw the outline of a bee in the center of each honeycomb cell. Make sure to position them in a way that they align with the body. Then, divide the circle into six equal sections by drawing lines that intersect at the center. Sketch out the fourth cell. In order to make your honeycomb print a bit more realistic you'll need some of the holes to be empty and free of honey (or larvae). This forms the bee's head, thorax, and abdomen. Start by drawing a vertical line, then add diagonal lines on both sides, intersecting the vertical line at the top and bottom. Add 5 more hexagons for this honeycomb.
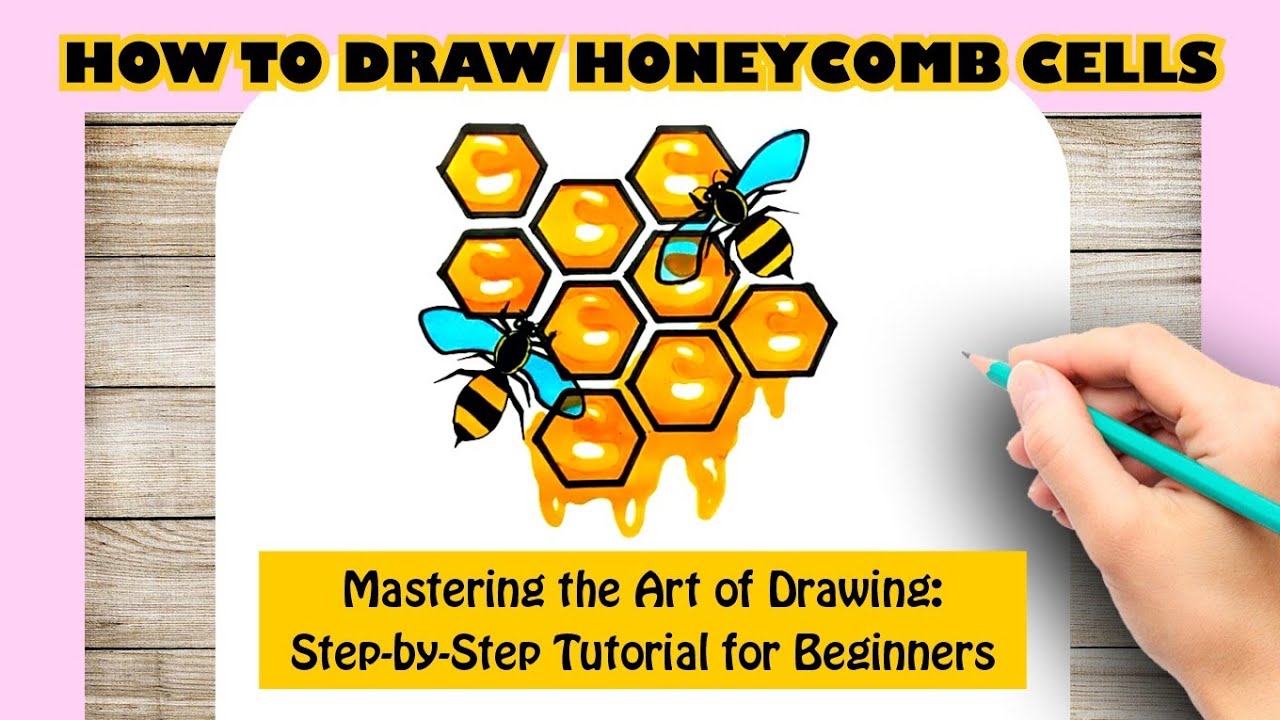
Are you ready to embark on a creative journey with your kids? They are very full and leaking honey together! Not only will your little ones learn the art of drawing, but they will also discover the intricate world of honeybees and their. Repeat your action in the previous step and draw the cell on the other side. Make sure to position them in a way that they align with the body. Web learn to draw a honeycomb. Use a pencil and a ruler to create six equal sides. Sketch out the fourth cell. Change the middle hexagon shape to the same brown gradient used in section 2, step 4. We’ll start with folding our paper.
Sketch out a few more straight lines to make the same hexagon. Your honeycomb drawing is now complete! Fill in the bee with the appropriate colors. Starting from the center of each side, draw a line connecting it to the side next to it. Sketch out the fourth cell. Now you have the hang of the basics of everything we will need for this design. Then, we’ll add a beehive and some buzzing bees 🐝 and sweet honeycombs 🍯. Web hey there, it's rob from art for kids hub 🖐️! Web learn to draw a honeycomb. Draw the outline of a bee in the center of each honeycomb cell.
How to Draw Cells YouTube
Materials needed include a drawing sheet, pencil, eraser, and color pencils or crayons. Adding depth and dimension to the honeycomb Starting from the center of each side, draw a line connecting it to the side next to it. Web hey there, it's rob from art for kids hub 🖐️! Not only will your little ones learn the art of drawing,.
How to Draw a in a Few Easy Steps Drawing Tutorial for
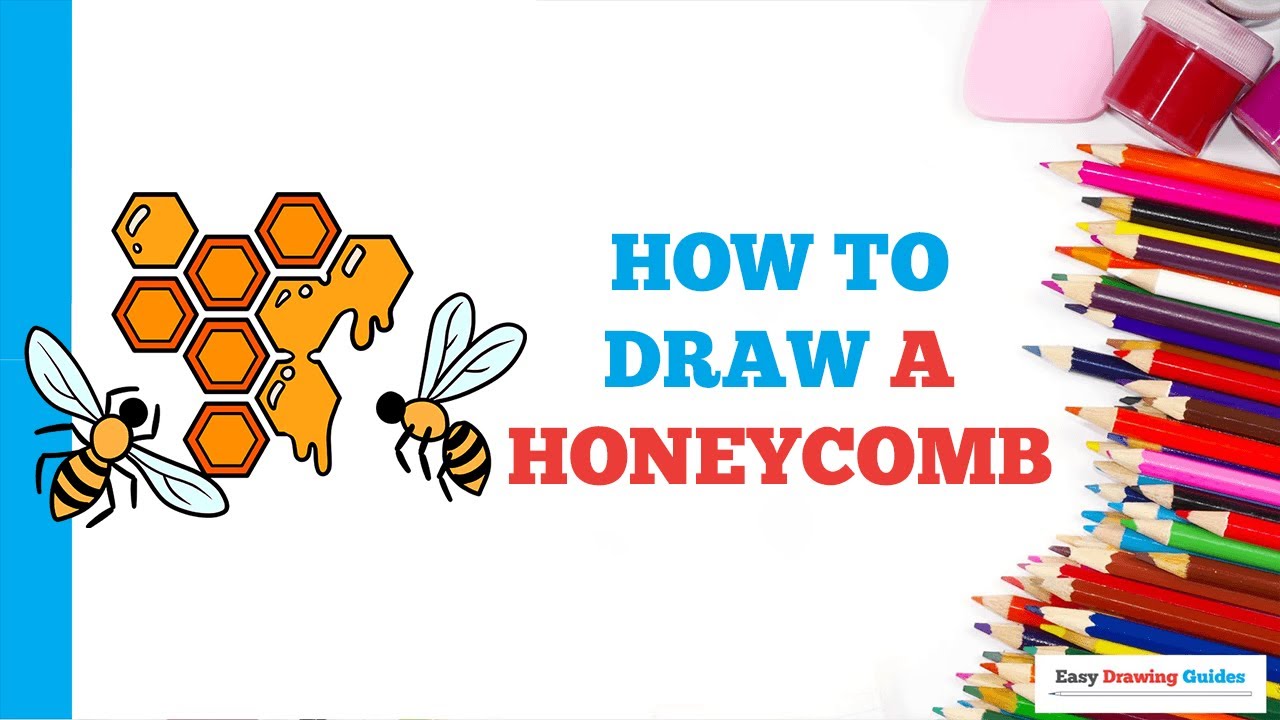
In this step by step drawing guide, we will go through the process of creating a detailed and realistic honeycomb pattern. Web how to draw a honey comb. Draw a hexagonal shape on the left side of the first wax cell to give the appearance of the second prismatic wax cell. Today, we're going to learn how to draw a.
How To Draw A Step By Step!
Fill in the bee with the appropriate colors. Draw lines connecting the sides. In this video, we will show you how to draw a honeycomb step by step with easy drawing tutorial step by ste. Finally, connect the diagonal lines to complete the hexagon shape. Draw the outline of a honeycomb cell in the center of each hexagon.
How to Draw a A StepbyStep Tutorial for Kids
Then, we’ll add a beehive and some buzzing bees 🐝 and sweet honeycombs 🍯. Draw a hexagonal shape on a sheet of paper for the first prismatic wax cell. How to draw honeycomb,how to draw a bee,bee honeycomb drawing,how to. Draw a hexagonal shape on the left side of the first wax cell to give the appearance of the second.
How to Draw a Easy Drawing Tutorial For Kids
Not only will your little ones learn the art of drawing, but they will also discover the intricate world of honeybees and their. Are you ready to embark on a creative journey with your kids? Next, add six legs to your bee by drawing three on each side of the body, extending downwards. Then, draw a busy worker bee. In.

How to Draw a Really Easy Drawing Tutorial
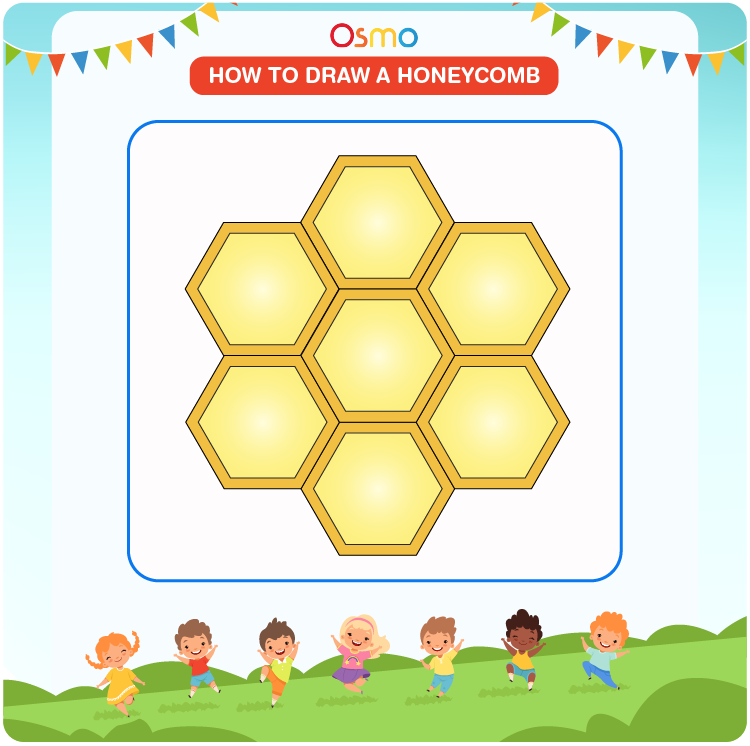
Web easy stepwise instructions on how to draw a honeycomb. To do this, draw a regular hexagon. Web learn to draw a honeycomb. Sketch out a few more straight lines to make the same hexagon. How to draw honeycomb,how to draw a bee,bee honeycomb drawing,how to.

How to Draw a Really Easy Drawing Tutorial
Then, we’ll add a beehive and some buzzing bees 🐝 and sweet honeycombs 🍯. Draw a hexagonal shape on a sheet of paper for the first prismatic wax cell. Sketch out a few more straight lines to make the same hexagon. Adding depth and dimension to the honeycomb Draw the outline of a honeycomb cell in the center of each.

How to Draw a Really Easy Drawing Tutorial
In this step by step drawing guide, we will go through the process of creating a detailed and realistic honeycomb pattern. Are you ready to embark on a creative journey with your kids? Web how to draw a honeycomb. How to draw a honeycomb. Add 5 more hexagons for this honeycomb.
How to Draw a Easy Drawing Tutorial For Kids
Draw a circle, an oval, and an inverted teardrop shape. In this video, we will guide you t. How to draw a honeycomb. Web create a planar shape from the selected epd honeycomb vectors, draw an oval equal in size to the inside of your frame, select the oval and clear the working model outside of the selected vector, make.
How to Draw a Easy Drawing Tutorial For Kids
Draw a hexagonal shape on the left side of the first wax cell to give the appearance of the second prismatic wax cell. Use a pencil and a ruler to create six equal sides. So, grab your crayons, and some paper 📝, and let’s get started on this honey of a drawing 🍯🐝! Web on each side of the bee’s.
They Are Very Full And Leaking Honey Together!
To do this, draw a regular hexagon. Finally, connect the diagonal lines to complete the hexagon shape. Not only will your little ones learn the art of drawing, but they will also discover the intricate world of honeybees and their. :)thanks for watching our channel.
Web Create A Planar Shape From The Selected Epd Honeycomb Vectors, Draw An Oval Equal In Size To The Inside Of Your Frame, Select The Oval And Clear The Working Model Outside Of The Selected Vector, Make The Working Model Into A Component And Subtract That Component From Your Frame Component.
Web 🍯🧸🍯🍯🐝step into the fascinating world of bees with our fun art tutorial on how to draw a beehive, bees, and honeycomb. Then, divide the circle into six equal sections by drawing lines that intersect at the center. Draw the outline of a bee in the center of each honeycomb cell. Draw a circle, an oval, and an inverted teardrop shape.
Fill In The Bee With The Appropriate Colors.
Make sure to position them in a way that they align with the body. Repeat your action in the previous step and draw the cell on the other side. How to draw honeycomb,how to draw a bee,bee honeycomb drawing,how to. Copy and paste the original honeycomb group and delete some of the brighter gradient shapes.
Your Honeycomb Drawing Is Now Complete!
Web adaptations, honey production, and reproduction strategies. So, grab your crayons, and some paper 📝, and let’s get started on this honey of a drawing 🍯🐝! Erase some of the lines of three of the honeycombs. Change the middle hexagon shape to the same brown gradient used in section 2, step 4.