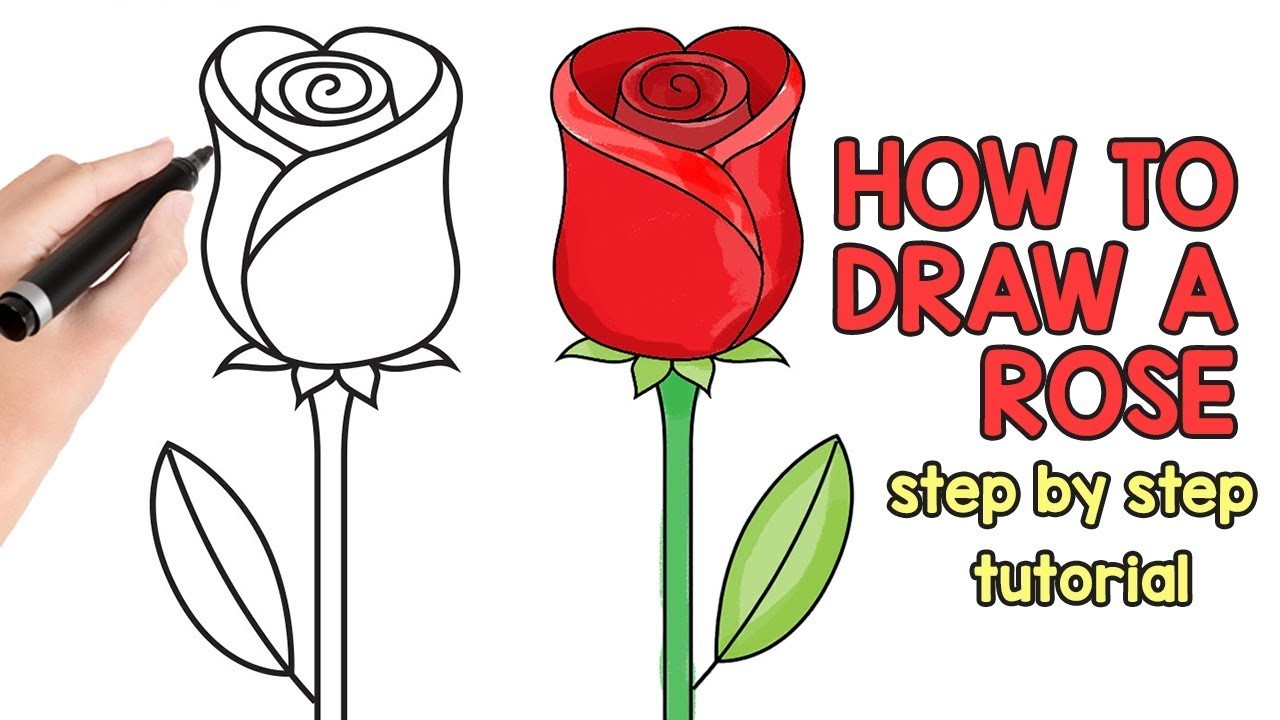
How To Draw A Rose On Your Hand
How To Draw A Rose On Your Hand - Using a penciled guideline helps you keep the rose’s general shape while filling in details. When drawing your rose, notice where the lines start and stop in relation to the other lines. Web today, hadley and i are learning how to draw a rose! It gives us advice on blending out the petals and adding dark areas. This drawing is perfect for valentine's day and mother's day! Follow the instructions as you turn your page to place the numbers and letters at various angles. Start by drawing an oval shape, as shown in step 1. These pens create a beautiful watercolor effect. Here's how you can watch the action. Web drawing by free hand will suffice.
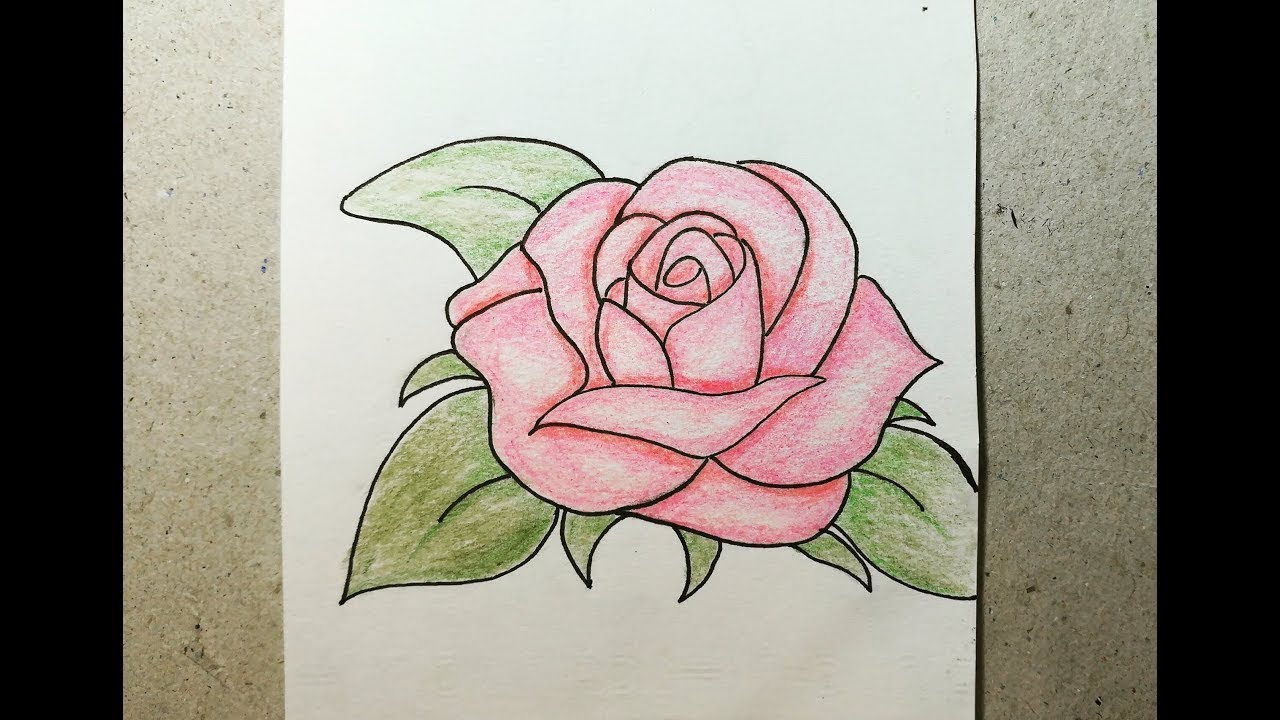
Other parts of the heart don’t need to touch the oval shape, but there is nothing wrong if they do. This step is green in the following image. Derrick lewis and rodrigo nascimento headline the event. Web learn how to draw a realistic rose using an ordinary pencil. Web starting from the bottom of your basic shape, draw a couple of lines that will start to form your flower. And finally, add some light lines to show the nerves or veins. This video tutorial uses the lines of a 6, 9, y, u, c and more. Draw) form is to make sure you think about what part of the rose you're drawing so that your hand movements follow the same curves of the petal or the roundness of the stem. Begin by drawing three small circles, each one a little larger than the last. Brand recognition would be an obvious one (apple is one of the most widely recognized companies in the world), along with expertise in.
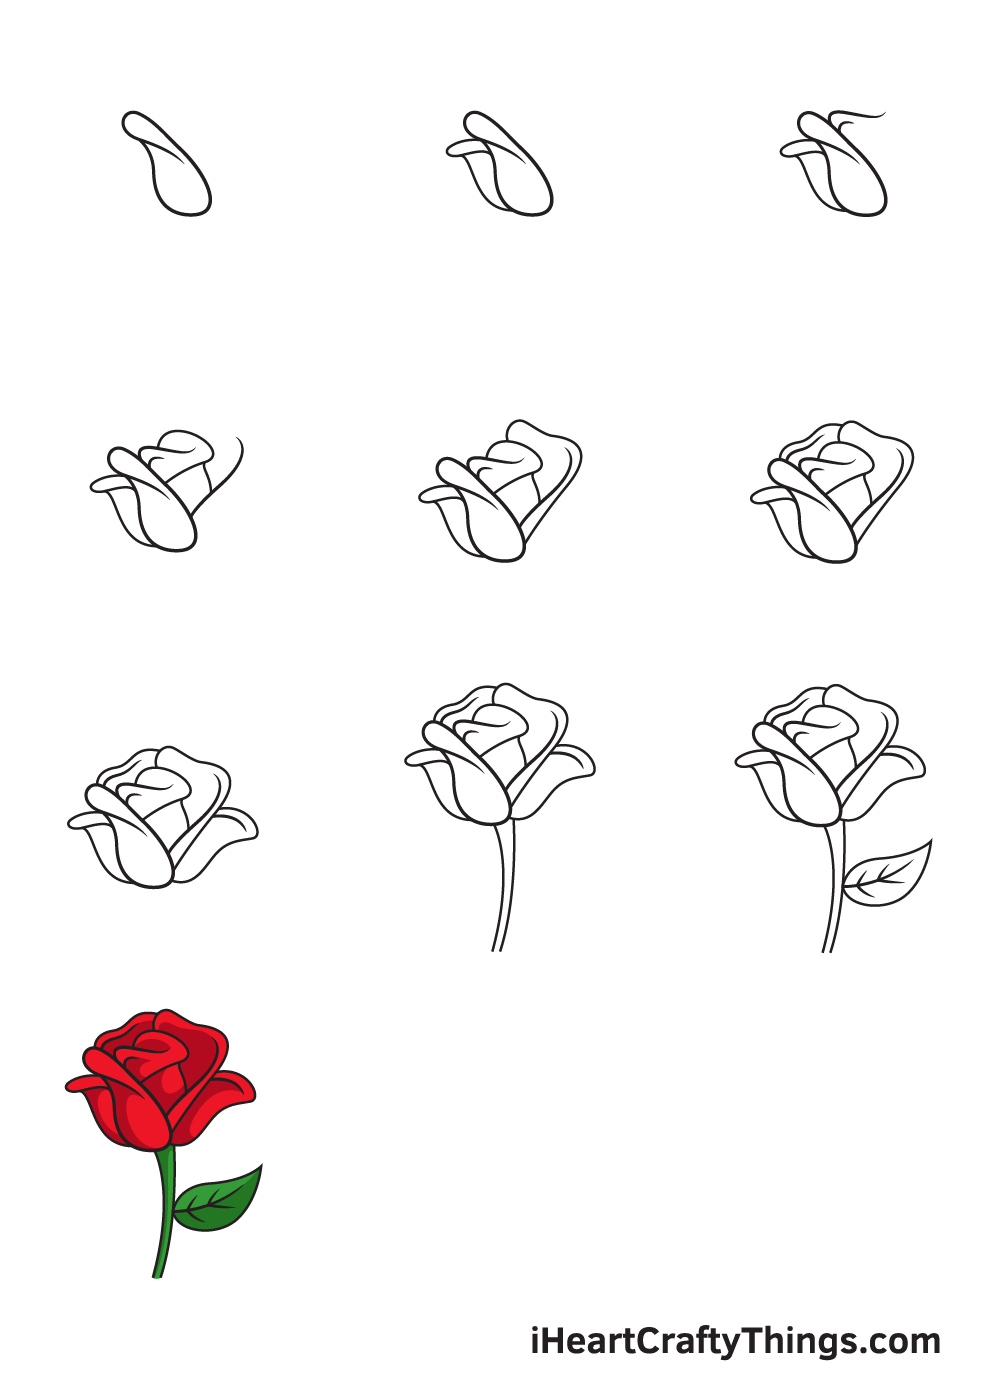
Create a layer of basic shapes. Then draw the first inner petal with a pointer end. Web the tutorial below shows us how easy it can be to draw a watercolor rose by starting with a simple circle. Now draw a small oval around the beginning oval, making the bottom of the second oval even with the first. These pens create a beautiful watercolor effect. The sides of the leaves round outward and come together into a point. It gives us advice on blending out the petals and adding dark areas. Web learn to draw a rosesubscribe: Begin by drawing three small circles, each one a little larger than the last. This will be the center of the rose.

How To Draw A Rose Bush Step By Step Easy Drawing a rose just got
When drawing your rose, notice where the lines start and stop in relation to the other lines. This video tutorial uses the lines of a 6, 9, y, u, c and more. Web the first line, going upward from the stem at an angle, is the center stem. Follow the step by step instructions and pause if you need more.
How to Draw a Rose step by step drawing tutorial YouTube
Discover (and save!) your own pins on pinterest. Web the first line, going upward from the stem at an angle, is the center stem. Your lines should look like a curved y. Begin by drawing three small circles, each one a little larger than the last. When drawing your rose, notice where the lines start and stop in relation to.

Easy Rose Drawing Tutorial at Explore collection
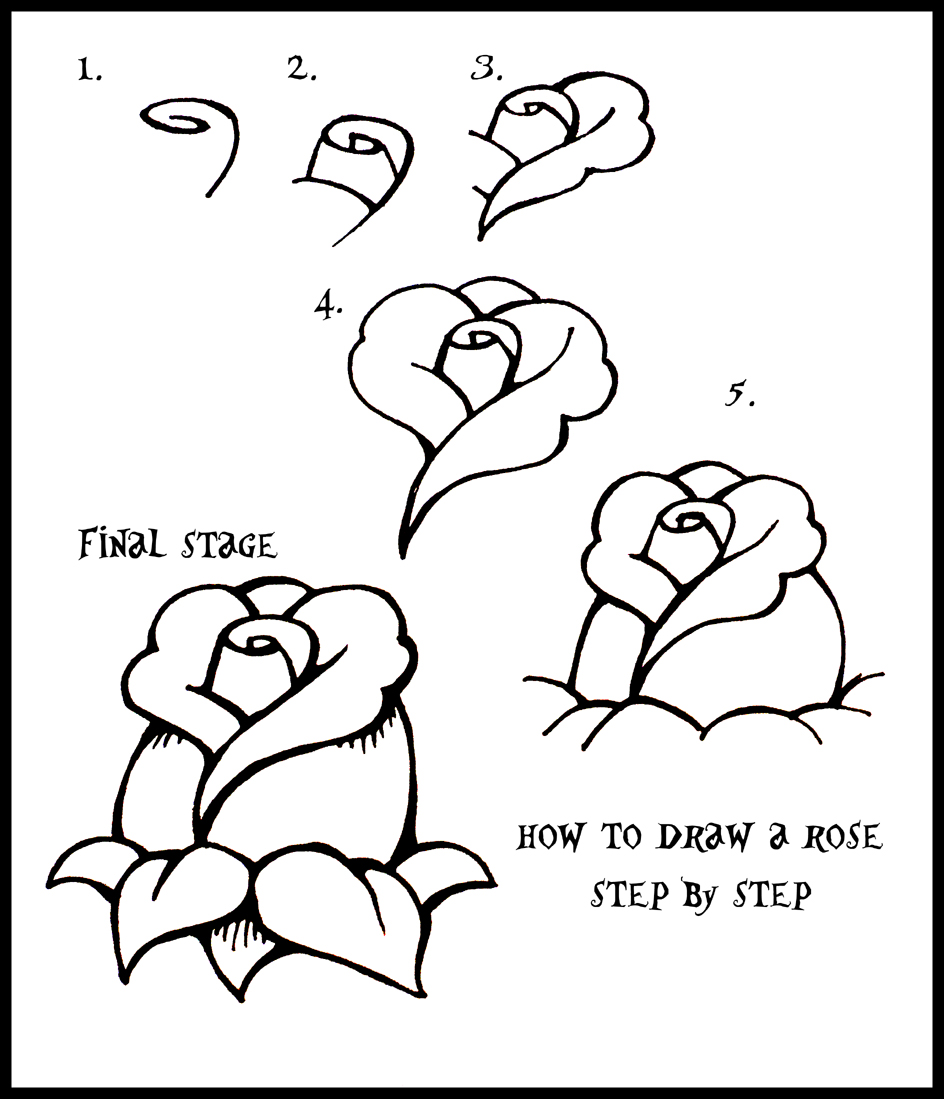
This is where the work begins but if you pay attention, it’ll be easy peasy. Web today, hadley and i are learning how to draw a rose! Web sketch in several leaves at the base of the flower. Inside the circle, draw a spiral. Begin by drawing three small circles, each one a little larger than the last.

How to draw a rose stepbystep guide for beginners Flower drawing
Web the first line, going upward from the stem at an angle, is the center stem. Then, from the pointed end downward, draw the shape of each leaf, ending at the middle line. Web sketch in several leaves at the base of the flower. Begin by drawing three small circles, each one a little larger than the last. These pens.
Draw a Rose Step by Step Easy Norton Didle1944
Web the first line, going upward from the stem at an angle, is the center stem. This step is red in the following image. Rose flower in full bloom. Lay down the basic shapes and simple lines that will make up your rose drawing. .yaz.x if you are passionate about art and want to start, on the link in my.

How to Draw a Rose for Beginners HelloArtsy
This step is green in the following image. And finally, add some light lines to show the nerves or veins. Web today, hadley and i are learning how to draw a rose! The rose will look more realistic if the spiral is not in the circle’s exact center. The drawing will take 6 steps in total as we continue to.
How To Draw A Rose Step By Step Guide
Web the first line, going upward from the stem at an angle, is the center stem. Web learn to draw a rosesubscribe: Again don’t worry about the shape of the heart, the left and right sides don’t have to look the same. This step is green in the following image. The sides of the leaves round outward and come together.

How To Draw A Rose With A Pen This drawing lesson will walk you step
Web the tutorial below shows us how easy it can be to draw a watercolor rose by starting with a simple circle. Web rose drawing easy step by step tutorial. Derrick lewis and rodrigo nascimento headline the event. Next, draw a line that looks sort of like half of a curly s shape. Next, sketch a heart connected to the.
how to draw a rose Easy step by step for beginners YouTube
Inside the circle, draw a spiral. Web the first line, going upward from the stem at an angle, is the center stem. Also, learn professional techniques on how to sketch a rose using special advanced pencils in th. Art supplies ~ this is a list of the suppl. ️ supplies you might love (amazon.
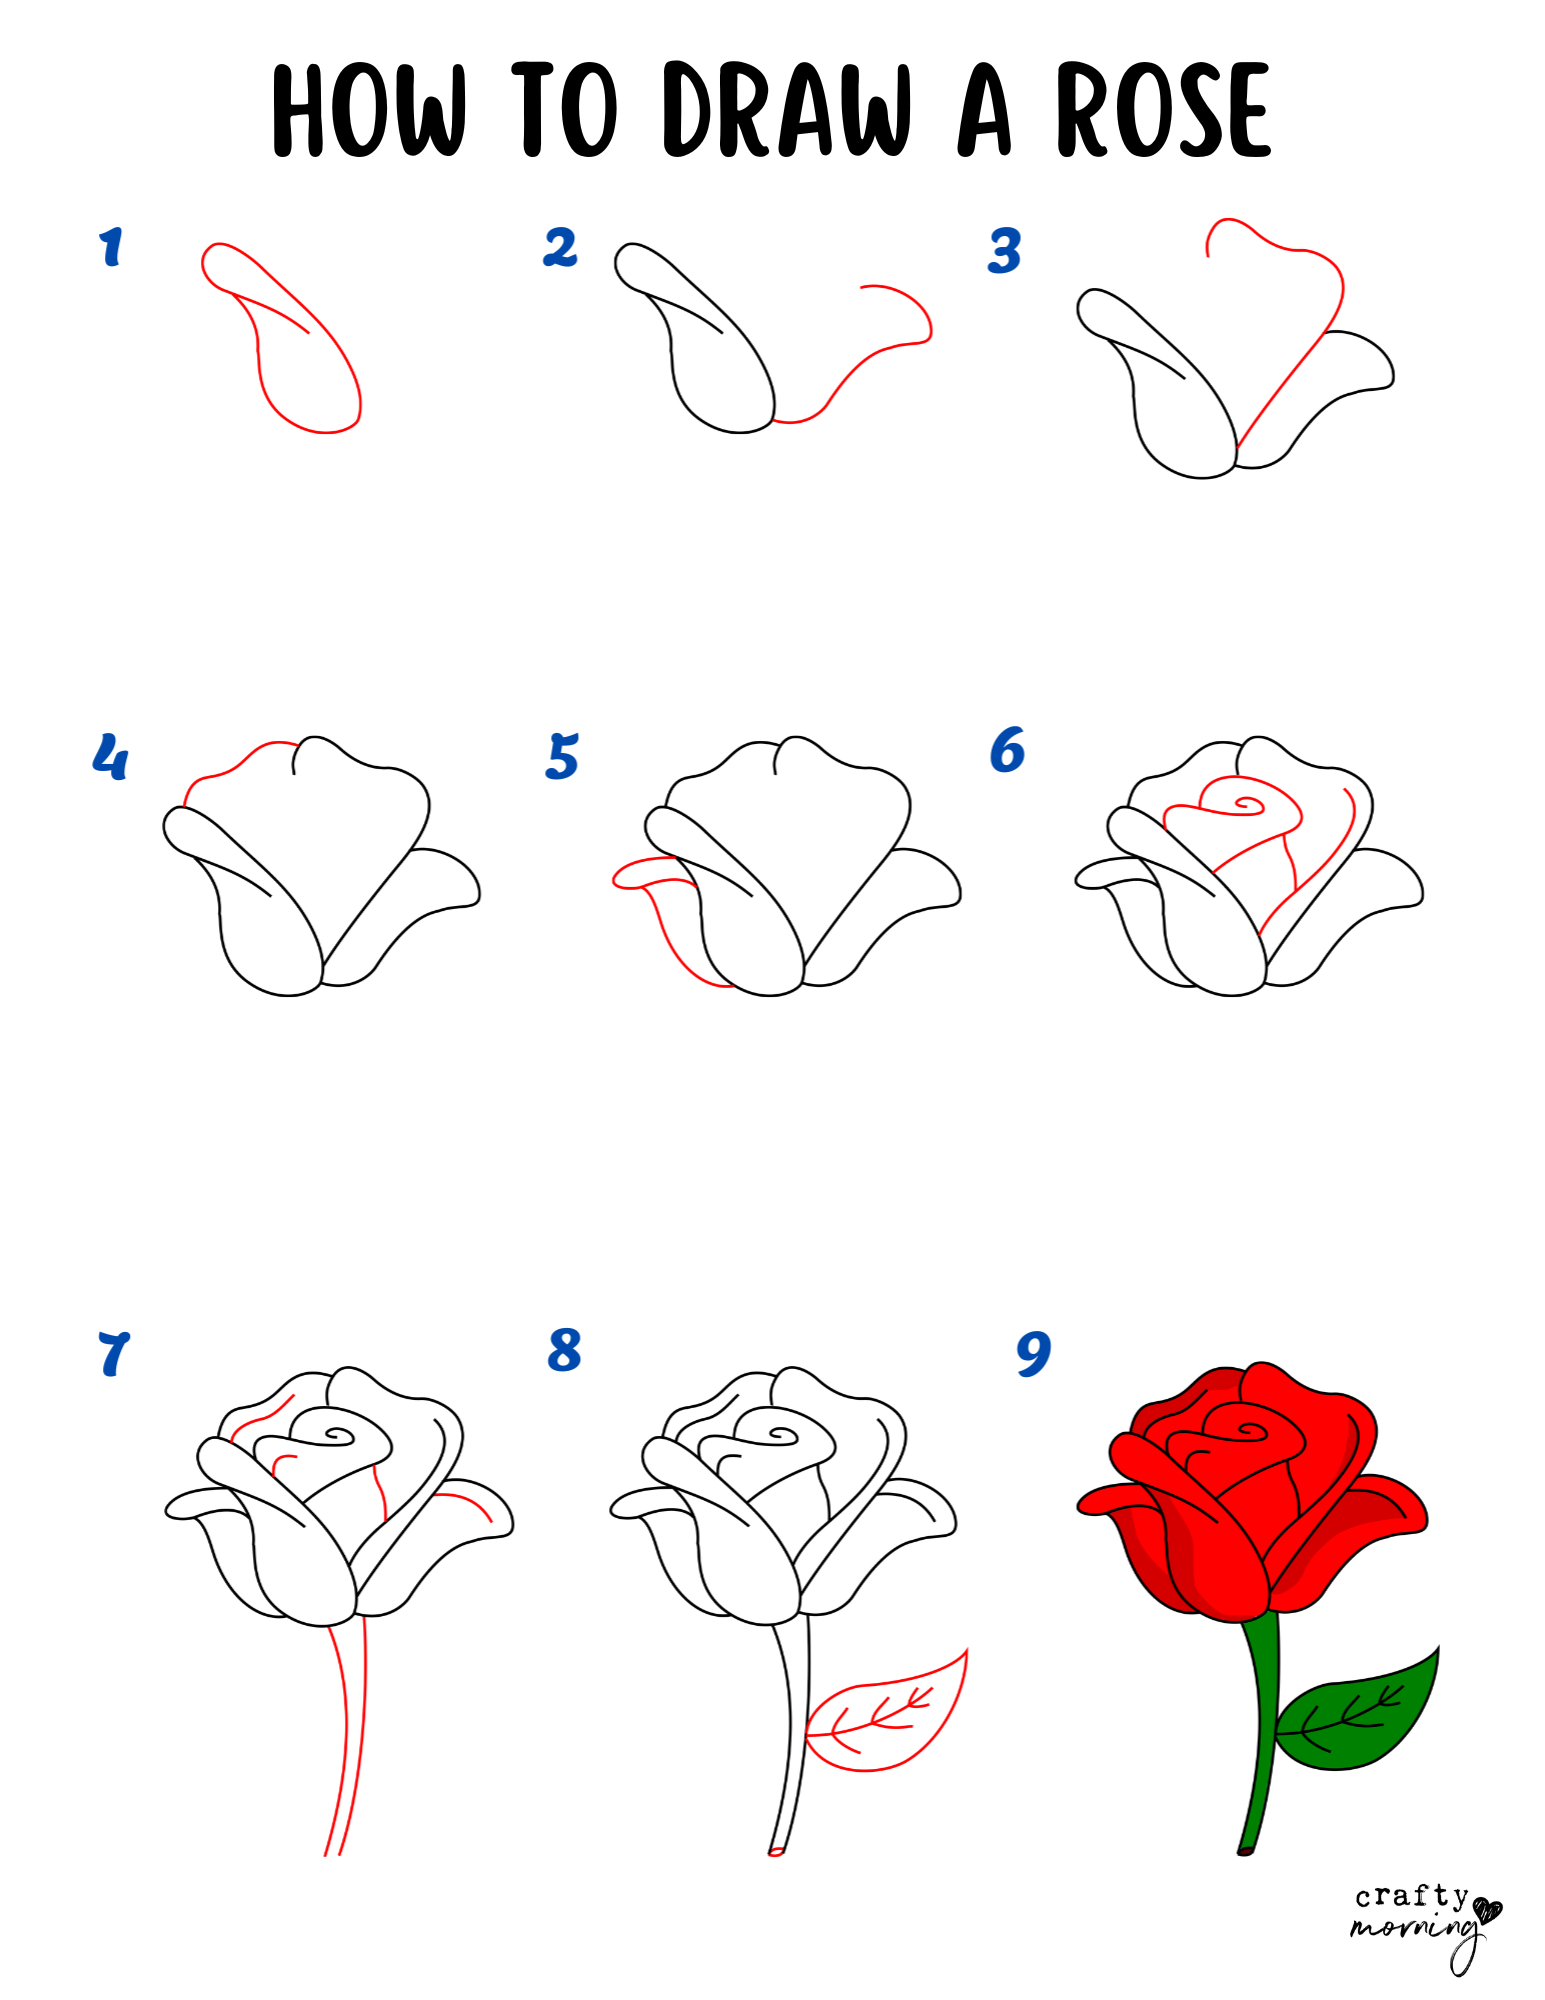
How to Draw a Rose Step by Step (Easy) Crafty Morning
Web learn how to draw a rose easy for beginners with this simple art tutorial. By the end of this lesson we will arrive at a finished drawing of a rose for beginners by working on one area at a time. This video tutorial uses the lines of a 6, 9, y, u, c and more. Now draw a small.
This Video Tutorial Uses The Lines Of A 6, 9, Y, U, C And More.
This will be the center of our rose flower. Create a layer of basic shapes. Inside the circle, draw a spiral. By the end of this lesson we will arrive at a finished drawing of a rose for beginners by working on one area at a time.
Draw In A Stem Coming Down From The Bottom Of The Rose.
Begin by drawing three small circles, each one a little larger than the last. Web learn to draw a rosesubscribe: The finished work of art will be finalized with color making it a drawing you will be proud of! Web with apple, rivian could get a boost in a variety of ways.
Derrick Lewis And Rodrigo Nascimento Headline The Event.
If you follow my drawing tutorial you can find out how you can make your own rose drawing eas. The rose will look more realistic if the spiral is not in the circle’s exact center. Draw) form is to make sure you think about what part of the rose you're drawing so that your hand movements follow the same curves of the petal or the roundness of the stem. Rose flower in full bloom.
Draw The Core Shape Of The Rose And Move To Drawing The Petals Inside Of It.
The back part of the leaf sits under the flower and is not visible. Start by drawing an oval shape, as shown in step 1. Next, draw an oval around these, as in step 3. The swirl should be in the middle of the heart where you would normally find the indent of the heart.