How To Draw Bunny Feet
How To Draw Bunny Feet - Younger kids and beginners might find it easier to draw them without the bumps, so simply drawing an oval shape. Both shapes should be relatively close to one another. Draw a curved line linking the back foot to the oval you drew earlier. Draw an outline inside the ears and start the arms. Then, at the top of the head, enclosing a long, narrow shape, using a curved line on each side and put smaller curves. This is the step where you will finally start to see the rabbit in and amongst the shapes and lines you have drawn during the construction phase of your bunny drawing tutorial. Time to color your bunny! Start by drawing a small circle that is a bit smaller at the top then the bottom. Make a drawing of the bunny’s face. Web sketch a rough outline for the hands and feet.
This step is the cute bunny ears. Once you have the shape down, go in and add details, such as the. Draw a vertical line and a. Time to color your bunny! Use your cricut machine to cut the image on chipboard or other heavy cardstock. Enclose a small round shape to form the nose, and extend a short line beneath it. Just above the other end of the front foot that is. From the bottom of the oval, we will draw another. Welcome to beta kids drawing channel.in this video, we will show you how to draw a bunny footprint step by step with easy drawing tutorial for. For the front feet, you can draw a “u” shape with a slight point at the end.
Draw the rabbit’s head with curved lines. Depending on the perspective of your reference photo, you might need to make the body shape longer than you would for a cartoon bunny. Web in step 4, draw a round bunny tail off the left of the leg. Just above the other end of the front foot that is. Start by sketching the outline of the bunny’s face. Once you have the shape down, go in and add details, such as the. Constructing the bunny’s front feet. The first will be the head of your bunny; From the short line, draw two short, curved lines to form the mouth. In order to draw a bunny, the outline will follow the edges of the construction shapes that you have drawn.
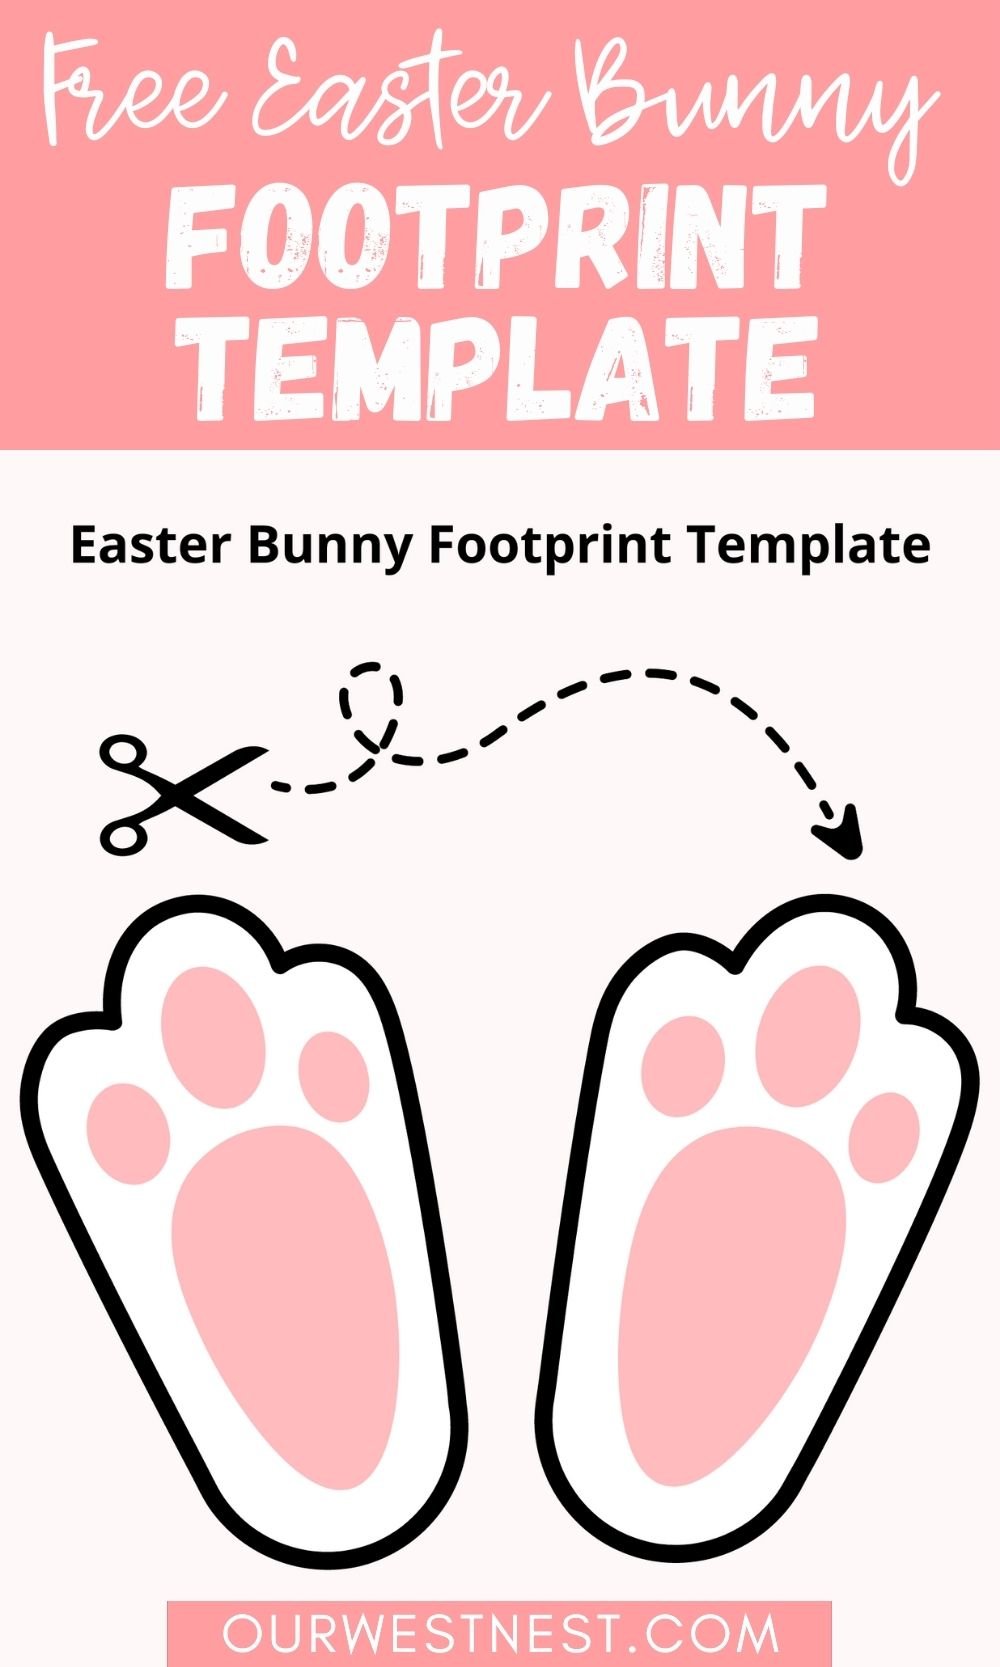
How to Make Bunny Footprints for Easter Free Easter Bunny Footprints
Draw a dot for each eye, perhaps leaving a tiny speck uncolored to indicate the shine of the eyes. Draw the side of the bunny's face. Colors add depth and personality to your bunny drawing. Start by sketching the general structure of the bunny with simple shapes, such as ovals, circles, and rounded cs. Starting from the back of the.
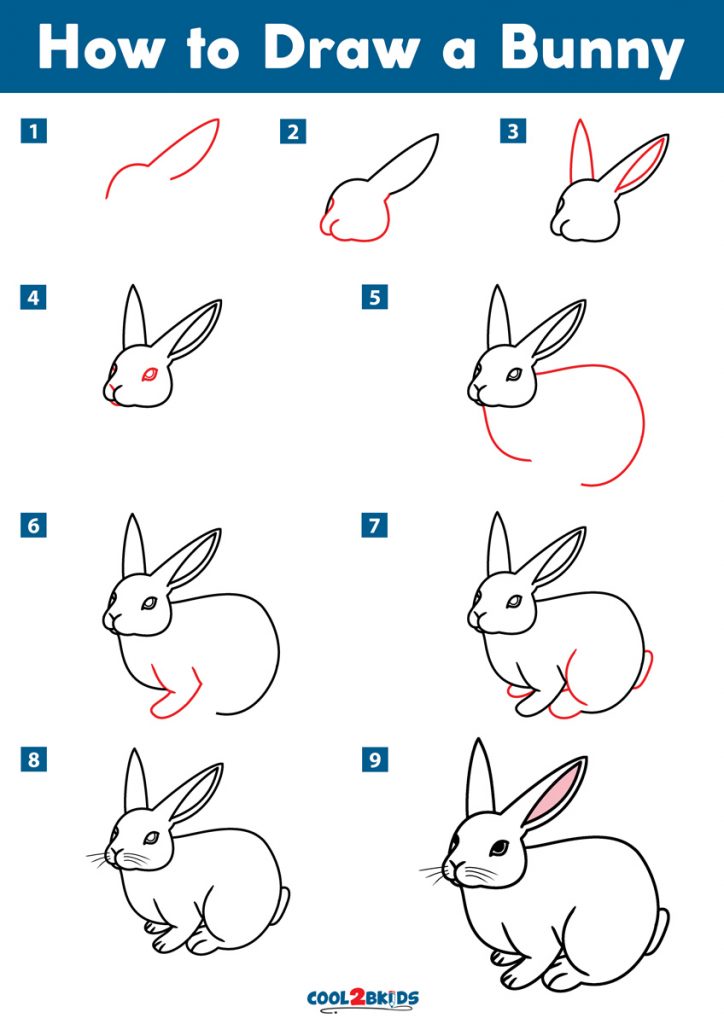
How to Draw a Bunny Cool2bKids
In this step, you will see your bunny drawing come to life. Web add the chin and legs. Draw an irregular circle shape with the bottom part slightly wider than the top. To do this, make an upside down 'u' shape and add a horizontal line at the bottom right, a bit longer than the ear is thick. Add shape.
Rabbit Foot Drawing at Explore collection of
We’re going to continue drawing the shape of the head in this step. Also draw the line at the bottom. Enclose a long, narrow shape within each ear. The first will be the head of your bunny; Both shapes should be relatively close to one another.

Rabbit Foot Bunny Feet Template / How to Make Easter Bunny Paw Prints
Web in step 4, draw a round bunny tail off the left of the leg. Add a rounded triangle to the bottom of the oval for the head. Draw bunny feet and two lines for the paws. Draw a dot for each eye, perhaps leaving a tiny speck uncolored to indicate the shine of the eyes. Draw bunny “hands” and.

Rabbit Foot Anatomy
Time to color your bunny! 🥰 learn how to draw a cute bunny rabbit easy, step by step to celebrate easter and spring. Then, connect the gap in between the ears with a line. Web in step 4, draw a round bunny tail off the left of the leg. You can draw them with or without bumps for the fingers.

Bunny Rabbit Feet Template / Easter Bunny Footprint Stencil My Bored
Just above the other end of the front foot that is. Draw the two bunny ears, and add whiskers to the side of the face. This step is the cute bunny ears. Start by sketching the outline of the bunny’s face. In order to draw a bunny, the outline will follow the edges of the construction shapes that you have.

Free Printable Easter Bunny Footprints
Make a drawing of the bunny’s face. From the short line, draw two short, curved lines to form the mouth. The next step is to draw in the face and the inside of the ears. Welcome to beta kids drawing channel.in this video, we will show you how to draw a bunny footprint step by step with easy drawing tutorial.
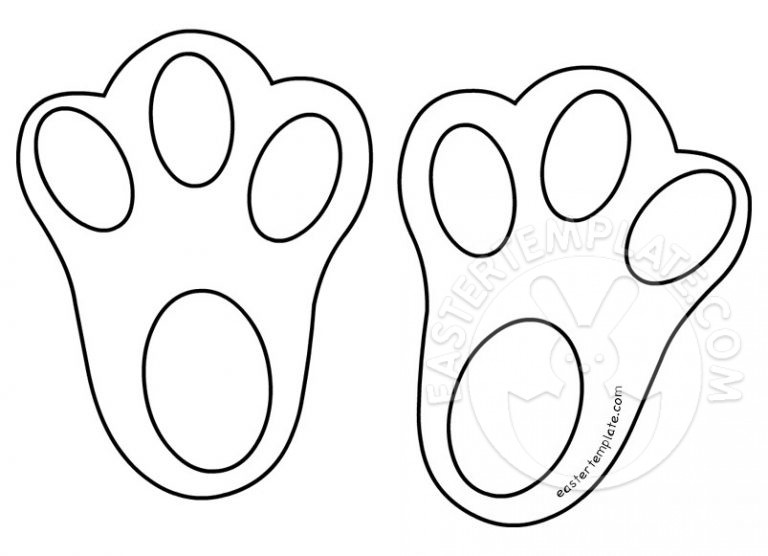
Printable Easter Bunny Feet Easter Template
Draw the side of the bunny's face. Start by drawing a small circle that is a bit smaller at the top then the bottom. Draw a vertical line and a. Then draw to slightly curved shapes as two arms. Starting from the back of the head, draw a curved line linking the bunny’s body to the head.

How to draw Rabbitdraw rabbit feet draw a cute bunny step by step
Start by using the 0.7mm marker to draw the bunny ear on the left. Colors add depth and personality to your bunny drawing. Depending on the perspective of your reference photo, you might need to make the body shape longer than you would for a cartoon bunny. Web add detail to the bunny’s face. You can draw them with or.

Easter Bunny Feet Svg, Rabbit Feet Svg, Graphic by Lillyrosy · Creative
Constructing the bunny’s front feet. The front line of the “u” shape should begin inside the main body oval, just in front of the middle. Draw the eyes using small circles, add the nose by sketching an inverted triangle, sketch the mouth and add the tooth. Draw a circle for the bunny's head. The next step is to draw in.
Web Shapes And Proportions Are The Foundation Of Your Cute Bunny Drawing.
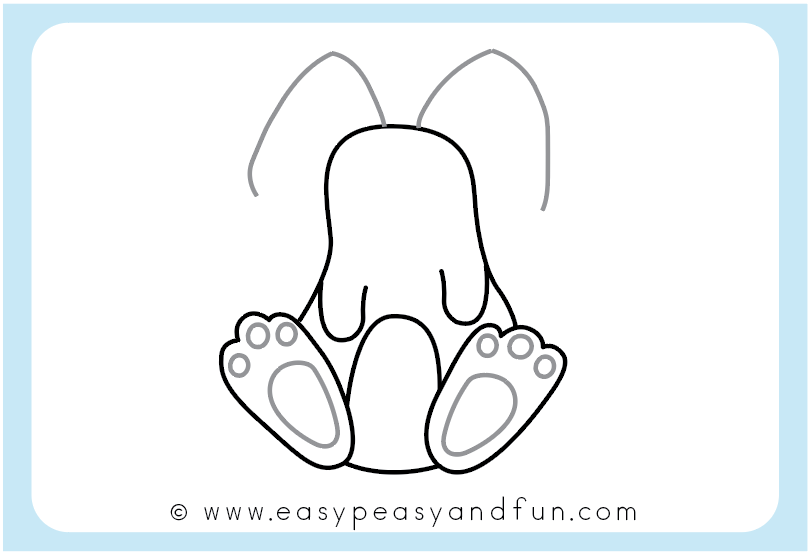
This the second part of my easter special where i show you how to draw an easter bunny and this time i'm focussing on the feet. Once you have the shape down, go in and add details, such as the. In this step, you will see your bunny drawing come to life. Draw a dot for each eye, perhaps leaving a tiny speck uncolored to indicate the shine of the eyes.
Draw Two Small Circles In The Middle Of The Larger Circle For The.
Constructing the bunny’s front feet. Draw an oval at an angle, we want the angle to be facing downwards as this will be guiding where we place the details of the head. Next draw the first ear on the side and then add the second ear on the other side of the circle. On the right side of the right ear, draw a small curve.
Cut Two Bunny Feet Using The Template (Use Small Scissors For The Inside Holes).
Start by sketching the general structure of the bunny with simple shapes, such as ovals, circles, and rounded cs. Also draw the line at the bottom. Web next draw two bunny feet. From the short line, draw two short, curved lines to form the mouth.
Web Add The Chin And Legs.
Both shapes should be relatively close to one another. Web sketch a rough outline for the hands and feet. Start by drawing a small circle that is a bit smaller at the top then the bottom. Draw bunny feet and two lines for the paws.