How To Draw Different Head Angles
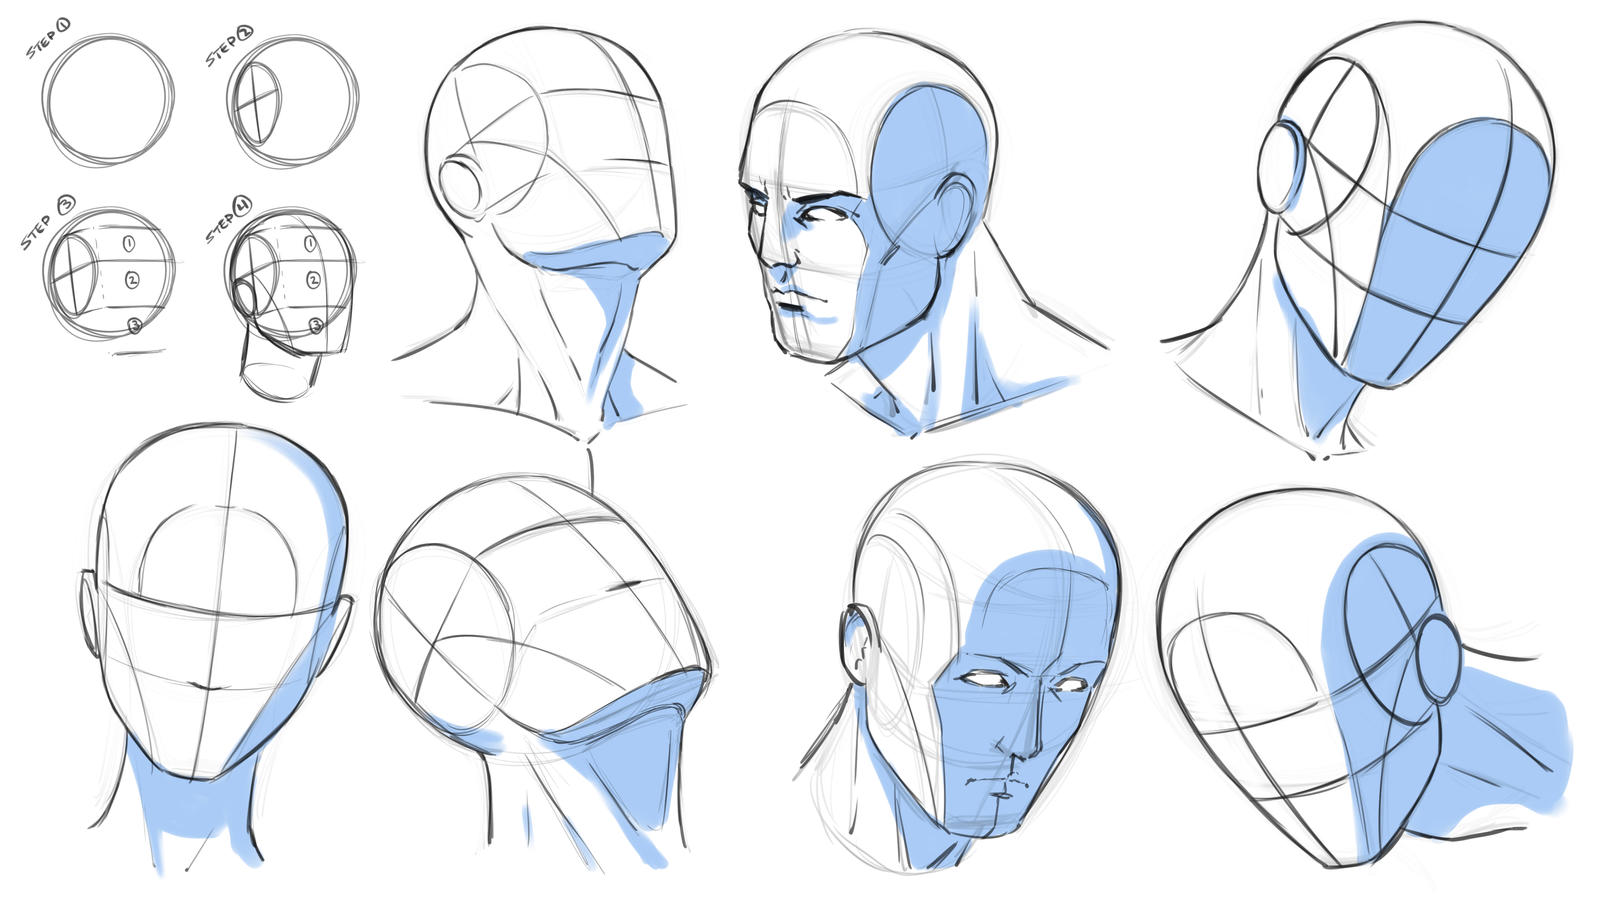
How To Draw Different Head Angles - When drawing a head from profile, start by arranging your two basic shapes so that they roughly resemble the angle you’re looking for. Then curve the side edges inward, and raise the back bottom edge of the box up, to complete the form. Understanding the rules of lighting in order to make your drawing look realistic understanding the basic anatomy of each of the facial features so you can draw them better; Web in today's video you will learn how to draw the head at a few different angles by using the andrew loomis method. The cranium is drawn like a sphere and will make up most of the head. Also draw a line that will represent the front plane of your character's face. Next we'll make the width of the cube narrower at the base. Web to draw it, lets keep things simple and start off with a regular ol' cube. Establish the cross where the middle line of the face crosses the eyebrow line. There are 3 main shapes that make up the head.
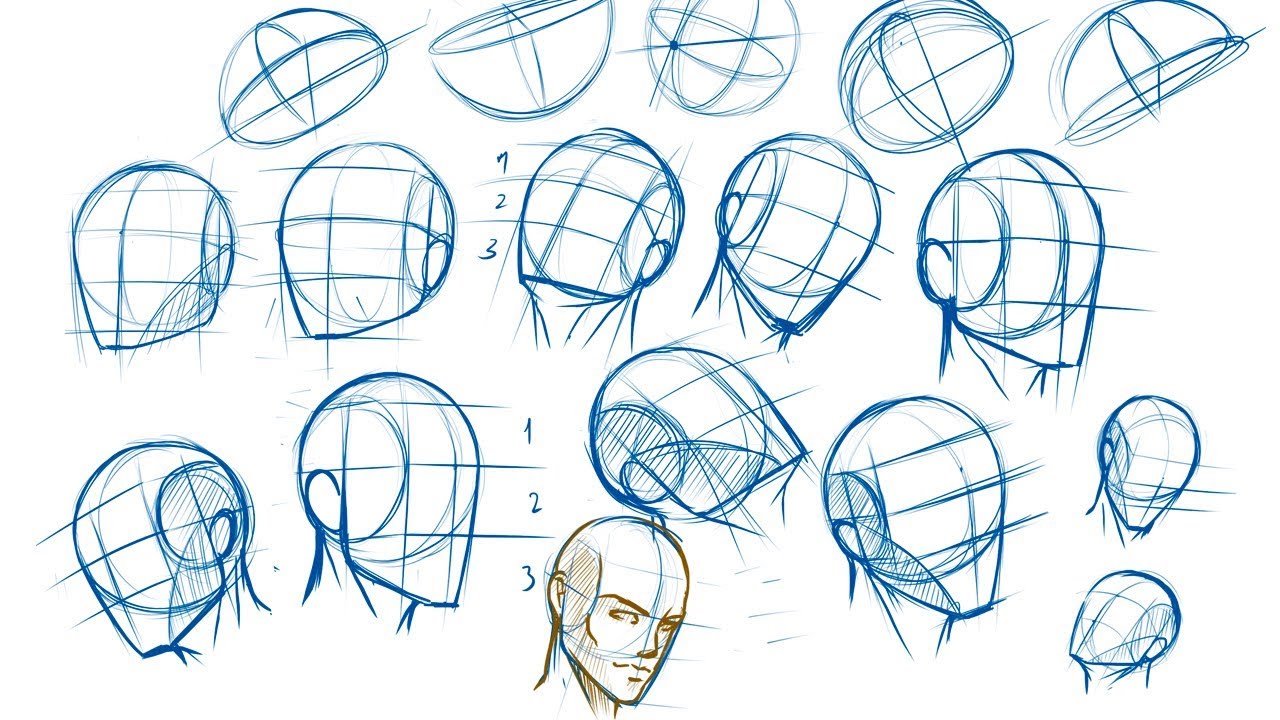
There are 3 main shapes that make up the head. Web how to draw the head from different angles to create more dynamic portraits; Web to draw it, lets keep things simple and start off with a regular ol' cube. Web in today's video you will learn how to draw the head at a few different angles by using the andrew loomis method. Next we'll make the width of the cube narrower at the base. Web in this lesson, i show you how to draw heads from different angles. The cranium, the jaw and cheeks, and the neck. Draw a smaller circle inside that circle, and this will represent the flat plane. The principles are similar for each, starting with a circle, an inner ellipse and marking the brow line with a cross. Now draw a circle from the top of the head to just under the tip of the nose.
Web in this lesson, i show you how to draw heads from different angles. Web in this video, we'll show you how to draw heads from any angle, no matter how difficult the pose seems. Then curve the side edges inward, and raise the back bottom edge of the box up, to complete the form. Now draw a circle from the top of the head to just under the tip of the nose. Once you have a good approximation of the relationships between the shapes, you can start building the rest of your drawing from that foundation. Next we'll make the width of the cube narrower at the base. With the loomis method, artists can learn to draw the head from the front, draw the side profile and turned at an angle. Also draw a line that will represent the front plane of your character's face. Draw a smaller circle inside that circle, and this will represent the flat plane. As with the cranium, practice drawing the face block from every conceivable angle.
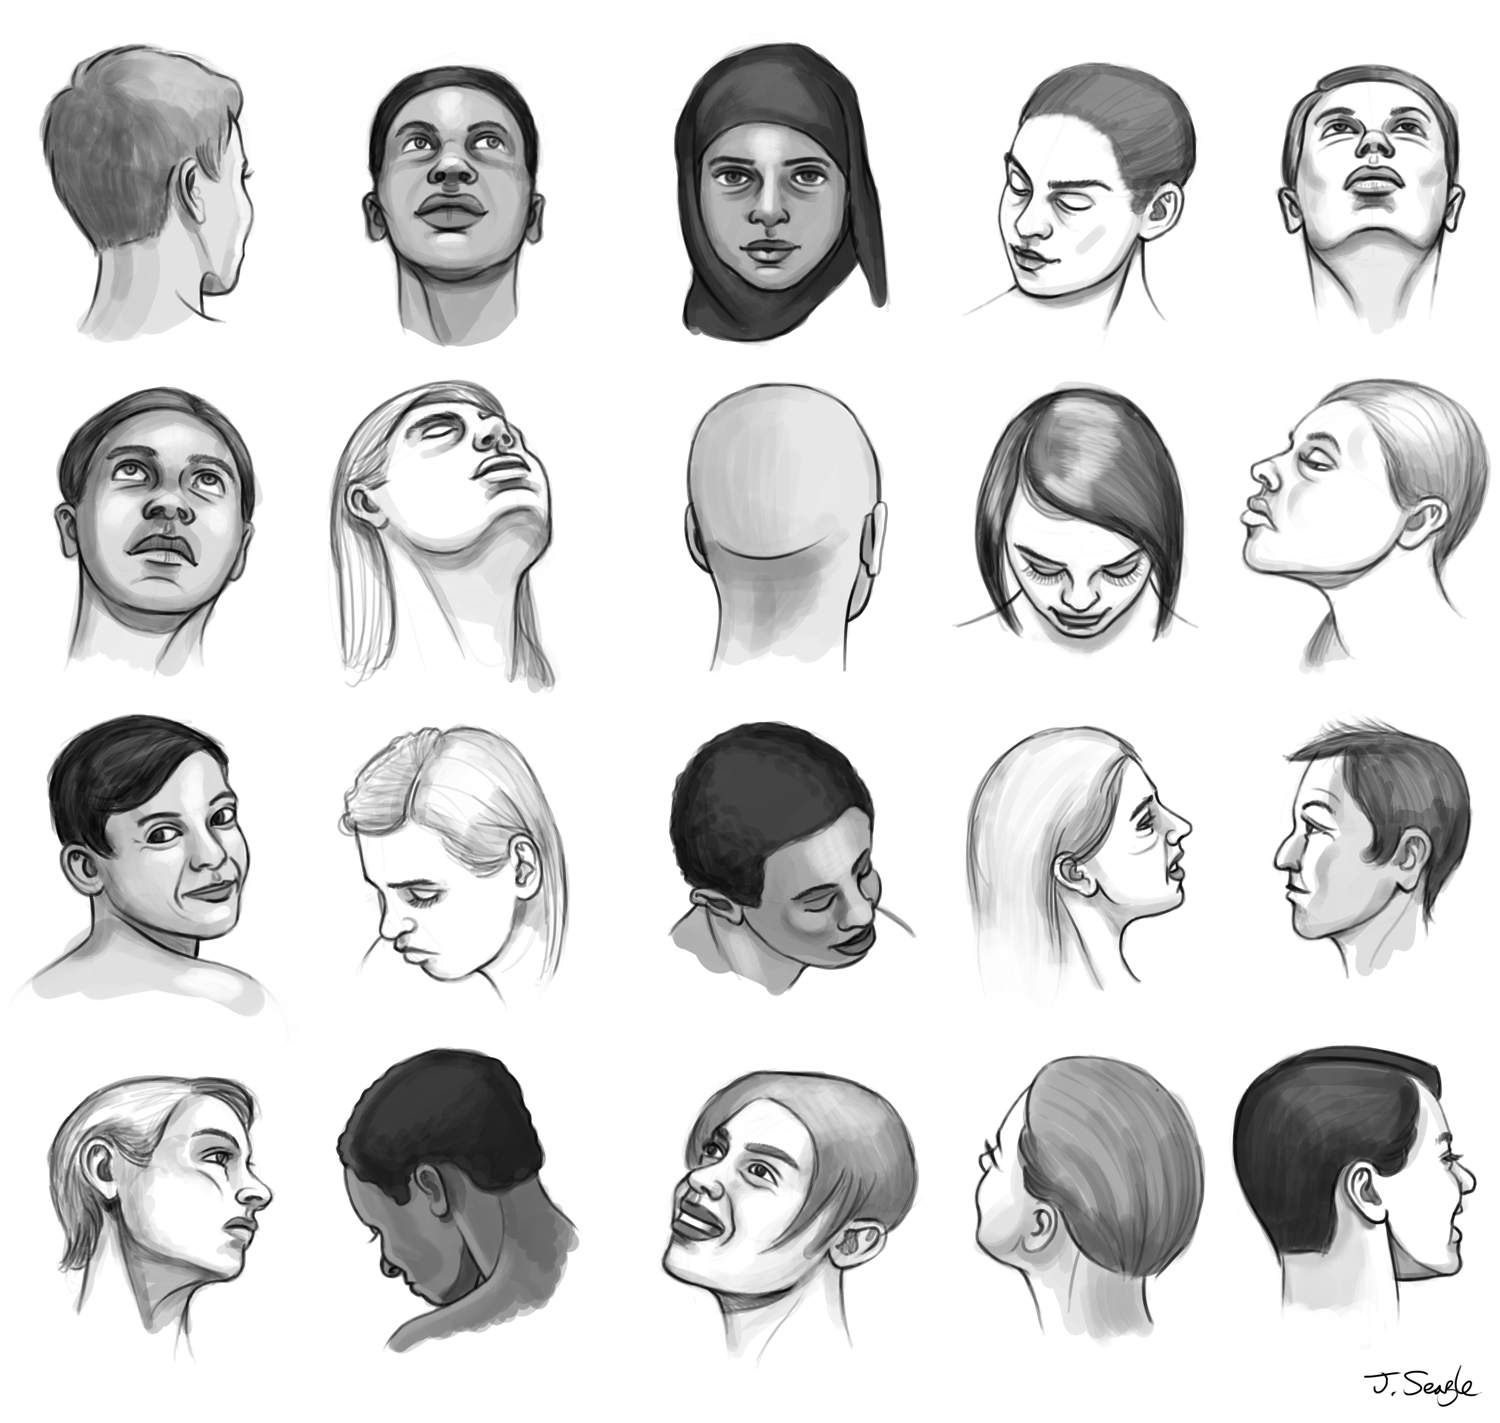
Jeff Searle Drawing the head from different angles
Arrange two basic shapes to create the profile. Web draw another horizontal line to mark the tip of the nose. The cranium is drawn like a sphere and will make up most of the head. Then curve the side edges inward, and raise the back bottom edge of the box up, to complete the form. Next we'll make the width.

How To Draw Heads From Different Angles Warehouse of Ideas
The cranium is drawn like a sphere and will make up most of the head. Next we'll make the width of the cube narrower at the base. Web in today's video you will learn how to draw the head at a few different angles by using the andrew loomis method. As with the cranium, practice drawing the face block from.

Head Angles by on DeviantArt Drawing
This allows you to place features and draw the head on an angle with more confidence.if y. Then curve the side edges inward, and raise the back bottom edge of the box up, to complete the form. Web in today's video you will learn how to draw the head at a few different angles by using the andrew loomis method..
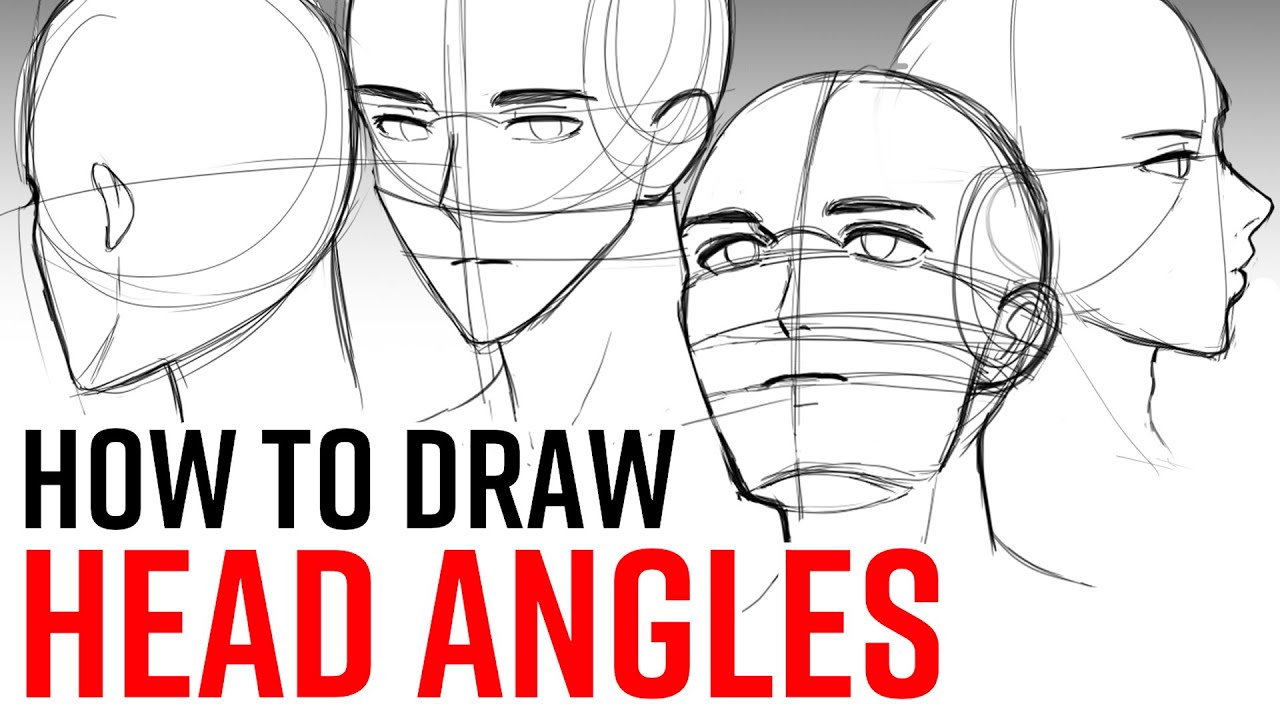
How to Draw Different HEAD ANGLES YouTube
The principles are similar for each, starting with a circle, an inner ellipse and marking the brow line with a cross. Next we'll make the width of the cube narrower at the base. Web to draw it, lets keep things simple and start off with a regular ol' cube. Identify and divide the head into thirds: Then curve the side.

How to Draw Heads from Different Angles │ Drawing Tutorial YouTube
Web the loomis method is a powerful tool for creating realistic portraits of people from different perspectives. Web how to draw the head from different angles to create more dynamic portraits; With the loomis method, artists can learn to draw the head from the front, draw the side profile and turned at an angle. Once you have a good approximation.
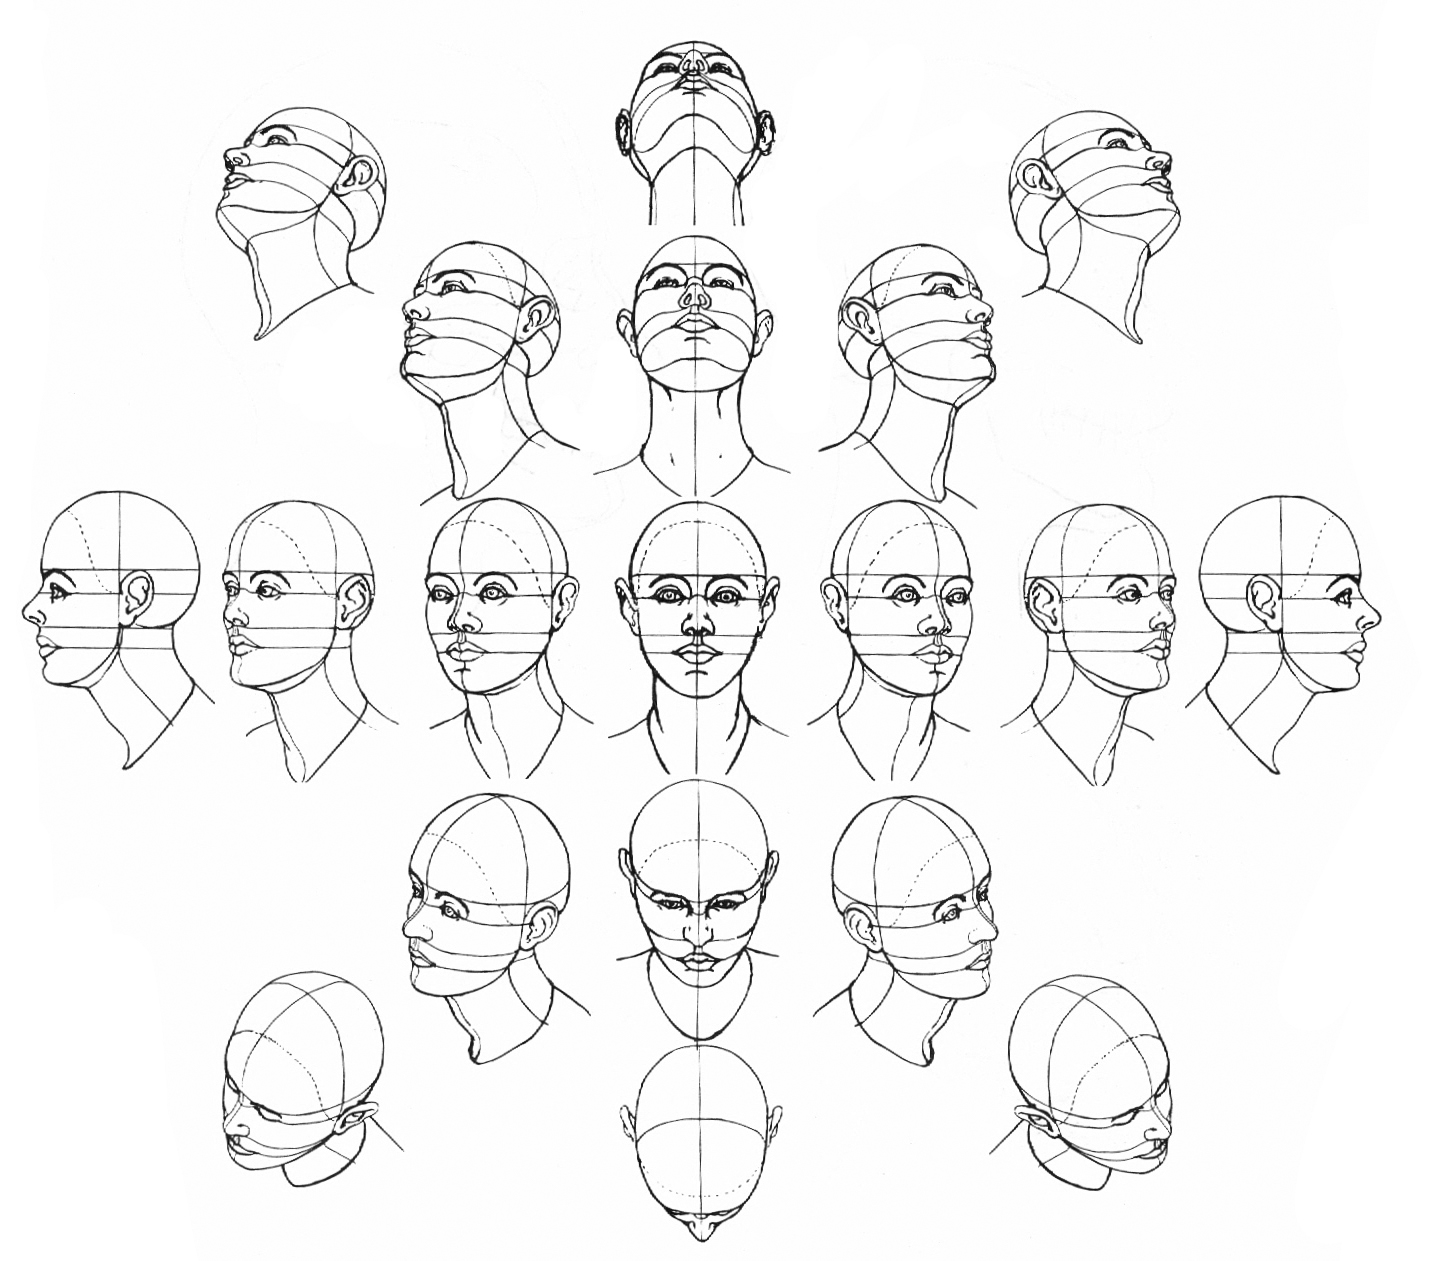
How to Draw Heads at Various Angles Reference by robertmarzullo on
Web draw another horizontal line to mark the tip of the nose. Also draw a line that will represent the front plane of your character's face. Web as the face moves toward a diagonal, such as up to the side, both lines will grow shorter, and the angle between the two will change. Establish the cross where the middle line.
Jeff Searle Drawing the head from different angles
Web in this video, we'll show you how to draw heads from any angle, no matter how difficult the pose seems. Identify and divide the head into thirds: As with the cranium, practice drawing the face block from every conceivable angle. Web how to draw the head from different angles to create more dynamic portraits; We will divide the head.
How to Draw the Head from Any Angle / Basic Head Sketching Tutorial
Web as the face moves toward a diagonal, such as up to the side, both lines will grow shorter, and the angle between the two will change. With the loomis method, artists can learn to draw the head from the front, draw the side profile and turned at an angle. Web in today's video you will learn how to draw.

Jeff Searle Drawing the head from different angles
Once you have a good approximation of the relationships between the shapes, you can start building the rest of your drawing from that foundation. We will divide the head into equal one thi. Then curve the side edges inward, and raise the back bottom edge of the box up, to complete the form. With the loomis method, artists can learn.

How to draw a head from different angles Creative Bloq Drawing the
Establish the cross where the middle line of the face crosses the eyebrow line. Now draw a circle from the top of the head to just under the tip of the nose. Next we'll make the width of the cube narrower at the base. Then curve the side edges inward, and raise the back bottom edge of the box up,.
The Principles Are Similar For Each, Starting With A Circle, An Inner Ellipse And Marking The Brow Line With A Cross.
Identify and divide the head into thirds: Now draw a circle from the top of the head to just under the tip of the nose. Establish the cross where the middle line of the face crosses the eyebrow line. With the loomis method, artists can learn to draw the head from the front, draw the side profile and turned at an angle.
Web In Today's Video You Will Learn How To Draw The Head At A Few Different Angles By Using The Andrew Loomis Method.
Web in this lesson, i show you how to draw heads from different angles. Web the loomis method is a powerful tool for creating realistic portraits of people from different perspectives. Web as the face moves toward a diagonal, such as up to the side, both lines will grow shorter, and the angle between the two will change. As with the cranium, practice drawing the face block from every conceivable angle.
Web Draw Another Horizontal Line To Mark The Tip Of The Nose.
Once you have a good approximation of the relationships between the shapes, you can start building the rest of your drawing from that foundation. Then curve the side edges inward, and raise the back bottom edge of the box up, to complete the form. Understanding the rules of lighting in order to make your drawing look realistic understanding the basic anatomy of each of the facial features so you can draw them better; Web how to draw the head from different angles to create more dynamic portraits;
Arrange Two Basic Shapes To Create The Profile.
The cranium, the jaw and cheeks, and the neck. Web to draw it, lets keep things simple and start off with a regular ol' cube. Next we'll make the width of the cube narrower at the base. There are 3 main shapes that make up the head.