How To Draw Eggs
How To Draw Eggs - Observe that the blue pencil lines are used to show the newest elements being drawn in each step. Use light, curved lines to indicate the roundness and smoothness of the egg’s surface. For each flower, draw a circle for the center and use u shaped lines for petals. Use light blue and light. Web dive into the art of culinary illustration with our egg drawing tutorial! Let’s finish the eggs drawing by adding some color! Eggs have a very distinct and simple design, so we shall focus on creating this shape in the first few steps of this guide on how to draw an egg. Detail the second egg by spotting portions with small circles. Sketch out a smooth, rounded line. Draw another rounded line at the top to make a closed outline.
Web sketch your fried egg. The design and proportion of each part will be considered in each step of the lesson. Enclose an irregular oval shape outside of the remainder of the egg to indicate a drip of egg white. Simply draw it’s outer shape similar to an oval where one end is pointier then the other. Web draw the outline of the egg. Then, inside the egg white towards the top left, draw a circle for the yolk. For each flower, draw a circle for the center and use u shaped lines for petals. Take your time to observe the curvature and pay attention to the proportion of the curves. Follow the vertical top and bottom, and the horizontal left and right delimitation marks to create the shape of the egg. Mark the size of the egg in width.
By doing this, we can fill in the egg white more freely and without having to squeeze an oddly shaped and sized circle inside. Sketch out the top outline of the egg. Draw the other half of the egg shell. For each flower, draw a circle for the center and use u shaped lines for petals. The design and proportion of each part will be considered in each step of the lesson. Draw curved lines around the base of the yolk to add dimension to the drawing. Within each of the wide stripes, between the lines, draw small flowers. Color this picture of eggs. In this video you can learn how to draw with pencil a perfect egg step by step, from an ovoid. Sketch out a smooth, rounded line.

How to Draw Eggs Really Easy Drawing Tutorial
Now outline the egg shape over the “skeleton”. Detail the second egg by spotting portions with small circles. I love eggs and bacon. Color this picture of eggs. Observe that the blue pencil lines are used to show the newest elements being drawn in each step.
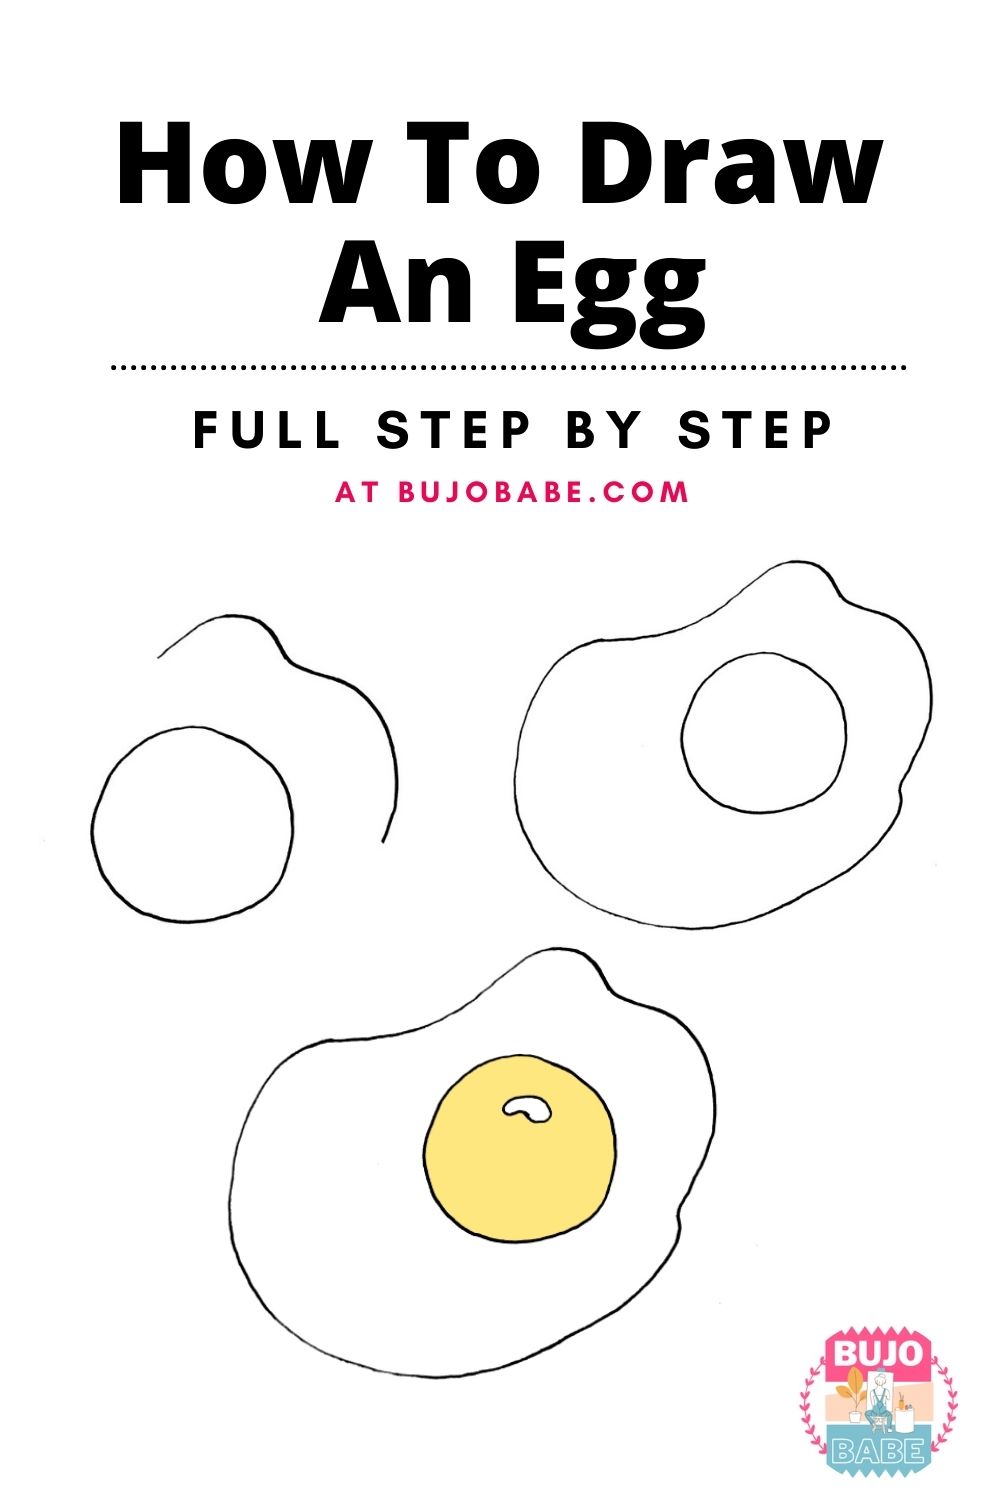
How To Draw An Egg (4 Quick And Easy Steps) Bujo Babe
Depict the top of the egg. We will pay attention to the shapes of each area and types of contours drawn making sure that the drawing looks correct. On the sides, draw two thin vertical lines. First, use a purple crayon to color the skillet. The egg is a very basic shape so there is not much to do in.

How to Draw an Egg Design School
Add the bottom outline of the egg. Web draw the outline of the egg. We will pay attention to the shapes of each area and types of contours drawn making sure that the drawing looks correct. Color this picture of eggs. Draw the bottom of the egg.

How to Draw an Egg 4 Steps (with Pictures) wikiHow
Web dive into the art of culinary illustration with our egg drawing tutorial! Simply draw it’s outer shape similar to an oval where one end is pointier then the other. Web draw the broken half of the egg shell. Use light blue and light. Make your fried egg drawing using two simple shapes.
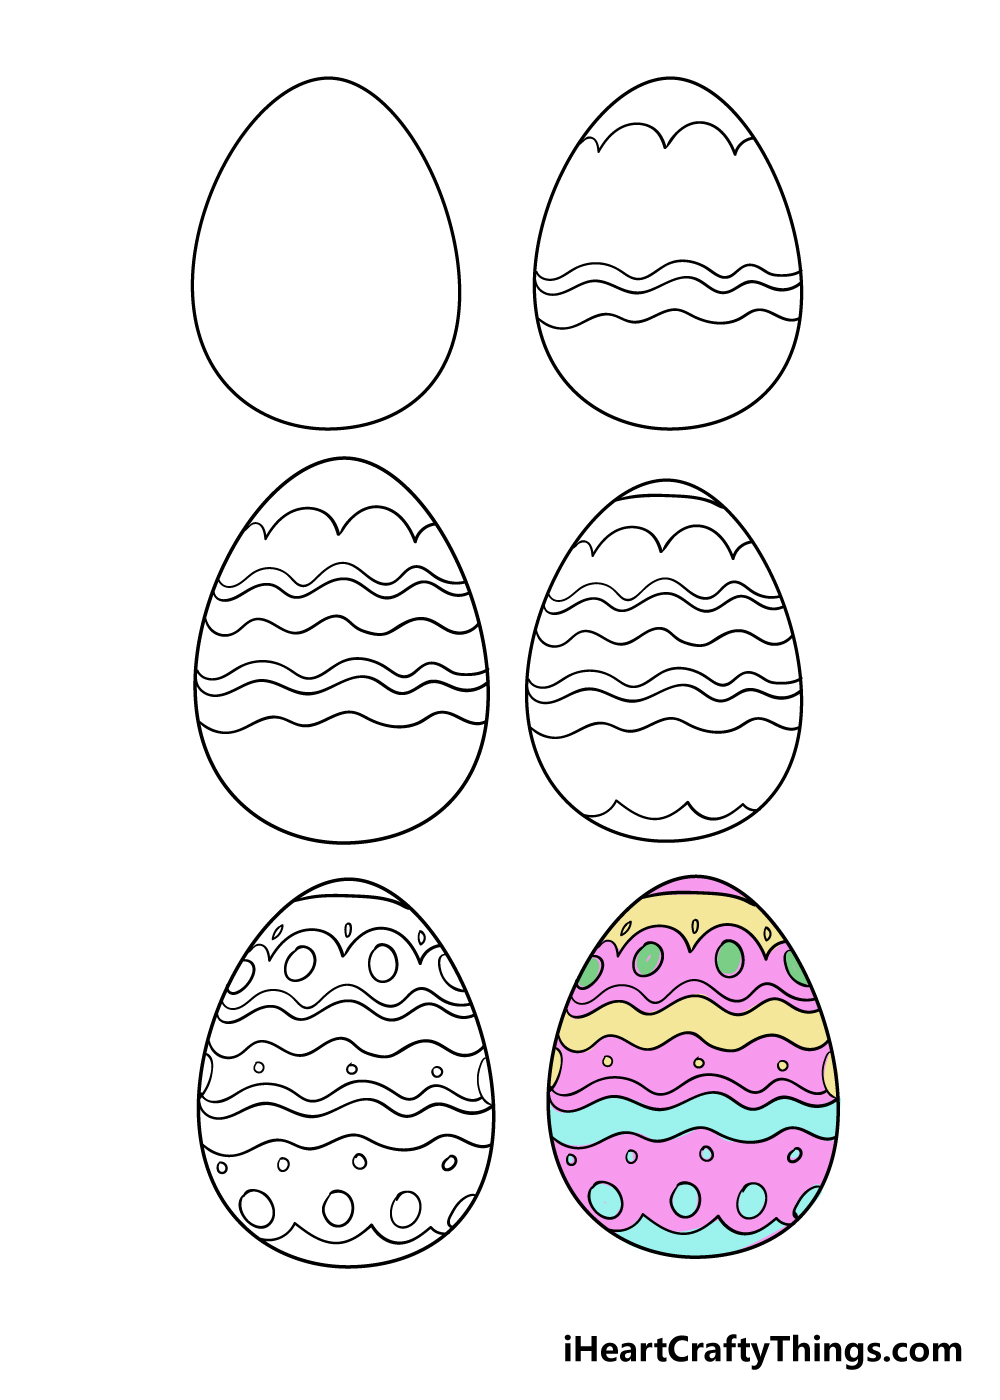
Easter Egg Drawing How To Draw An Easter Egg Step By Step
Draw curved lines around the base of the yolk to add dimension to the drawing. Enclose an irregular oval shape outside of the remainder of the egg to indicate a drip of egg white. Sketch out a smooth, rounded line. Web #draw a boiled #egg step by step for beginners. Next, use a light yellow crayon to shade the egg.

How To Draw An Egg (4 Quick And Easy Steps) Bujo Babe
Then, inside the egg white towards the top left, draw a circle for the yolk. Enclose a curved line to the yolk, forming the outline of the egg white. This is just a simple circle that is not perfectly symmetrical or drawn. In this video you can learn how to draw with pencil a perfect egg step by step, from.

HOW TO DRAW AN EGG EASY YouTube
Web #draw a boiled #egg step by step for beginners. Eggs have a very distinct and simple design, so we shall focus on creating this shape in the first few steps of this guide on how to draw an egg. Use a darker shade of purple to color the inside of the skillet and the inner part of the hole.
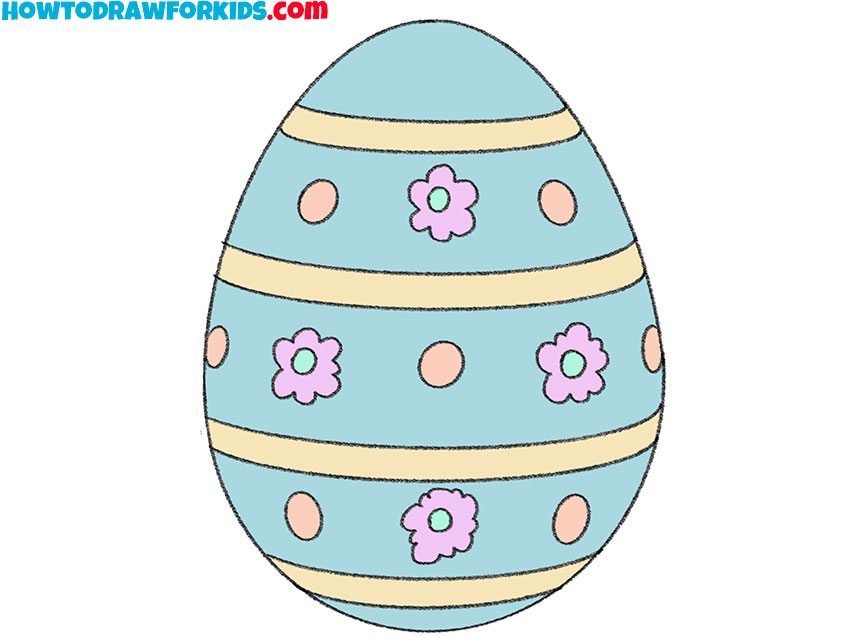
How to Draw an Easter Egg Easy Drawing Tutorial For Kids
We shall be drawing the second half in the next. Learn how to draw cartoon eggs and bac. Simply draw it’s outer shape similar to an oval where one end is pointier then the other. Web sketch your fried egg. Next, sketch subtle curves on both sides of the oval to create the contours of the egg.
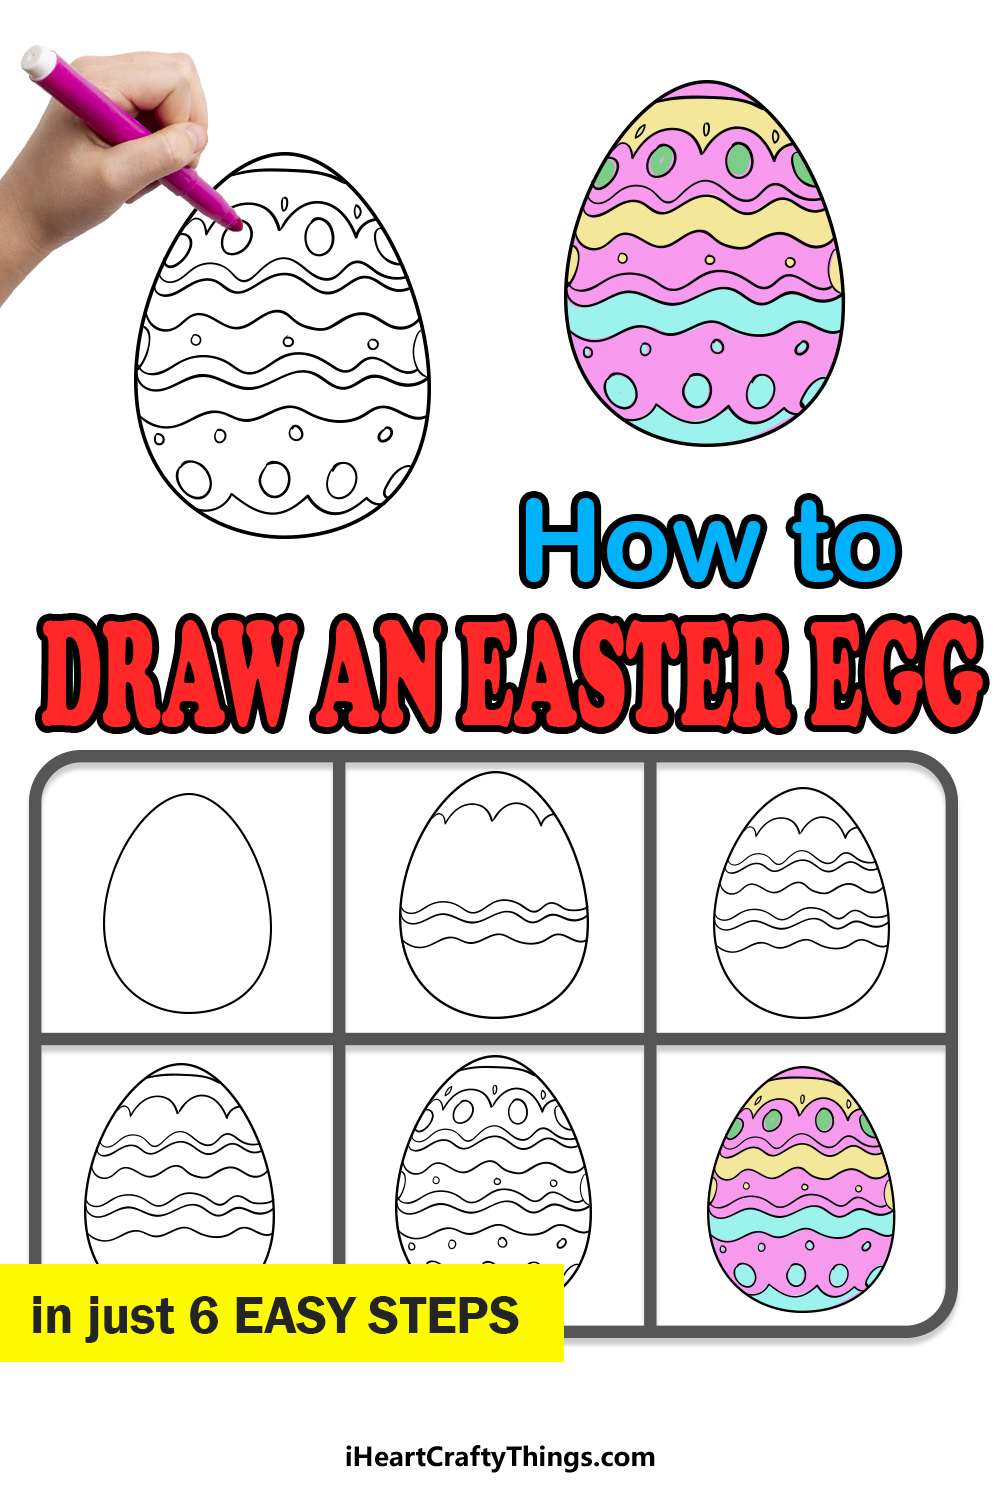
Easter Egg Drawing How To Draw An Easter Egg Step By Step
Web #draw a boiled #egg step by step for beginners. Use light, curved lines to indicate the roundness and smoothness of the egg’s surface. By doing this, we can fill in the egg white more freely and without having to squeeze an oddly shaped and sized circle inside. Draw the other half of the egg shell. Let’s finish the eggs.

How to Draw Eggs Really Easy Drawing Tutorial
Web draw the outline of the egg. Whether you are a beginner or an experienced artist, learning how to draw an egg can be a great way to practice your shading and rendering skills. How to draw an easter egg. Enclose an irregular oval shape outside of the remainder of the egg to indicate a drip of egg white. This.
Drawing Is A Technique Or Procedure Of Making An Image.
You can also add a straight horizontal line to indicate the edge of the surface it’s sitting on. By doing this, we can fill in the egg white more freely and without having to squeeze an oddly shaped and sized circle inside. Simply draw it’s outer shape similar to an oval where one end is pointier then the other. Use a darker shade of purple to color the inside of the skillet and the inner part of the hole on the handle.
Draw Some Irregular Circles Or Ovals On The Egg Shell, Indicating The Shininess.
Mark the size of the egg in width. Now outline the egg shape over the “skeleton”. You might think an oval template is the perfect answer to sketching your egg. Make your fried egg drawing using two simple shapes.
Eggs Have A Very Distinct And Simple Design, So We Shall Focus On Creating This Shape In The First Few Steps Of This Guide On How To Draw An Egg.
Depict the top of the egg. Draw the other half of the egg shell. So the good news is that in doing a serious still life, you only need to look at your actual egg. Web in today’s basic drawing lesson, we will discover how to draw eggs and bacon on paper.
I Hope You Have A Marker And Paper And You're Going To Follow Along With Us.
We shall be drawing the second half in the next. First, use a purple crayon to color the skillet. Web draw the broken half of the egg shell. The egg is a very basic shape so there is not much to do in the initial step.