How To Draw French Braids
How To Draw French Braids - From this point, start the next loop, it is parallel to the one that goes inside, and its end should be fixed in the center. Begin by drawing small, curved lines along each strand, following the direction of the hair. Do the same for the right side. Afterward, pull two more sections of hair from the side as you did in step 1. Mentally draw a line horizontally, it should cross the coil from the outside approximately in the center. Web once you’re comfortable with the basics, try experimenting with other braid styles, such as fishtail or french braids. Elle rêve de voir sa fille échapper à sa condition misérable et entrer à l'école. Web french braids are a popular choice for both men and women, and can be worn for a variety of occasions. Repeat the process of drawing braids until you have gotten comfortable. Next, cross the tuft on the.
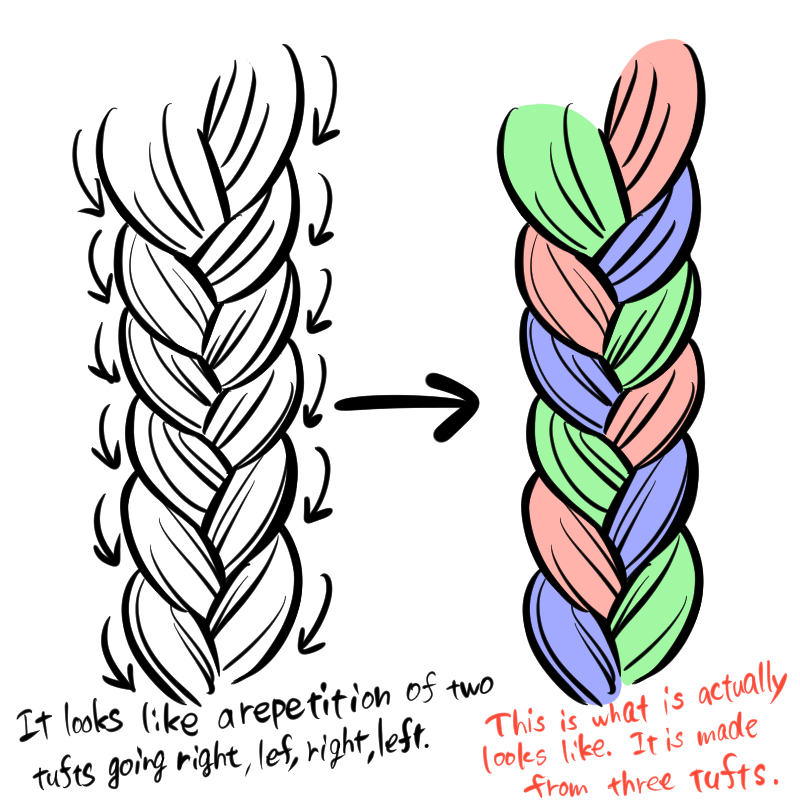
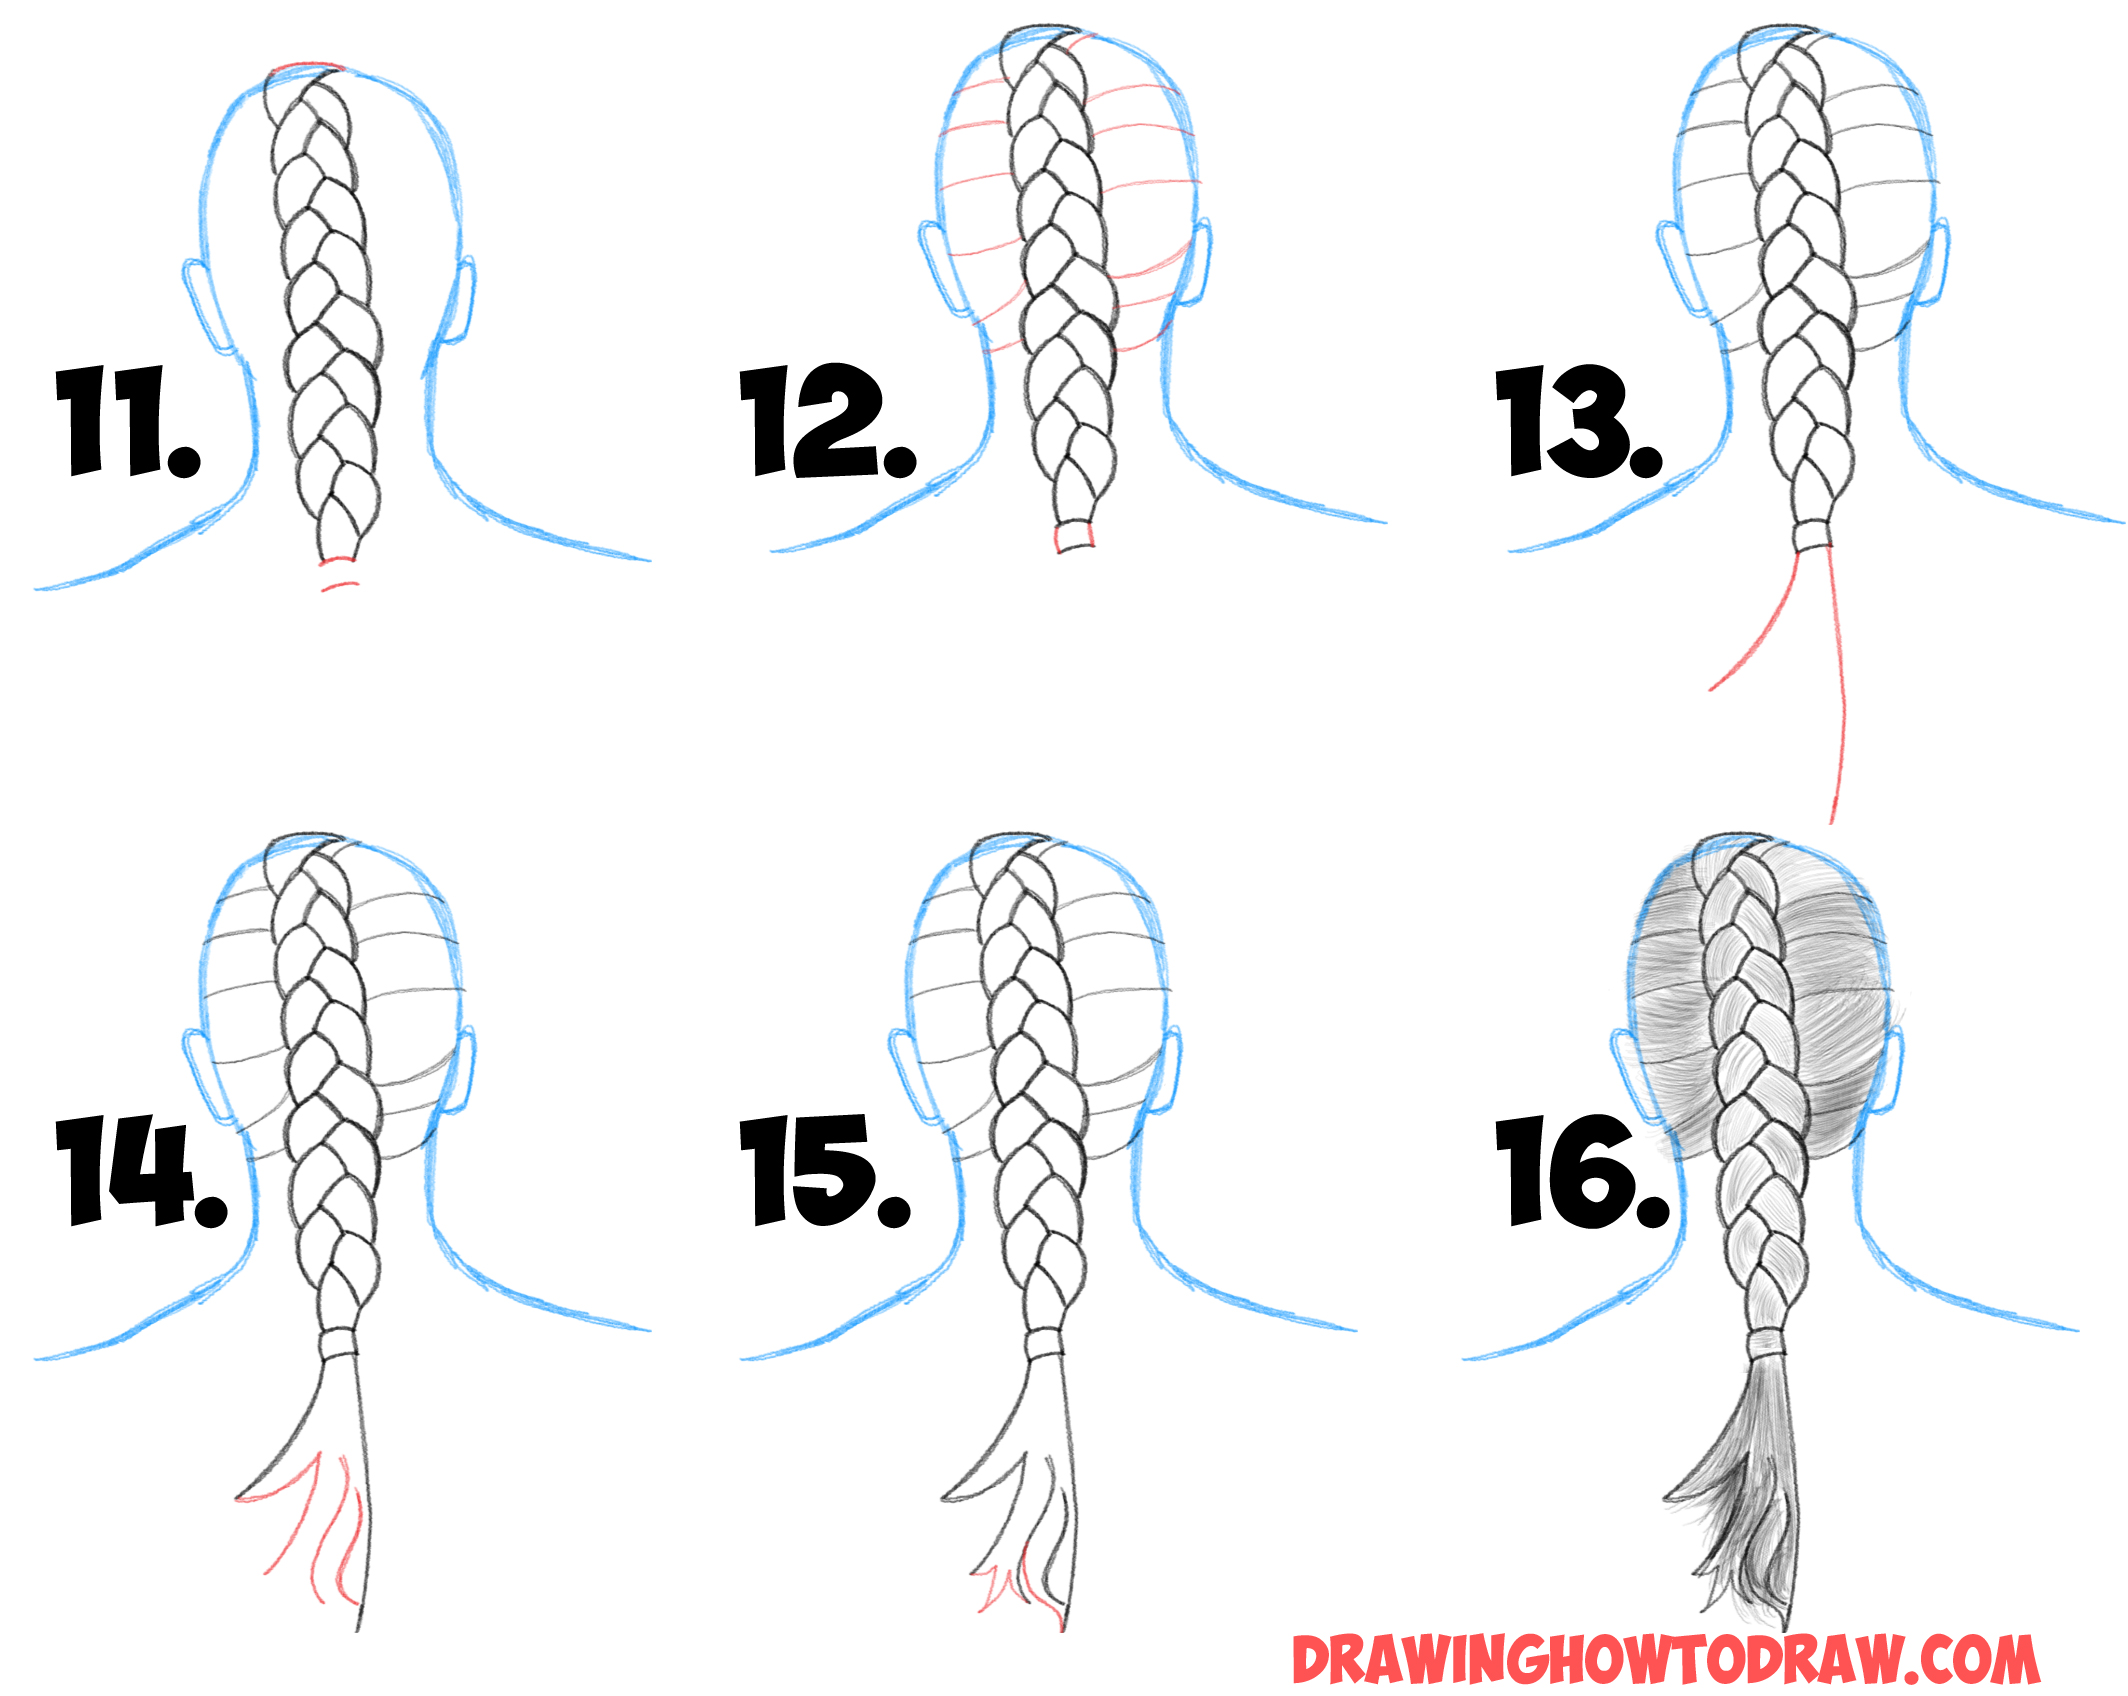
To make the braid look realistic, it’s crucial to add texture. Before i get to how it is drawn, i’ll touch on the structure of braids. Starting from the left side of the hair tie, bring your pencil downwards in a curved, slightly arching shape. Web creating a french braid. You will continue this process until you reach the end of. :) add the hairlines and detail to finish the dutch braid. Web easy steps for drawing braids. This is where the hair tapers to an end. Be mindful of the spacing between the lines, as they should be closer together towards the top. Add more lines towards the ends (where the hairs fold under) and fewer lines over the top.
The hairline will determine where the french braid will begin. Next, cross the tuft on the. You'll have to interrupt one of the hair sections; To make the braid look realistic, it’s crucial to add texture. Web easy steps for drawing braids. Add more lines towards the ends (where the hairs fold under) and fewer lines over the top. Yay we made it to the fun and easy part, add lines that follow the direction of the strands. Web french braids are a popular choice for both men and women, and can be worn for a variety of occasions. They are typically braided from the front of the head to the back, and can be styled in a variety of ways. First of all, make three tufts of hair.

How To Draw A French Braid Step By Step bmppotatos
Braids are a pattern, so the next step is to find a basic repeating shape that will loosely represent your braid. Web creating a french braid. Draw the tail below the tie. Web once you’re comfortable with the basics, try experimenting with other braid styles, such as fishtail or french braids. Add more sections of hair.
How To Draw A French Braid Step By Step bmppotatos
French braids pull segments from the hair towards the center of the braid, so first, we need to place those segments. Stay close to the outline made in step 1. A braid picture to draw serves as wonderful inspiration. Web creating a french braid. French braids tend to start right on top of the head, so for this step we’re.
How To Draw A French Braid Step By Step bmppotatos
Embarking on a journey to master braid drawing is certainly a thrilling. Web creating a french braid. Braids are a pattern, so the next step is to find a basic repeating shape that will loosely represent your braid. Elle rêve de voir sa fille échapper à sa condition misérable et entrer à l'école. Draw the tail and make the highlights.

How To Draw A French Braid Step By Step bmppotatos
Web to draw french braids on a girl, highlight their elegance by tracing their path around the head, detailing each overlapping strand, and shading lightly to showcase this refined hairstyle. Be mindful of the spacing between the lines, as they should be closer together towards the top. Web once you’re comfortable with the basics, try experimenting with other braid styles,.

How to Draw a Girl from Behind with French Braid Hairstyle Pencil
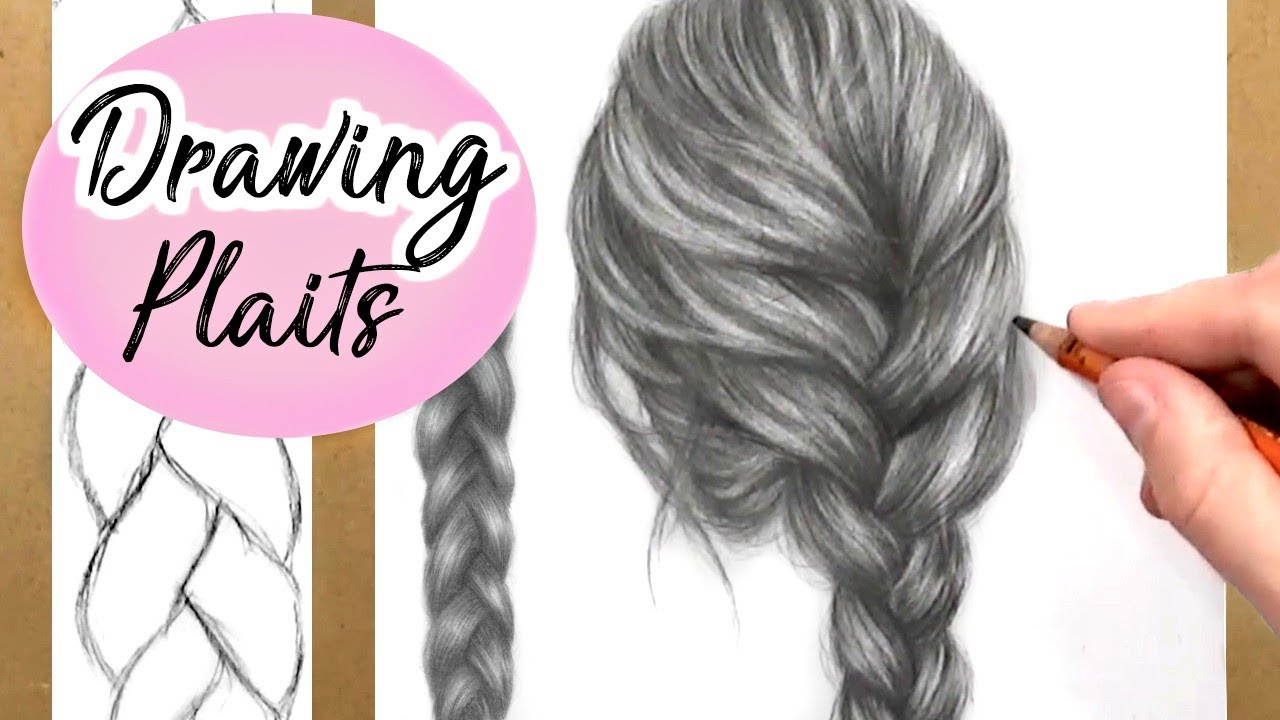
A braid picture to draw serves as wonderful inspiration. Web step by step tutorial how to draw braids using a pencil. Elle rêve de voir sa fille échapper à sa condition misérable et entrer à l'école. These lines represent the individual strands that create the braid. French braids, also known as cornrows, are a type of hair braid that originated.
:max_bytes(150000):strip_icc()/The-Ultimate-French-Braid-Tutorial-75f65f852d3a495e8f2beed7a38b6504.png)
How To Draw A French Braid From The Front
4.let’s try to actually draw it! Yay we made it to the fun and easy part, add lines that follow the direction of the strands. To make the braid look realistic, it’s crucial to add texture. Web as soon as you reach the center, stop. Add more lines towards the ends (where the hairs fold under) and fewer lines over.

How To Draw A French Braid Step By Step bmppotatos
Yay we made it to the fun and easy part, add lines that follow the direction of the strands. Afterward, pull two more sections of hair from the side as you did in step 1. Web easy steps for drawing braids. It may fluff out a little beyond the confines of the hair. The section of hair at the tip.

How To Draw A French Braid Step By Step bmppotatos
Next will be a repetition. Web ***i made a newer, better version of this tutorial***watch it here: French braids, also known as cornrows, are a type of hair braid that originated in africa. You'll have to interrupt one of the hair sections; Spray glitter hairspray to make your hair sparkle.

How to Draw Braids Easy Tutorial for Beginners How to draw braids
Web french braids are a popular choice for both men and women, and can be worn for a variety of occasions. Next will be a repetition. :) add the hairlines and detail to finish the dutch braid. French braids, also known as cornrows, are a type of hair braid that originated in africa. Web step by step tutorial how to.
How to Draw Braids with Easy Step by Step Drawing Tutorial How to
Web how to draw a french braid step 1: Web as soon as you reach the center, stop. French braids, also known as cornrows, are a type of hair braid that originated in africa. Yay we made it to the fun and easy part, add lines that follow the direction of the strands. H 264 fw by laetitia colombani.
Draw The Tail Below The Tie.
French braids pull segments from the hair towards the center of the braid, so first, we need to place those segments. Spray glitter hairspray to make your hair sparkle. Stay close to the outline made in step 1. These lines represent the individual strands that create the braid.
Draw The Tail And Make The Highlights.
Starting from the left side of the hair tie, bring your pencil downwards in a curved, slightly arching shape. Draw a ring to tie off the braid. Glitter hairspray can settle your style while adding extra shine. If you are in a wedding party or if you are going to a prom, you can add flowers to your hair.
Afterward, Pull Two More Sections Of Hair From The Side As You Did In Step 1.
Next, cross the tuft on the. Don’t worry if your initial attempts aren’t perfect. With a tail on the plait, your drawing looks complete, with an illusion of ‘running back’ and spoiling the braid. Repeat the process of drawing braids until you have gotten comfortable.
Add More Lines Towards The Ends (Where The Hairs Fold Under) And Fewer Lines Over The Top.
Elle rêve de voir sa fille échapper à sa condition misérable et entrer à l'école. Mentally draw a line horizontally, it should cross the coil from the outside approximately in the center. Add more sections of hair. Keep practicing your shapes and shading for more natural results over time.