How To Draw Simple Pumpkin
How To Draw Simple Pumpkin - Margherita cole | my modern met. Web welcome to our fun and educational drawing tutorial! Web hi everyone, in this video i show you how to draw a pumpkin step by step 🎃 pumpkin drawing easy. Add a curved shape on the right. Sketch the remaining front ribs. These lines will create sections on your pumpkin. Then draw some curved lines behind the stem to make your pumpkin look more dimensional. Web easy step by step tutorial on how to draw a pumpkin, pause the video at every step to follow the steps carefully. Web how to draw pumpkin in easy steps for beginners lesson.tutorial of drawing technique.drawing tutorial,art tutorial youtube videoyou can watch the video at. Web here's a super simple way to draw a pumpkin for halloween or the fall season!
Web different pumpkin shapes to draw. Where the stem connects to the pumpkin, use curved lines to draw the edge of the stem. Web at the base of the stem create some more indentations. Draw, cutout and decorate your house this halloween. Draw a curved line on the left side of the pumpkin shape. Position the chalk pastel at the top of the oval and proceed to draw a large curve away from the shape and then back to join the bottom. Draw them in a way similar to how you drew the straight cracks. Here are some other shapes for pumpkins you will love: Then, draw a matching curved line on the right side of the pumpkin to make it round. Draw a curved shape on the left.
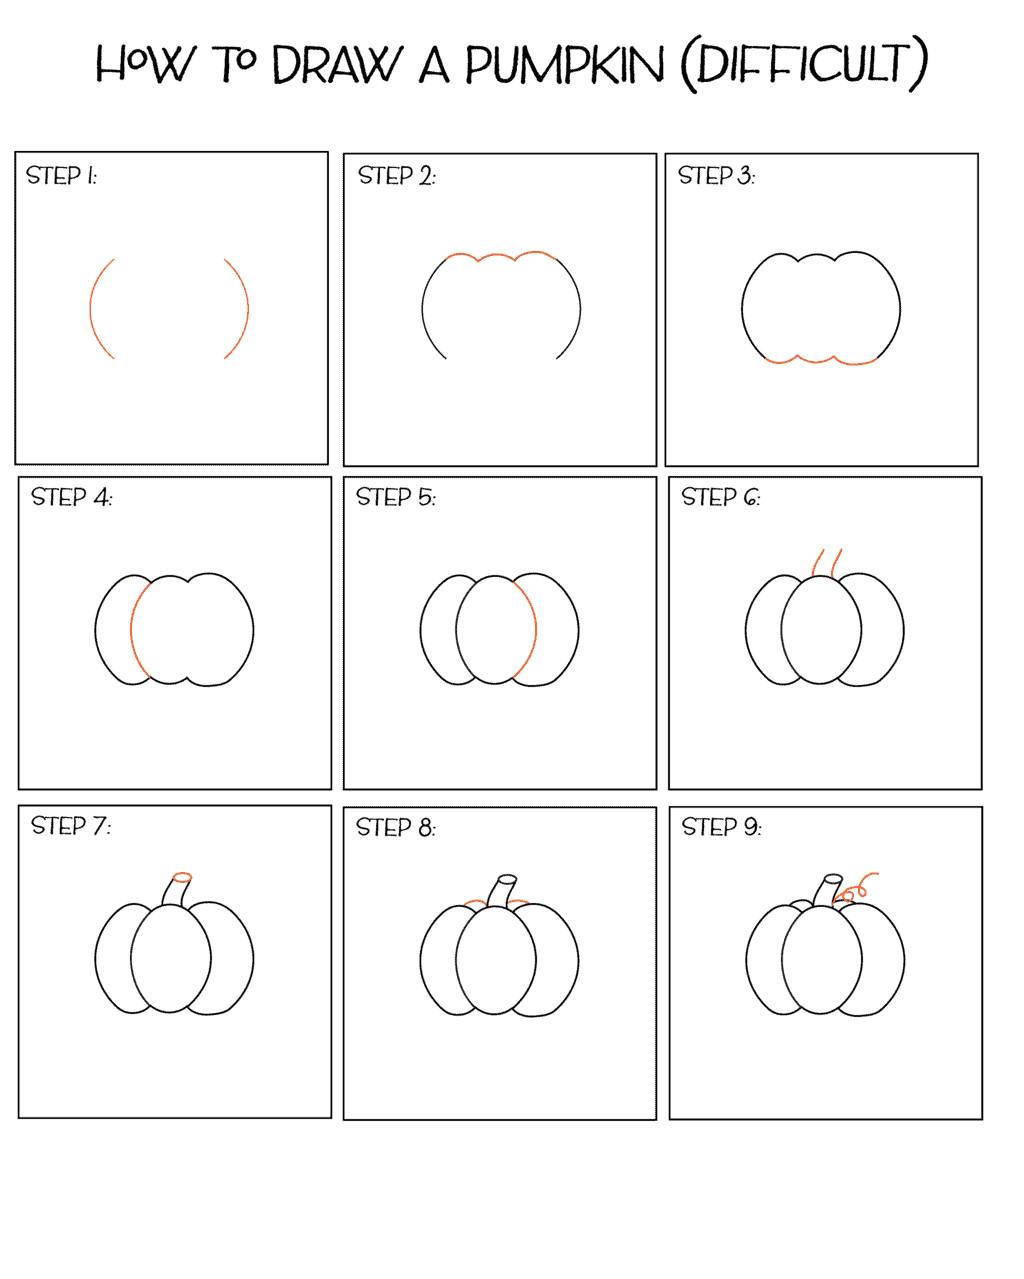
Draw an adjoining segment to build the pumpkin shell. Use a curved line to enclose the end of the stem. Margherita cole | my modern met. This completes the first segment of the pumpkin shell. Web outline your cartoon halloween pumpkin, filling in the nose with black. Again, draw three ribs out to the righ outline of the pumpkin body. The simplest pumpkin drawing method uses just circles and basic curved lines. Web with halloween fast approaching we'll be posting more how to draw halloween themed lessons for beginners. After you master the simple steps to make a beautiful pumpkin drawing, try playing with the shape of the pumpkin. Web keep drawing lines that radiate generally toward the center of the stump under the pumpkin.
How to Draw a Pumpkin Step by Step easy for Halloween, Cute, Realistic
Draw another curved line across it to give the tip of the stem an oval shape. Here is our first pumpkin face sketched out. Add the final 2 lines that make the back of the pumpkin and add curved lines on the stem to show texture. Web outline your cartoon halloween pumpkin, filling in the nose with black. Start sketching.
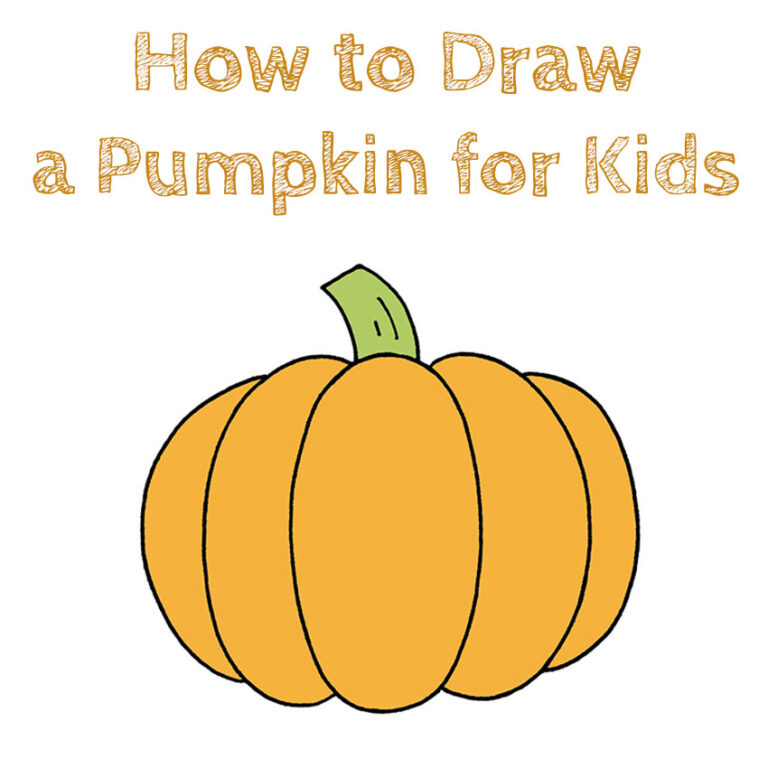
How to Draw an Easy Pumpkin · Art Projects for Kids
Start small at the top and make it bigger as you go down. Then, texture the stem with curved lines. Start by drawing the overall shape of your pumpkin with a two curved lines. Web keep drawing lines that radiate generally toward the center of the stump under the pumpkin. Web here's a super simple way to draw a pumpkin.

How to Draw a Pumpkin Easy Peasy and Fun
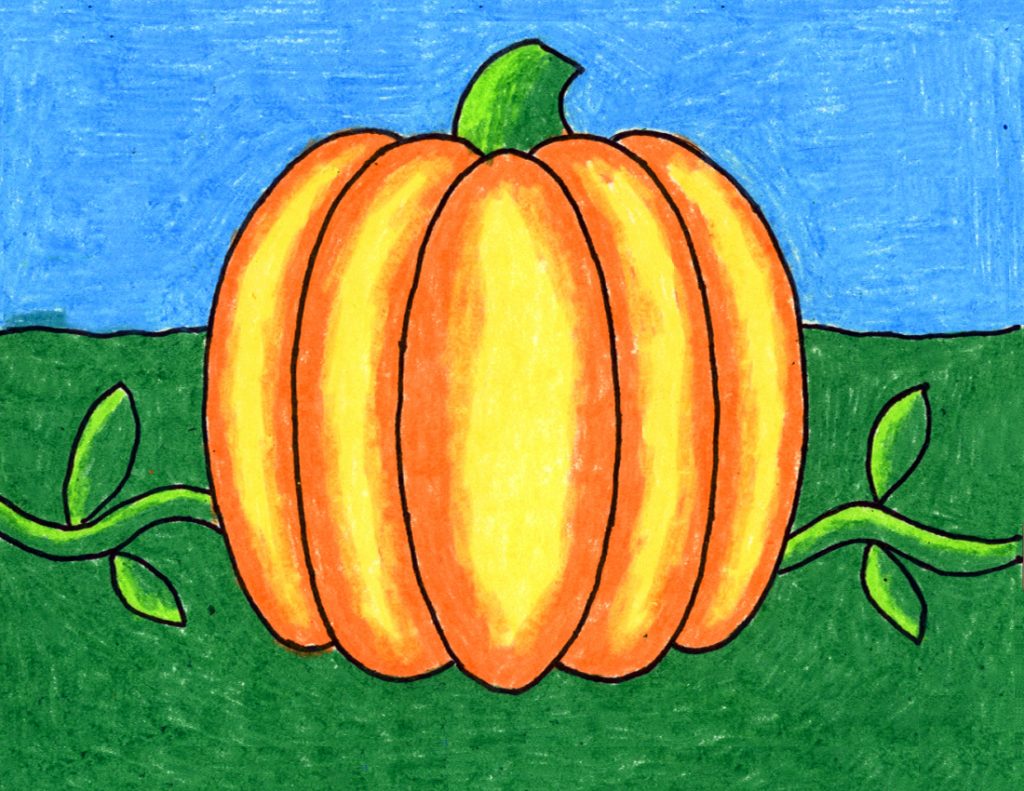
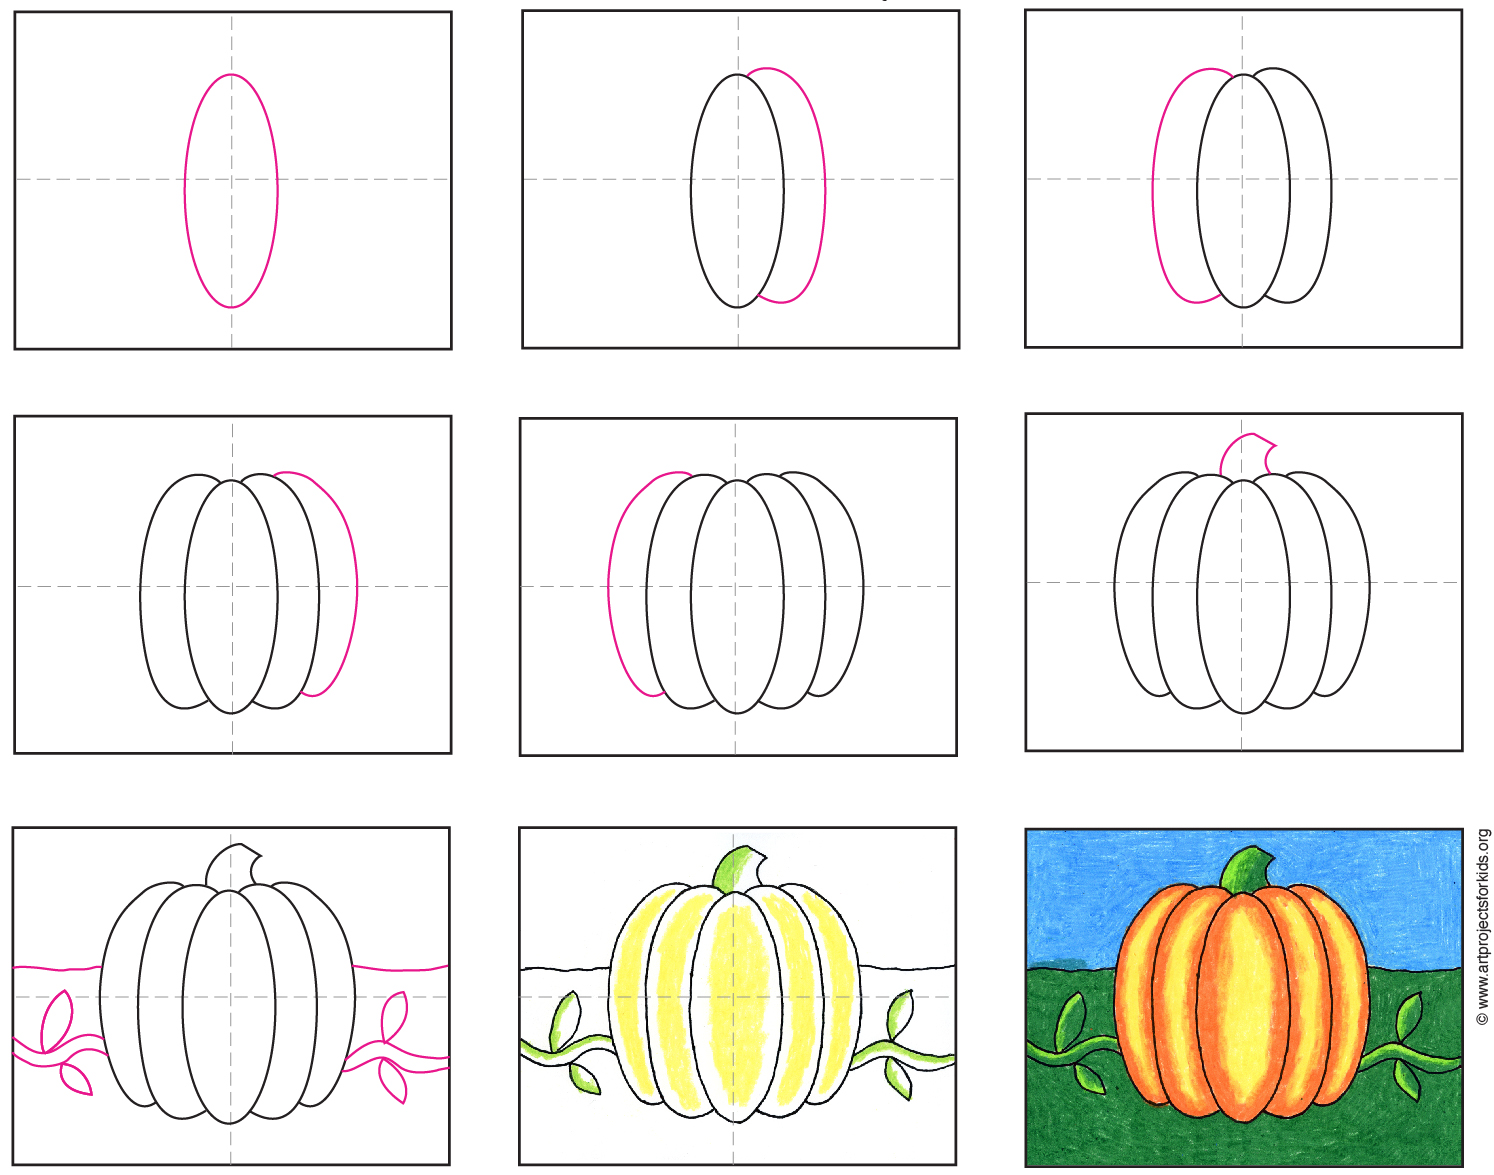
Start at our “stem base”, only just touch our pumpkin body at the bottom and finish on the previous rib. Add a curved shape on the right. Here is our first pumpkin face sketched out. Divide the oval into 5 parts using curved lines. Draw a vine with leaves and a horizon line.
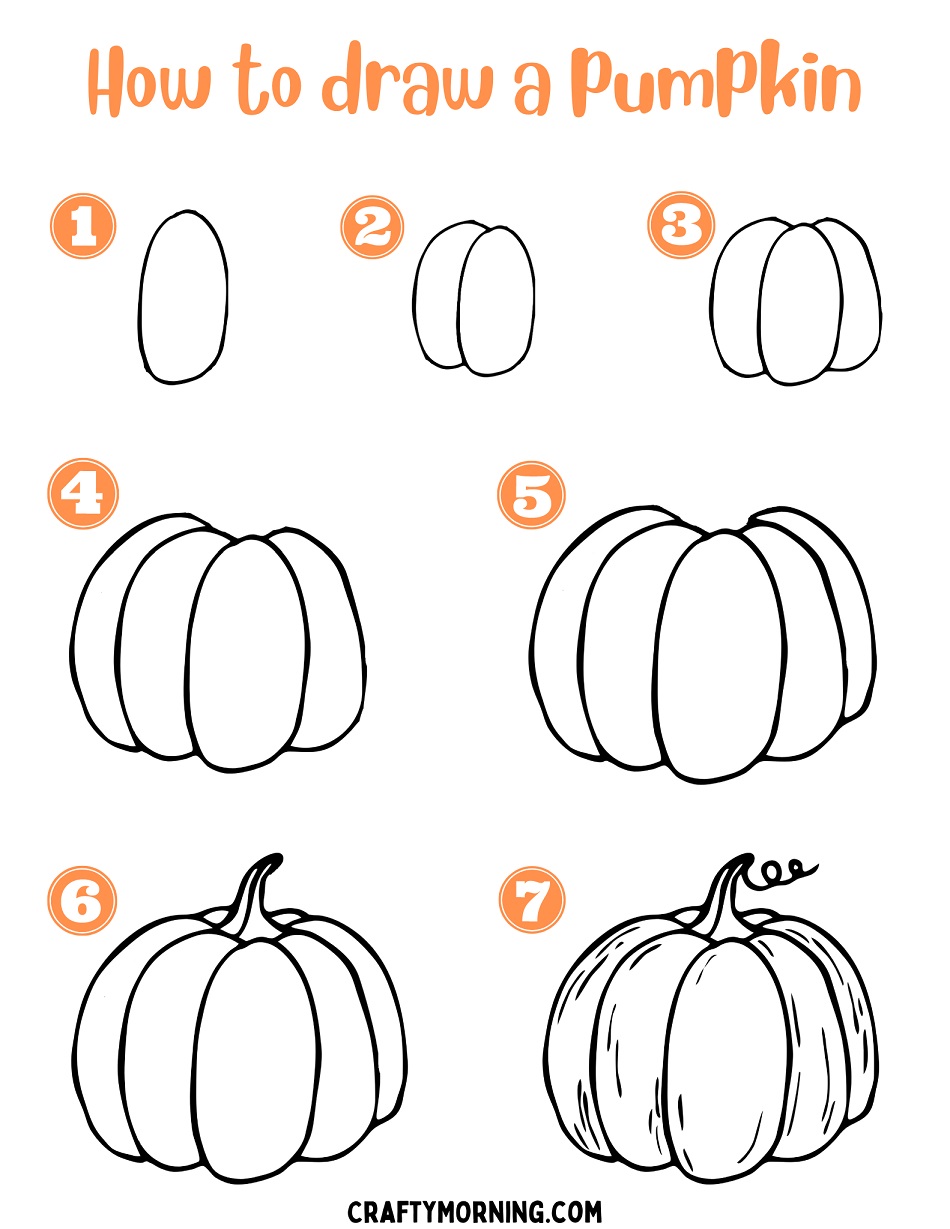
How to Draw a Pumpkin (Easy Step by Step) Crafty Morning
Web how to draw titan tv man from skibidi toilet | skibidi toilet drawing step by step easy#skibiditoilet #drawing #howto #draw #cover #memes♥ thanks for watchin. Divide the oval into 5 parts using curved lines. Draw, cutout and decorate your house this halloween. Connect the dots 3 times. Draw a vine with leaves and a horizon line.

How to draw easy and cute Halloween pumpkin stepbystep
Now we will add a little line at the top of the stem to give it some depth. Draw a curved line on the left side of the pumpkin shape. Draw a curved shape on the left. Then, texture the stem with curved lines. Web how to draw titan tv man from skibidi toilet | skibidi toilet drawing step by.

Pippi's blog Halloween drawings for kids
Divide the oval into 5 parts using curved lines. Web easy step by step tutorial on how to draw a pumpkin, pause the video at every step to follow the steps carefully. Web add a tail to your pumpkin by drawing a curved shape. The simplest pumpkin drawing method uses just circles and basic curved lines. Sketch the remaining front.
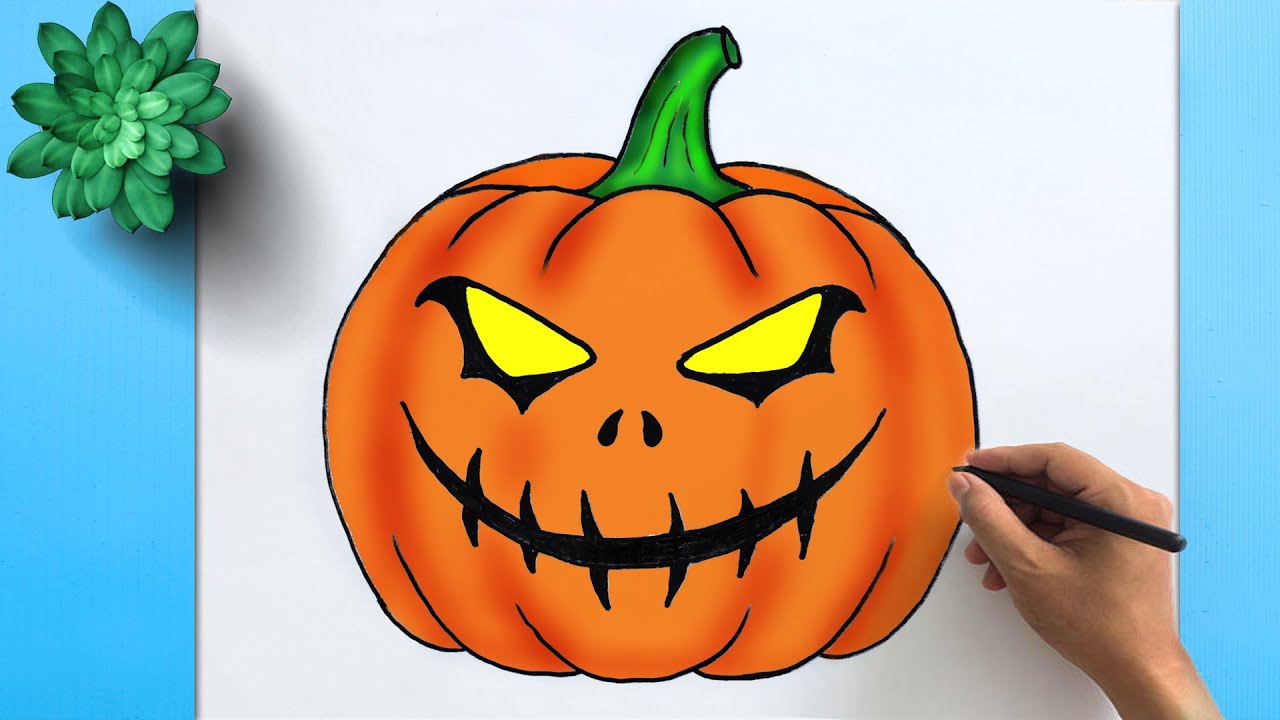
Halloween pumpkin drawing easy 👻 How to Draw Halloween Pumpkin Easy
Then draw some curved lines behind the stem to make your pumpkin look more dimensional. Follow my step by step drawing tutorial and make your own p. Web how to draw pumpkin easy how to draw how to draw a pumpkin how to draw a pumpkin easy how to draw pumpkin how to draw a pumpkin step by step learn.
How to Draw an Easy Pumpkin · Art Projects for Kids
Start sketching circular rings around the top surface of the stump. A tall and skinny pumpkin Web with halloween fast approaching we'll be posting more how to draw halloween themed lessons for beginners. Draw a curved shape on the left. Position the chalk pastel at the top of the oval and proceed to draw a large curve away from the.
How to Draw a Pumpkin for Kids How to Draw Easy
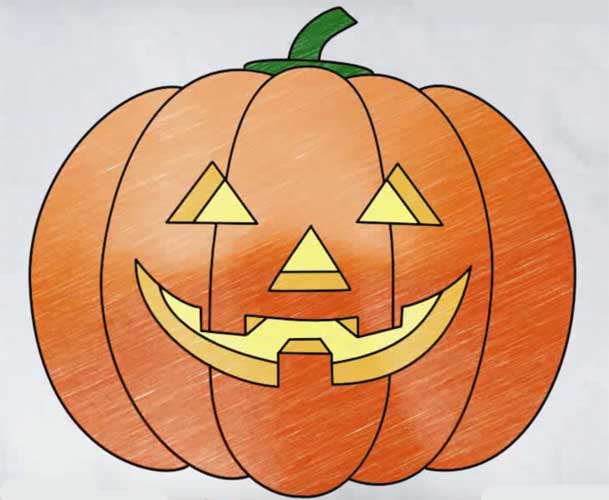
Create the pumpkin’s eyes by drawing two triangles and a mouth. Connect the dots 3 times. Use a curved line to enclose the end of the stem. Divide the oval into 5 parts using curved lines. Draw the classic pumpkin face.
How To Draw A Pumpkin StepByStep So Festive!
These lines will create sections on your pumpkin. Color the mouth and space behind the eyes black to give your pumpkin. Divide the oval into 5 parts using curved lines. Start by drawing the overall shape of your pumpkin with a two curved lines. You’ll be refining the details a little later in the process.
Draw The Classic Pumpkin Face.
Use a loose touch with your pencil and follow the general curvature of the stump’s edges. Start at our “stem base”, only just touch our pumpkin body at the bottom and finish on the previous rib. Web easy step by step tutorial on how to draw a pumpkin, pause the video at every step to follow the steps carefully. Sketch the remaining front ribs.
A Tall And Skinny Pumpkin
Start by drawing the overall shape of your pumpkin with a two curved lines. Margherita cole | my modern met. Draw a curved shape on the left. Position the chalk pastel at the top of the oval and proceed to draw a large curve away from the shape and then back to join the bottom.
Add The Final 2 Lines That Make The Back Of The Pumpkin And Add Curved Lines On The Stem To Show Texture.
Web to do this, begin by drawing a curved line towards the top of your pumpkin. Now we will add a little line at the top of the stem to give it some depth. Draw, cutout and decorate your house this halloween. This completes the first segment of the pumpkin shell.
After You Master The Simple Steps To Make A Beautiful Pumpkin Drawing, Try Playing With The Shape Of The Pumpkin.
Draw a circle connecting the two lines. Draw the classic pumpkin face. Draw two simple triangles for the eyes and a one smaller for the nose. Use a curved line to enclose the end of the stem.