How To Draw Tie
How To Draw Tie - Web next, you’ll need to sketch the outline of your tie. At this point, you can add the pattern’s finishing touches. Web let's draw a tie and collar step by step. Curving the ends of the bow in a curved line will make it more realistic. Draw an oval shape for the knot. During a game you may speak of two teams or players tied, but only drawn once the game has ended. Web draw the center knot of the bow tie. Draw a fourth oval around the third oval. Catch up on the developing. Then, draw the tie’s length, width, and any pattern or texture you want to include.
#drawing is defined in many ways. Web start with drawing the center piece of the bow shape. Sketch two long, slightly curved lines extending from the knot for the tie’s body. This video is suitable for kids and beginners who want to. There are many different types of neckties that can be drawn to reflect different personalities and. Start drawing the tie knot by creating a triangular shape under the collar. This next part of your tie drawing should be quite a simple one for you to do! Web draw the center knot of the bow tie. Web draw a small triangle for the tie’s knot. Also draw the two lines coming apart as they go down so that the overall width of the tie increases.
Draw each of these with more of a curve at their base and smoother longer curves towards the bottom. There are many different types of neckties that can be drawn to reflect different personalities and. This forms the front part of the tie. Draw a fourth oval around the third oval. Remember to pay attention to details like the knot, the texture, and shading to make your tie drawing look more realistic. Web let's draw a tie and collar step by step. Make sure that the ovals are evenly spaced. Now sketch the shirt’s collar. Draw this cute tie by following this drawing lesson. Going down from the knot add the two sides of the tie.

How To Draw Tie In Simple And Easy Steps
During a game you may speak of two teams or players tied, but only drawn once the game has ended. Draw a square in the middle of the page. At the bottom of the line, draw another line slanting upwards and to the right. Make sure that the ovals are evenly spaced. Draw the neck of the tie below.
Tie Drawing How To Draw A Tie Step By Step
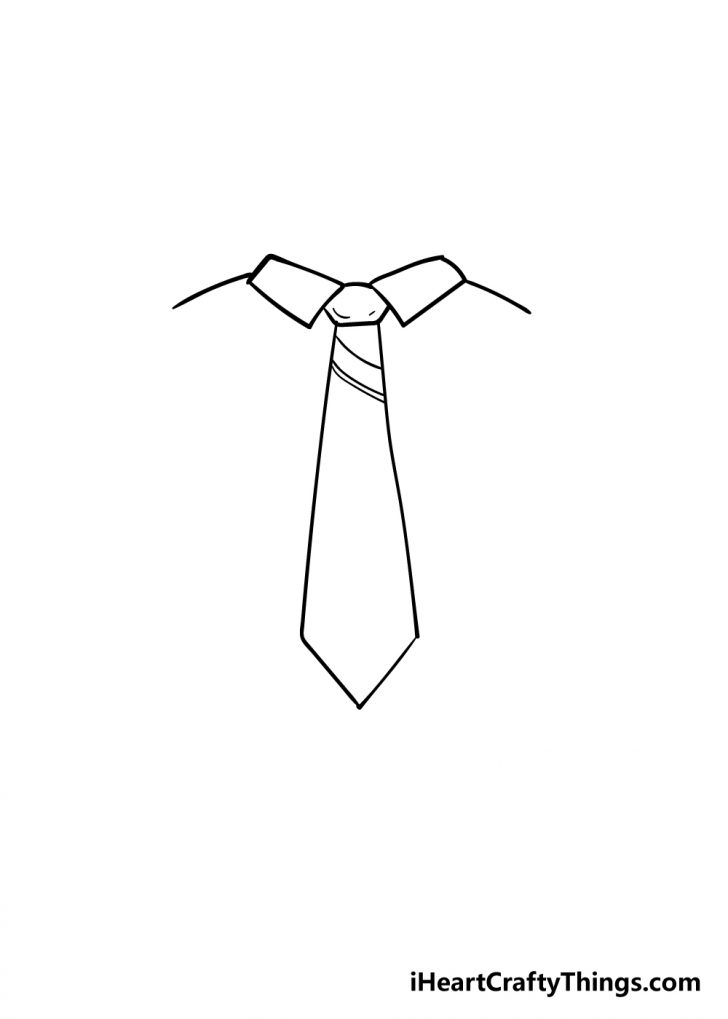
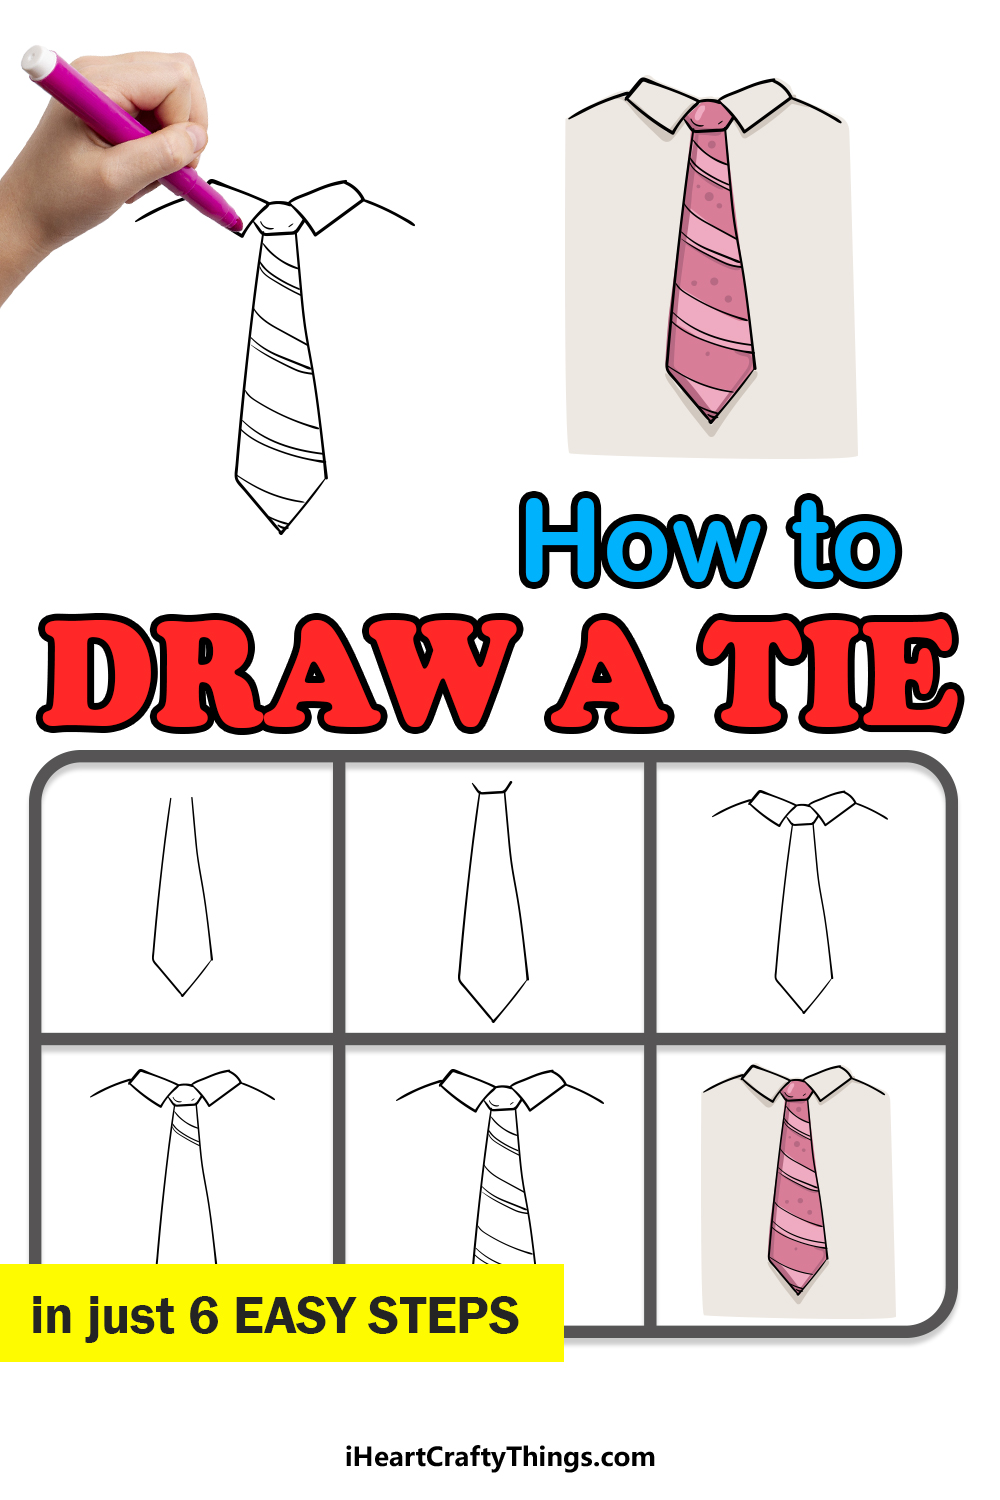
At the bottom of the line, draw another line slanting upwards and to the right. Web next, you’ll need to sketch the outline of your tie. This line will serve as. Web step by step directions to draw a tie. Web the art of drawing ties allows you to express your creativity and add a personal touch to your wardrobe.

How to Draw a Tie Step by Step EasyLineDrawing
In very little time, through a little repetition, you'll have the perfect bow tie drawing. Draw a fourth oval around the third oval. Not only is it a fun and relaxing activity, but it also gives you the opportunity to stand out from the crowd. Draw the long, tapered tail of the tie below the knot. Web drawing the tie's.

How to Draw a Tie Design School
Sketch two long, slightly curved lines extending from the knot for the tie’s body. Web draw a small triangle for the tie’s knot. Draw the neck of the tie below. There are many different types of neckties that can be drawn to reflect different personalities and. Draw each of these with more of a curve at their base and smoother.

How To Draw Tie In Simple And Easy Steps
Web draw a small, curved line at the bottom of the tie to represent the tip. During a game you may speak of two teams or players tied, but only drawn once the game has ended. Watch this video and follow the simple steps to create your own tie drawing. This next part of your tie drawing should be quite.
how to draw a tie on a shirt lineartdrawingsaestheticblue
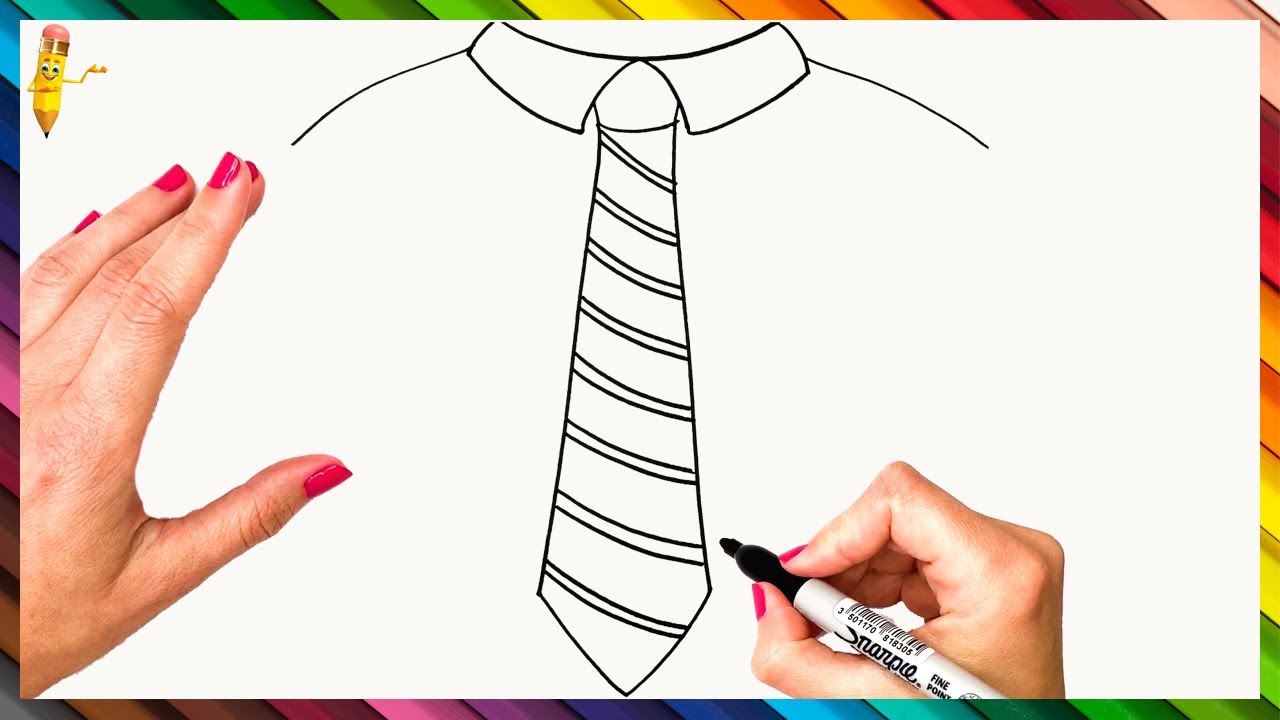
Also draw the two lines coming apart as they go down so that the overall width of the tie increases. Web do you want to learn how to draw a tie in a very easy way? This step will see you drawing the top knot of the tie, and all you need to do for this is draw three short.
How To Draw A Tie Step By Step Tie Drawing Easy
Add the body details shown. Draw each of these with more of a curve at their base and smoother longer curves towards the bottom. Web to draw a tie, you will need the following materials: Finish your tie drawing with a splash of color. Drawing is a popular concept over the world.

How To Draw Tie In Simple And Easy Steps
This step will see you drawing the top knot of the tie, and all you need to do for this is draw three short lines. Web draw a small triangle for the tie’s knot. Web learn how to draw a tie for kids easy and step by step. Customize your tie with different colors, patterns, or styles. Finish your tie.

How to Draw a Tie Design School
Web neckties can be extremely expressive. Draw the neck of the tie below. Web learning how to draw a bow tie is very simple! Drawing is a popular concept over the world. Add the body details shown.

How to Draw a Tie Step by Step Tie Drawing Bow Tie Drawing YouTube
Draw this cute tie by following this drawing lesson. Add some diagonal lines within the triangle to create texture and depth. Tuck the tie’s top in. This next part of your tie drawing should be quite a simple one for you to do! #drawing is defined in many ways.
Web To Draw A Tie, You Will Need The Following Materials:
This line will serve as. At this point, you can add the pattern’s finishing touches. Watch this video and follow the simple steps to create your own tie drawing. Then, draw a slightly larger oval around the first one.
Web Learning How To Draw A Bow Tie Is Very Simple!
#drawing is defined in many ways. Remember to erase any unnecessary guidelines and. Remember to pay attention to details like the knot, the texture, and shading to make your tie drawing look more realistic. Drawing a neck tie is #easy.
Draw Each Of These With More Of A Curve At Their Base And Smoother Longer Curves Towards The Bottom.
Draw an oval shape for the knot. Draw a square in the middle of the page. Web so much is to be expected when neither team has managed to eke out an advantage in a tie with such high stakes. The corners of the middle of the bow square are rounded.
Drawing Is A Popular Concept Over The World.
Web next, you’ll need to sketch the outline of your tie. Start by drawing a straight vertical line down the center of your paper. Web step by step directions to draw a tie. Draw a fourth oval around the third oval.