How To Install Center Mount Drawer Slides
How To Install Center Mount Drawer Slides - Web product family link : Use a carpenter's square and use the mark to draw a centerline on both the drawer box and cabinet sides. Repeat this process on the other side of the drawer. Use a screwdriver to remove any screws holding the slides in place. Drawer slides come in a variety of sizes. For inset drawers, first attach a mounting block 3 ⁄ 4 thick inside the face frame to which you can screw the slide. Mark the exact center of the drawer opening on the inside of the face mount. Requires fewest modifications to the drawer box. Then pull the slide almost all the way out, so the back of the drawer box is still resting on the plywood spacer, and screw in one of the. Mount the slide 1/32 back fromthe front of the face frame.
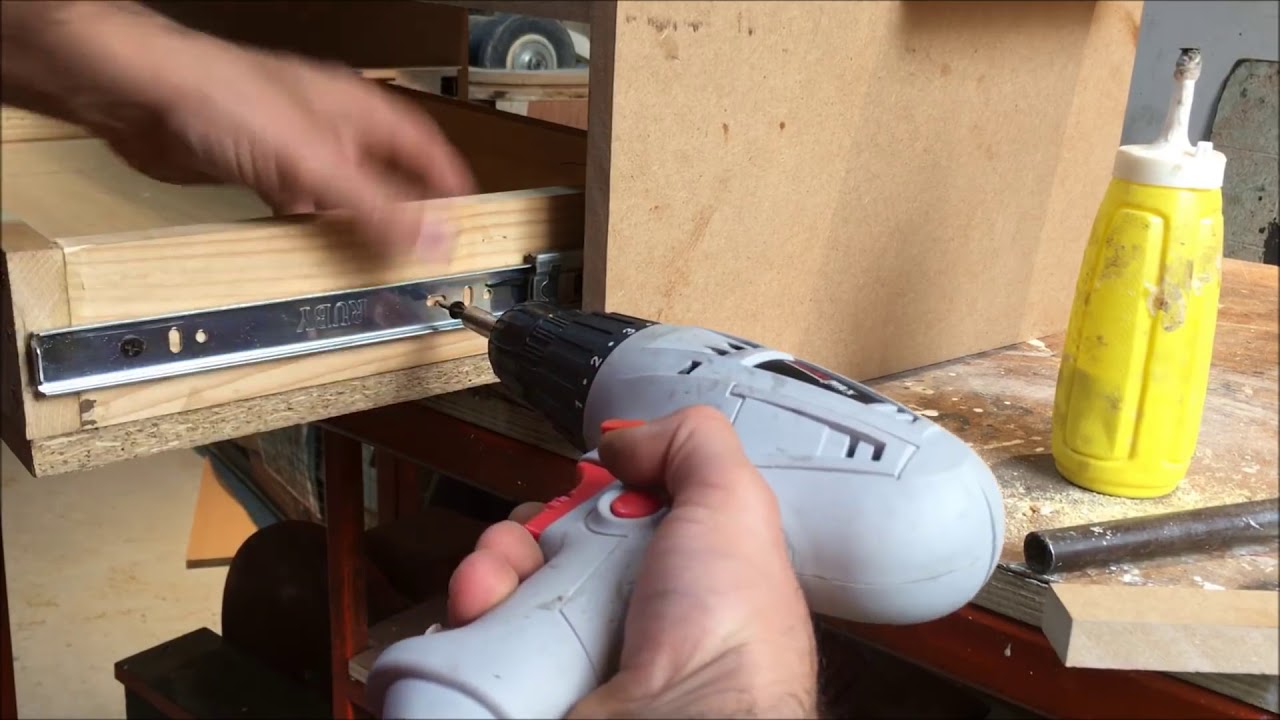
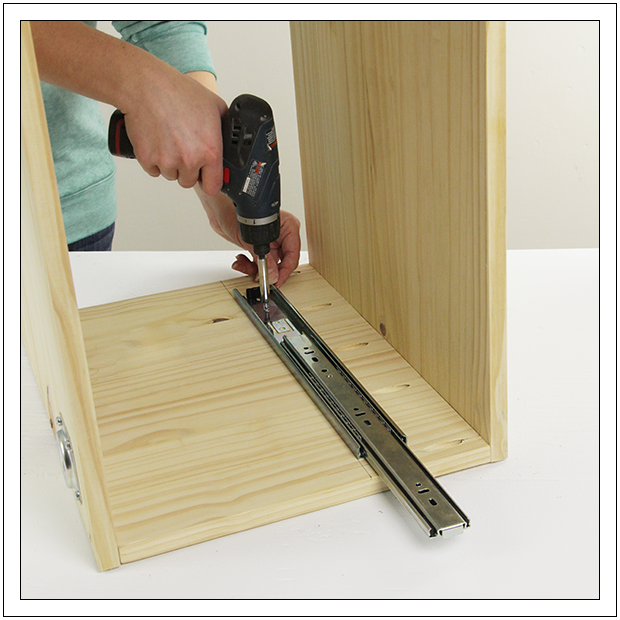
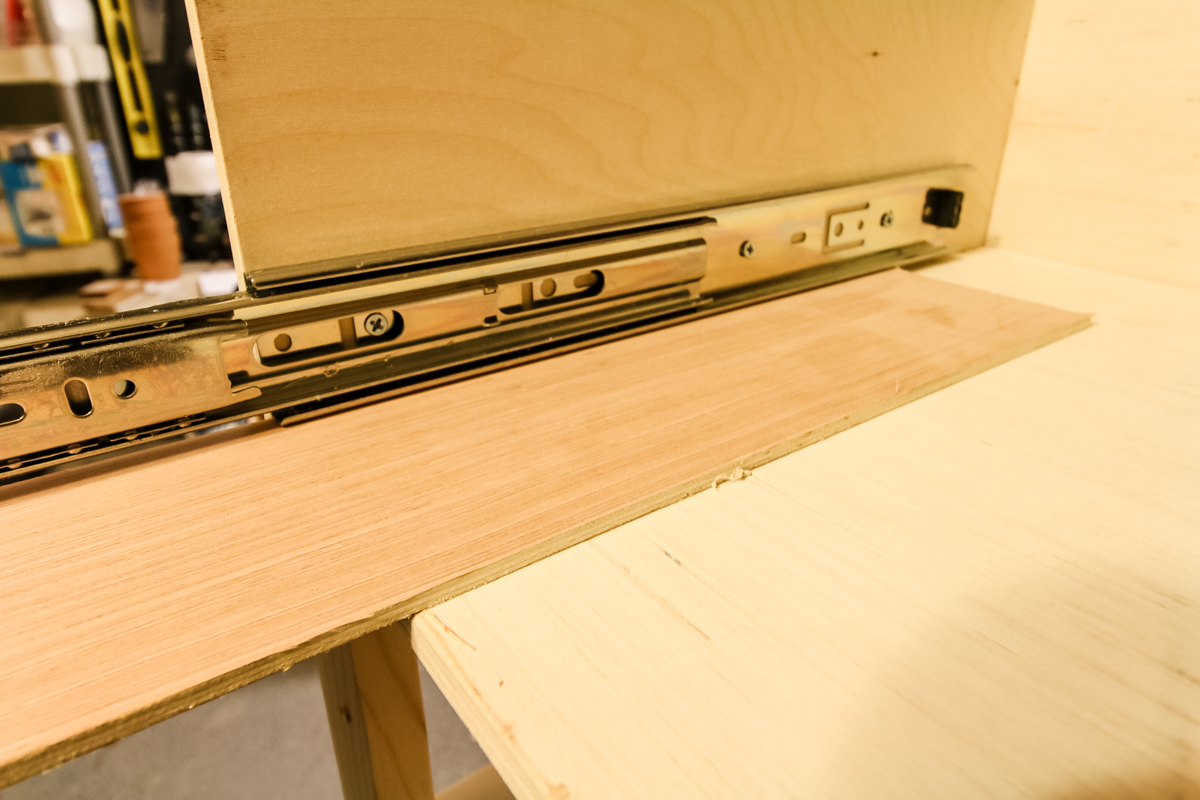
Web attach the first screw, and check the alignment of the slide before inserting the second screw. It is always better to have the slides slightly inside the cabinet than outside of the cabinet. 22 in (559 mm) load capacity: You need to attach one side of the slide inside the cabinet or case, and the other half to the drawer. Plan 30 minutes a drawer, and relax when it takes you 5 with practice. Web drawer slide installation in 11 steps. More potential for malfunctions over time. Place the slides flush with the front of the cabinet, and clamp it down to screw it in place. Web when you’re building projects with drawers, installing the slides can be one of the most challenging tasks. Set your drawer slide on top of the strip, lined up with the front edge.
Web remove the drawer and the existing drawer slides, if applicable, from the interior of the cabinet. View videos on how to install a knob, install a pull, and how to convert a knob to a cabinet pull. Web 7 tips to install drawer slides. Set your drawer slide on top of the strip, lined up with the front edge. Plan ahead and order rear mount brackets for face frame cabinets. Web over the last 10 years of installing hundreds of drawer slides, i’ve come up with a unique method that makes installing full extension drawer slides easy. More potential for malfunctions over time. If you're making your own drawers, wood slides are a great diy option. Screw the slides into place on the drawer. Mount the slide 1/32 back fromthe front of the face frame.
How to install drawer slides step by step YouTube
Drawer slides come in a variety of sizes. Web over the last 10 years of installing hundreds of drawer slides, i’ve come up with a unique method that makes installing full extension drawer slides easy. Web how to take apart the slide for installation. Web attach the first screw, and check the alignment of the slide before inserting the second.

How to Install Drawer Slides The simple and easy way!
Web use a pencil to mark the place where you want to attach the slide. Web use a tape measure to mark the center of the drawer height. Web learn how to install drawer slides easily and accurately for drawers that fit right. Web remove the drawer and the existing drawer slides, if applicable, from the interior of the cabinet..

How To Install Drawer Slides Easily and Accurately YouTube
Next, mark the center of the drawer box and cabinet sides. Make multiple marks and connect them to form a line. Make sure to check the top sides and bottom of the drawer for clearance.) 3. Web product family link : Place the slides flush with the front of the cabinet, and clamp it down to screw it in place.
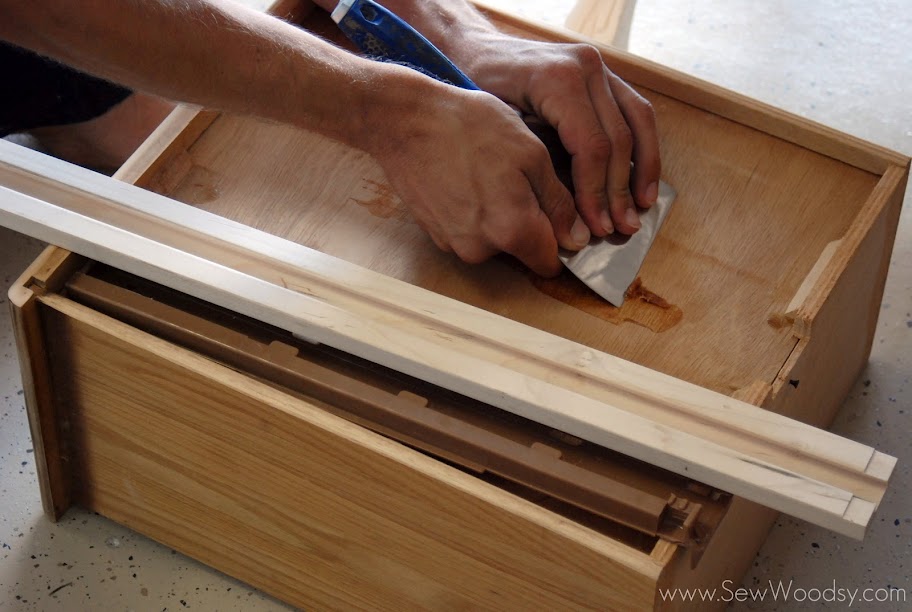
{Modifying} Classic Wood Center Mount Drawer Slides Sew Woodsy
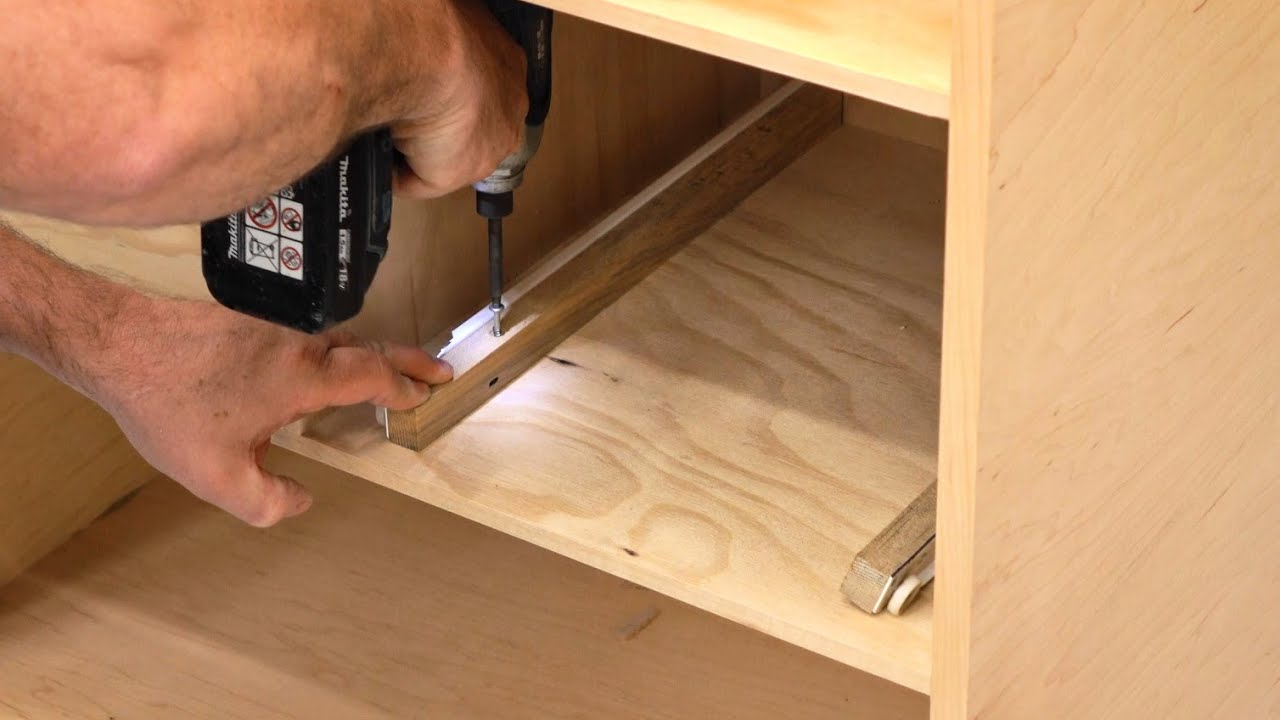
Insert the drawer slides into the metal brackets. Use a drawer slide jig. Web when you’re building projects with drawers, installing the slides can be one of the most challenging tasks. Our how to videos explain how to install your cabinet hardware. You need to attach one side of the slide inside t.

How To Install Kitchen Drawer Slides Our Home from Scratch
Set the retention clips in place against underside of drawer. If you're replacing old slides, remove them from both the drawer and the cabinet. Mount the slide 1/32 back fromthe front of the face frame. You need to attach one side of the slide inside t. Set your drawer slide on top of the strip, lined up with the front.

Drawer slide install YouTube
If no clamp is available, use tape or a partner to help hold it in place if possible. Mark the exact center of the drawer opening on the inside of the face mount. Web add the cabinet mount. Web product family link : Mount the slide 1/32 back fromthe front of the face frame.
How to Install Drawer Slides ‹ Build Basic
Web 7 tips to install drawer slides. You need to attach one side of the slide inside the cabinet or case, and the other half to the drawer. Requires fewest modifications to the drawer box. Web add the cabinet mount. Make sure to check the top sides and bottom of the drawer for clearance.) 3.

Installing Rockler CenterLine Drawer Slides * The Easy Way * YouTube
View videos on how to install a knob, install a pull, and how to convert a knob to a cabinet pull. Remove old drawers and drawer slides from inside the cabinet. Attach the drawer slide on to the cabinet’s interior with the screws included. Make sure to check the top sides and bottom of the drawer for clearance.) 3. Slide.
How To UnderMount Drawer Slides Woodworking YouTube
Make sure to check the top sides and bottom of the drawer for clearance.) 3. Use a carpenter's square and use the mark to draw a centerline on both the drawer box and cabinet sides. Web heavy dresser drawers can be a real drag when they slide on wooden runners. Attach the screws provided to mount the slide. If you're.
How to Install Drawer Slides The simple and easy way!
Web product family link : Mark the exact center of the drawer opening on the inside of the face mount. Insert the drawer slides into the metal brackets. Web use a pencil to mark the place where you want to attach the slide. Install the slide to the face frame, securing it with one screw, photo below.
Web How To Take Apart The Slide For Installation.
Make sure to have a screwdriver on hand for this step. If no clamp is available, use tape or a partner to help hold it in place if possible. Extend the slide out and screw into place in the box. Set the retention clips in place against underside of drawer.
Drawer Slides Come In A Variety Of Sizes.
Install the slide to the face frame, securing it with one screw, photo below. Web add the cabinet mount. Screw the slides into place on the drawer. Mount the slide 1/32 back fromthe front of the face frame.
And Both Halves Need To Be Level, Positioned.
22 in (559 mm) load capacity: Remove old drawers and drawer slides from inside the cabinet. Web 7 tips to install drawer slides. When you’re building projects with drawers, installing the slides can be one of the most challenging tasks.
You Need To Attach One Side Of The Slide Inside The Cabinet Or Case, And The Other Half To The Drawer.
Web product family link : Then pull the slide almost all the way out, so the back of the drawer box is still resting on the plywood spacer, and screw in one of the. Web drawer slide installation in 11 steps. Web use a tape measure to mark the center of the drawer height.