How To Make Drawer Fronts
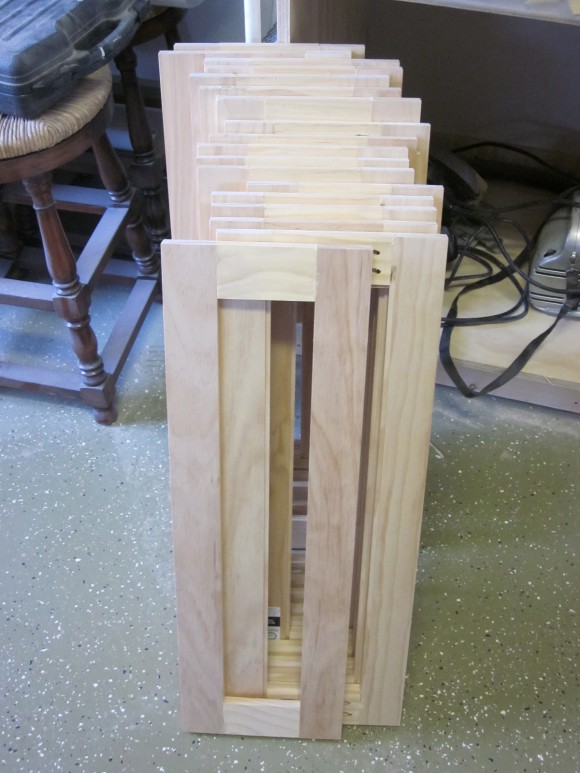
How To Make Drawer Fronts - After creating the frame, assemble your drawer front by attaching the panels to the frame. Web the holes in these front brackets are 1.25″ apart exactly (center to center). Web fill holes and seams with wood filler, then allow the wood filler to fully dry. For the wall mount, i used this last one of my upcycled drawer fronts by simply drilling pocket joints and attaching the white mdf drawer front on top. Measure between drawers to be sure the. Ensure that the box is square and fix for square as needed. Web the big disadvantage: Web after the paint cured, i distressed it a bit and set them aside to work on the drawer front. If you have a speed square use it to draw your line, otherwise just make sure your line is 1 5/16″ in from the edge all the way down. This breakout feature comes from wood magazine's weekend with wood 2015 class, featuring.
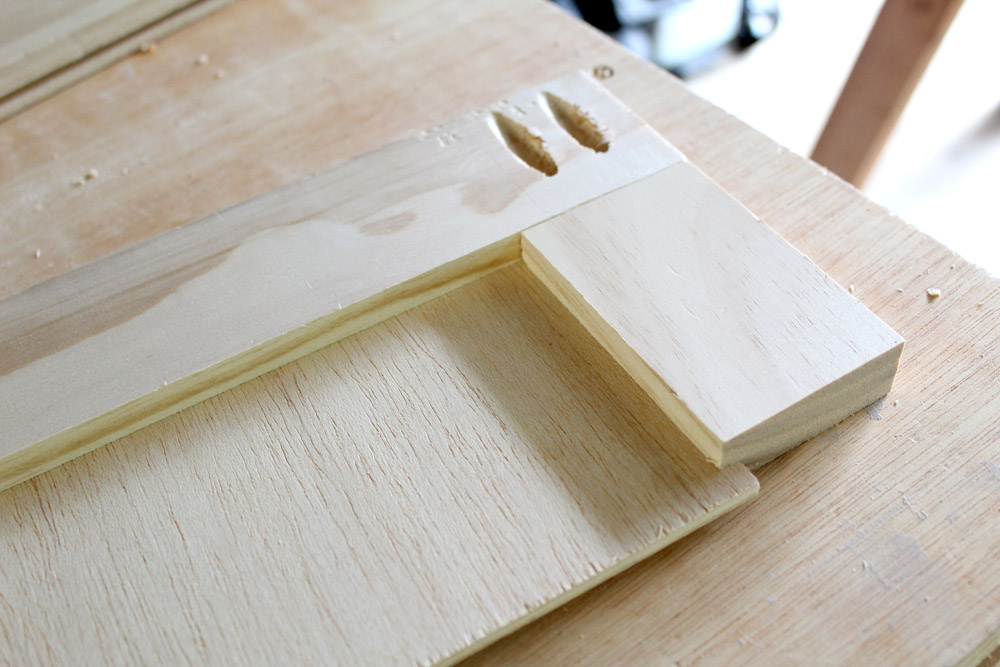
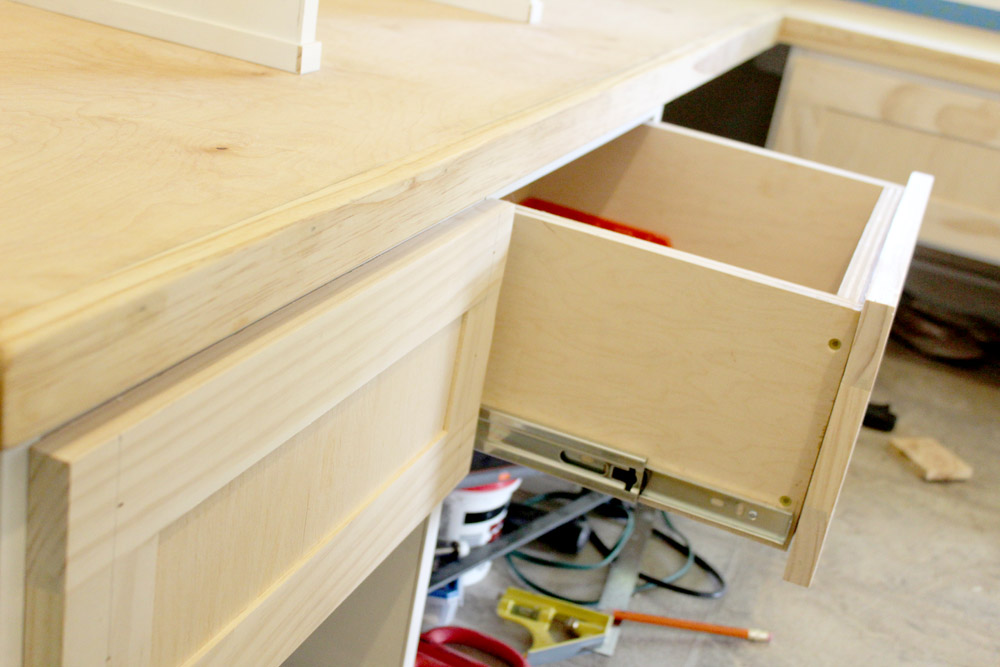
So you would have 1/4″ lip on the back, 1/4″ groove for the panel and 1/4″ decorative edge on the front. You want your drawer front to be at least a ¼” bigger on each side than the hole or opening that the drawer will go in. Web the big disadvantage: Make sure to carefully measure and align the panels to ensure a secure fit. Web remove doors and drawer fronts. Web carefully route all 4 edges of the top side of the diy wood drawer front. It’s much easier to do this now than it is after the panel is in. The piece of wood is laid out, then she slowly drags the router over it. Next, using spacers and starting at the bottom of his dresser frame, he locates exactly where he wants his drawer front to line up, making sure to leave space on the top, bottom, and sides with the spacers. In my case, i drilled the bottom holes 1.5″ in from the sides and 3.125″ down from the top, with the upper hole about 1.875″ down from the top.
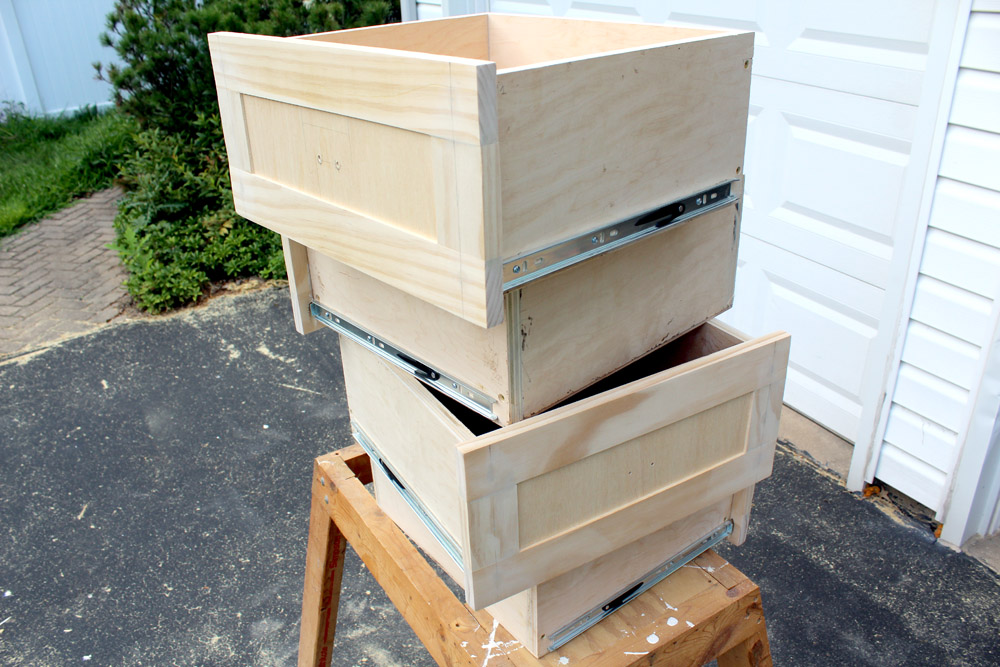
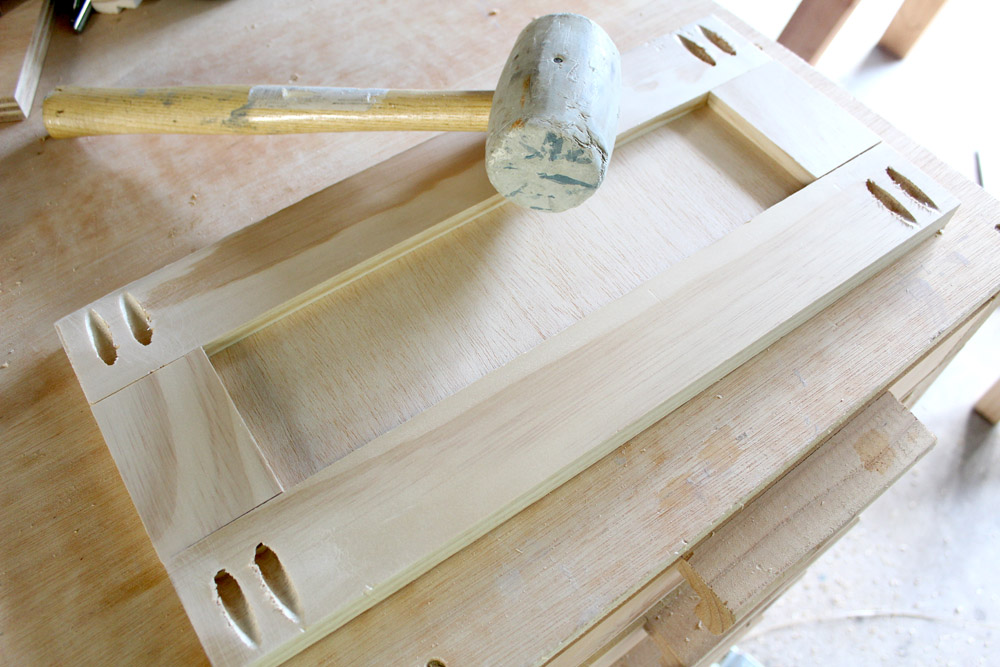
If your drawer is a hair too big or small, these slides won’t glide. Build the drawer box using wood glue and 1 ¼” pocket screws keeping all the sides square. Web the holes in these front brackets are 1.25″ apart exactly (center to center). Now you’re ready to attach the trim to the base. (please wear a dusk mask and eye protection while sanding) clean your piece prior to painting or staining. I painted the backs too because you can see about 1/2″ of them after installing. You want your drawer front to be at least a ¼” bigger on each side than the hole or opening that the drawer will go in. The total drawer height minus 4″ is the length to cut the stile. This breakout feature comes from wood magazine's weekend with wood 2015 class, featuring. Measure the drawer opening carefully to make sure you have the right size.

How to Make Quick and Easy Shaker Style Drawer Fronts
After creating the frame, assemble your drawer front by attaching the panels to the frame. Web here's a simple, easy to make drawer front that looks great. Eventually these will be used for hardware but for now they are being used for placement. In order to make this into a shelf, i needed a wall mount and a couple of.

How to make quick and easy shaker style drawer fronts Artofit
1/2″ rabbet on both ends is 1″. This was a little different for each drawer, so measure each one individually if you are doing this at home. Here's how i transformed our. The piece of wood is laid out, then she slowly drags the router over it. Today i'm finally gonna face frame these drawer fronts.

Howto Make Custom Drawer Fronts for RATIONELL drawers IKEA Hackers
Their next task could be to help the continent’s sluggish hydrogen markets take off. Eventually these will be used for hardware but for now they are being used for placement. Web after sanding, wipe everything down well and prime and paint the frames as well as your panels! To determine the size of the drawer front, look at the hole.
How to Make Quick and Easy Shaker Style Drawer Fronts
Web once the front is built, i trim 1/16″ off each side. For a drawer front we will need to fill the void behind the panel, so that, when the drawer pull is installed, it wont cause the panel to get sucked in. Prime, paint, and add hardware. Web how to diy and build new drawer fronts that attach to.

10InstallingDrawerFronts Addicted 2 DIY
For the wall mount, i used this last one of my upcycled drawer fronts by simply drilling pocket joints and attaching the white mdf drawer front on top. Watch the video for tips on which side should be the front to avoid cupping and wood movement issues. 1/2″ rabbet on both ends is 1″. Measuring & making the cuts for.
How to Make Quick and Easy Shaker Style Drawer Fronts
It’s much easier to do this now than it is after the panel is in. Web as for how geneva was able to make these fluted drawer pulls, she starts with two things: Use screws or any other suitable fasteners for a sturdy construction. Next, using spacers and starting at the bottom of his dresser frame, he locates exactly where.
How to Build Drawer Fronts Sawdust & Paper Scraps
Olu fashanu should come in right away and secure the offensive line in front of… Their next task could be to help the continent’s sluggish hydrogen markets take off. Sand your drawer front, making sure to go over the areas where wood filler was applied. Measure the drawer opening carefully to make sure you have the right size. Web after.
How to Make Quick and Easy Shaker Style Drawer Fronts
So you would have 1/4″ lip on the back, 1/4″ groove for the panel and 1/4″ decorative edge on the front. Lightly wipe a sanding block along all edges to smooth off any tiny bits left behind by the router. Measuring & making the cuts for the drawer fronts. It’s a lot harder to deal with a drawer that’s too.
How to Make Quick and Easy Shaker Style Drawer Fronts
While it might seem quicker to leave doors and drawer fronts in place, removing them will definitely make painting kitchen cabinets easier. Draw a line from the top of the scrap to the bottom. 1 5/16″ in from the edge. In order to make this into a shelf, i needed a wall mount and a couple of corbels added for.
How to Make Quick and Easy Shaker Style Drawer Fronts
This will remove dust to help the glue adhere. If your drawer is a hair too big or small, these slides won’t glide. This was a little different for each drawer, so measure each one individually if you are doing this at home. Glue and nail a ¼” plywood base cut to the size of the drawer box. You could.
It Also Ensures A Better.
Today i'm finally gonna face frame these drawer fronts. Web remove doors and drawer fronts. Web in this video (part 3 of 3) i’ll show you how to make and install drawer facesmerchandise & plans: Here's a simple, easy to make.
Web Here's A Simple, Easy To Make Drawer Front That Looks Great.
Working on one drawer at a time, place the trim piece off to the side ( right side down ). Next, using spacers and starting at the bottom of his dresser frame, he locates exactly where he wants his drawer front to line up, making sure to leave space on the top, bottom, and sides with the spacers. You could use the circular saw for both if that’s all you have but for me this was faster. So you would have 1/4″ lip on the back, 1/4″ groove for the panel and 1/4″ decorative edge on the front.
Make Sure To Carefully Measure And Align The Panels To Ensure A Secure Fit.
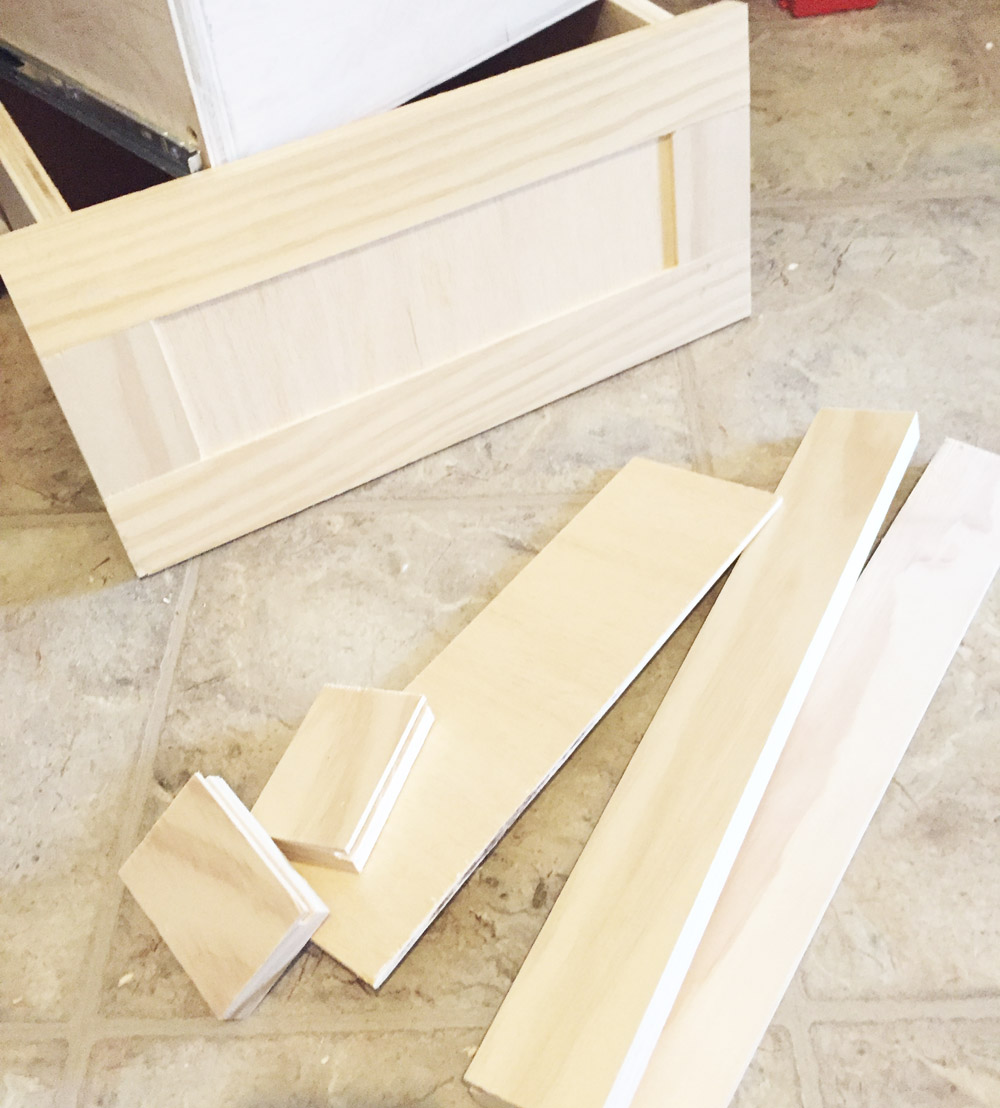
Eventually these will be used for hardware but for now they are being used for placement. Web grab your 1/4 scrap, orient it so that the 4″ is the width and the 10″ is the height. New placement for the front camera. For the drawer fronts i laid out all my measurements using this site and then i used my circular saw + guide for the rip cuts (longer cuts) and i’m using my miter saw for the cross cuts (shorter cuts).
Here's How I Transformed Our.
Web 12″ bar clamp. Draw a line from the top of the scrap to the bottom. (please wear a dusk mask and eye protection while sanding) clean your piece prior to painting or staining. Sand your drawer front, making sure to go over the areas where wood filler was applied.