Markers To Draw On Ceramic Mugs
Markers To Draw On Ceramic Mugs - Web simply draw your design on a white paper with our new sublimation markers, then heat transfer them to add your drawing on a sublimation ceramic mug!address:r. $1699 ($1.06/count) $16.14 with subscribe & save discount. Apply a thin coat of mod podge over the entire ceramic mug, in one direction. Cover it with clear nail polish. Web in this tutorial i bring you three ideas for decorating a white mug with permanent marker. If you mess up, you can wipe it off with a wet cloth. Seal sharpie on ceramic using mod podge. You should be able to see the design of the illustration on your mug. Wait until you have a cold oven to remove your arts and crafts projects and see if the colored markers are still on the surface. Additional tips to set permanent marker on ceramic.
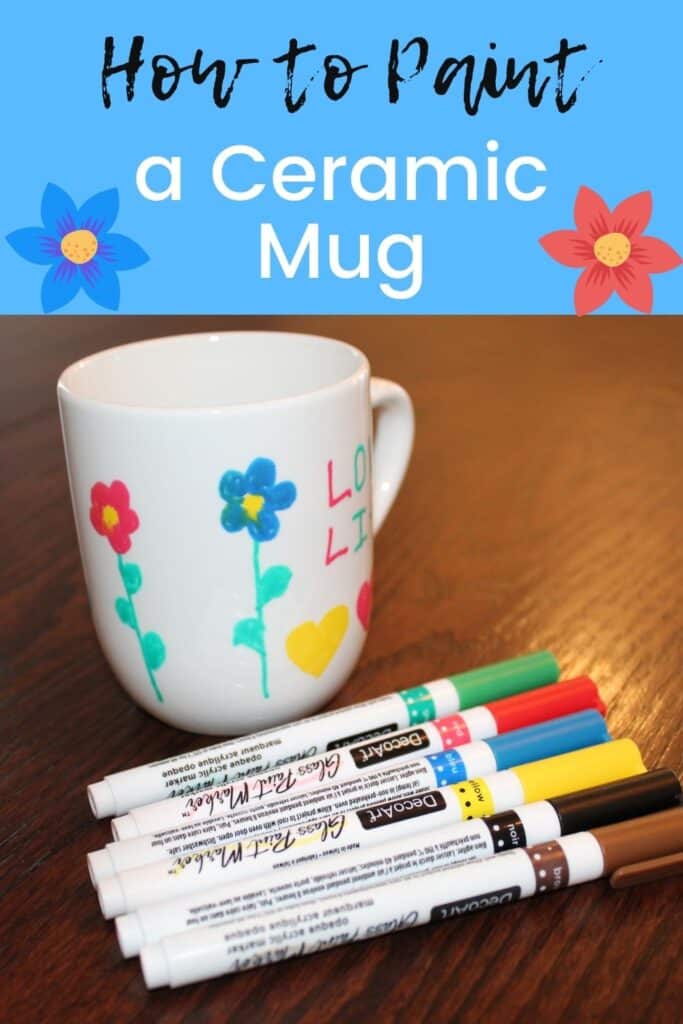
Make sure your area is well ventilated and turn on your oven to 350. Sketch your ideas on a paper. Apply a thin coat of mod podge over the entire ceramic mug, in one direction. Add colors and details to your design with permanent markers. Ceramic markers for mugs markers for ceramic mugs. Web clean the surface of the mug with a little rubbing alcohol. Decorate a mug by drawing your design with regular sharpies, or a paint pen, or place your adhesive stencil onto the mug and color in the stencil or paint the stencil. Place a sheet of aluminum foil on a cookie sheet and place your designed permanent marker mugs on the foil. If you wish to ink on glass instead of porcelain, transferring the design can be a lot easier. Unlike other colored markers, these work extremely well on the cup’s surfaces, owing to the d arkness of the resin.
I chose a sugar candy skull as my first design and used just 3 pens. Bake the ceramic pieces in the oven for 30 minutes, then let them cool. I'd like to draw on the handles of the mugs, so not on the area the mug press covers. Make sure your area is well ventilated and turn on your oven to 350. Unlike other colored markers, these work extremely well on the cup’s surfaces, owing to the d arkness of the resin. I left mine in the oven for a few hours. Seal sharpie on ceramic using mod podge. 4.4 out of 5 stars. Cure the art for 1 day. Check each product page for other buying options.

DIY Personalized Marker Mugs Karen Ehman
Web using the mug press with infusible ink markers. W e tried the markers, and the set works exceptionally well on different surfaces like ceramic, glass, stone, metal, and pottery. Seal sharpie on ceramic using mod podge. Once cooled, the designs should be permanently fixed to. Web painted sharpie mugs (that won’t wash off!) what you’ll need:

How to Decorate a Ceramic Mug with Paint Pens YouTube
Wait until you have a cold oven to remove your arts and crafts projects and see if the colored markers are still on the surface. The next day, put the mug in the oven at 140ºf for 40 minutes. Additional tips to set permanent marker on ceramic. The 3 layers of butcher paper protect your mug press from getting stained..

Cass Art Create Your Own Mug Design Markers Set of 6 Create your own
Additional tips to set permanent marker on ceramic. If using a stencil, carefully remove the stencil from the glass immediately after painting. Web using the mug press with infusible ink markers. Apply a thin coat of mod podge over the entire ceramic mug, in one direction. You should be able to see the design of the illustration on your mug.

Customize ceramic mugs with easytouse paint markers. This video
The next day, put the mug in the oven at 140ºf for 40 minutes. The 3 layers of butcher paper protect your mug press from getting stained. Set your mugs inside the oven, on the rake and let them bake for about 30 minutes. Once you’re happy with it, you bake it in the oven to set the marker design.

How to Paint Ceramic Mugs (Dishwasher Safe!) Simply Full of Delight
Price and other details may vary based on product size and color. Put some rubbing alcohol on a cotton ball and rub all over the outside of the mug (where you’ll be. Decorate a mug by drawing your design with regular sharpies, or a paint pen, or place your adhesive stencil onto the mug and color in the stencil or.
How to Paint Ceramic Mugs (Dishwasher Safe!) Simply Full of Delight
Leave the sharpie art in the oven for half an hour before turning the heat off. Once the 30 minutes is up, turn off the oven and let the mugs cool down inside the oven. Check each product page for other buying options. W e tried the markers, and the set works exceptionally well on different surfaces like ceramic, glass,.

Color Your Own 17 oz. Ceramic Travel Mug w/ Markers & Gift Box Page 1
Make sure your area is well ventilated and turn on your oven to 350. Put some rubbing alcohol on a cotton ball and rub all over the outside of the mug (where you’ll be. Seal sharpie on ceramic using mod podge. You can adapt my designs however you want or make your own creatio. If using a stencil, carefully remove.
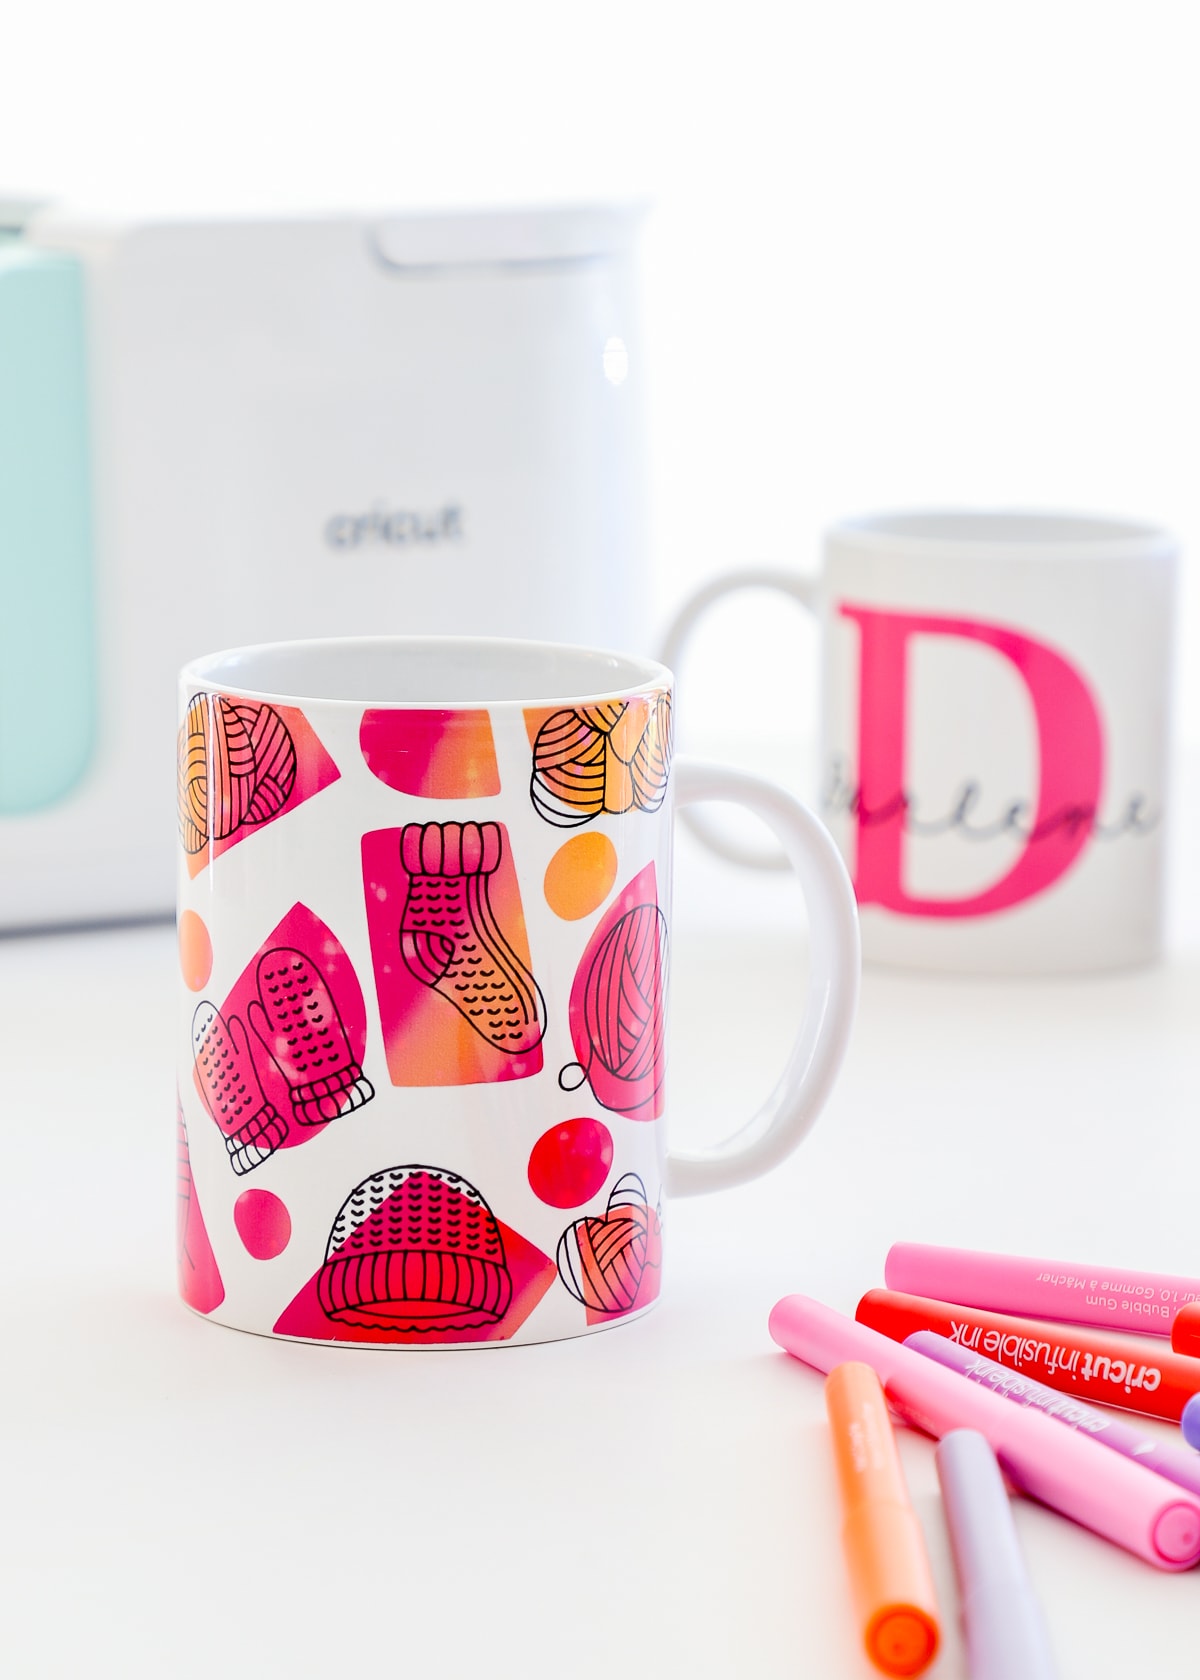
How to Make Mugs with Infusible Ink Pens and the Cricut Mug Press
$1699 ($1.06/count) $16.14 with subscribe & save discount. 4.4 out of 5 stars. Additional tips to set permanent marker on ceramic. 500+ bought in past month. You should be able to see the design of the illustration on your mug.

Better Than Sharpie Permanent Marker DIY Ceramic Mugs Kids Craft
Once you’re happy with it, you bake it in the oven to set the marker design in. Web can i use posca pens (/other ceramic markers) on sublimation mugs? Cure the art for 1 day. W e tried the markers, and the set works exceptionally well on different surfaces like ceramic, glass, stone, metal, and pottery. Once cooled, the designs.

The Complete Guide to Sharpie Mugs with Simple Designs and Ideas
Web once your design is finished, you need to let it dry for 24 hours. Web emooqi acrylic paint pens, marker pens for diy craft projects waterproof paint art marker for rock painting, ceramic, glass,canvas,mug,wood,0.7mm fine tip (12 pcs) 4.2 out of 5 stars 1,109 Bake the ceramic pieces in the oven for 30 minutes, then let them cool. Ceramic.
Check Each Product Page For Other Buying Options.
Check each product page for other buying options. Wait until you have a cold oven to remove your arts and crafts projects and see if the colored markers are still on the surface. Place a sheet of aluminum foil on a cookie sheet and place your designed permanent marker mugs on the foil. Price and other details may vary based on product size and color.
Carefully Place The Cookie Sheet Onto.
After 40 minutes, you need to let the mug cool off completely before you do anything with it. Set your mugs inside the oven, on the rake and let them bake for about 30 minutes. Once cooled, the designs should be permanently fixed to. Web in this tutorial i bring you three ideas for decorating a white mug with permanent marker.
Add Colors And Details To Your Design With Permanent Markers.
Leave the sharpie art in the oven for half an hour before turning the heat off. If you wish to ink on glass instead of porcelain, transferring the design can be a lot easier. Web can i use posca pens (/other ceramic markers) on sublimation mugs? The ink bled all the way to the 3rd layer of butcher paper.
500+ Bought In Past Month.
Once you’re happy with it, you bake it in the oven to set the marker design in. 4.5 out of 5 stars. If you mess up, you can wipe it off with a wet cloth. You should be able to see the design of the illustration on your mug.