Pencil Drawing Lips
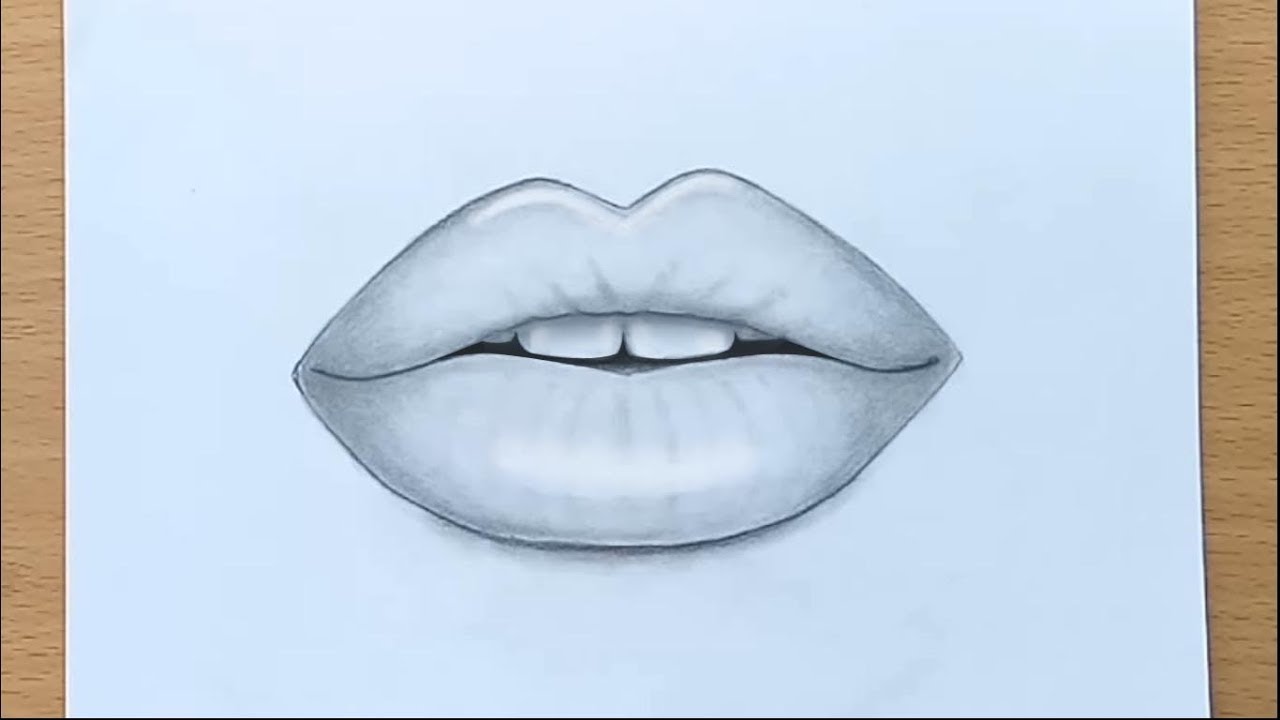
Pencil Drawing Lips - Draw a straight horizontal line between the “u” shape and the base of the triangle. Draw a long isosceles triangle. Web draw two circles in the bottom section of your lip drawing. Outline a smaller shape inside the lip. These circles will be used to round out the lines for the lips. Erase your guidelines and mark the darkest area. Then, draw a circle in the middle of the upper lips and add in another two thinner ovals on both sides of the upper lip. Web with your h pencil begin drawing the upper lips starting with the outer parts. Curve the line around the two circles. First, you’ll notice that the center line between your upper lip and bottom lip extends past the corner of the mouth.
Use a soft hb pencil to add texture to the lips. This is a sturdy but lightweight drawing board made by helix. How to scale the lips correctly; Use a soft eraser or a kneaded eraser to add highlights on the lips. There are many ways you can customize your drawing to make it extra unique, which i'll. This will give you a good base to begin drawing the lips from. Here is a step by ste. Draw the bottom line of the upper lip as before, but this time, make sure to lift the corners of the line into a slight smile. Here is a step by step tutorial on how to draw reali. Adding shading to the bottom lip;
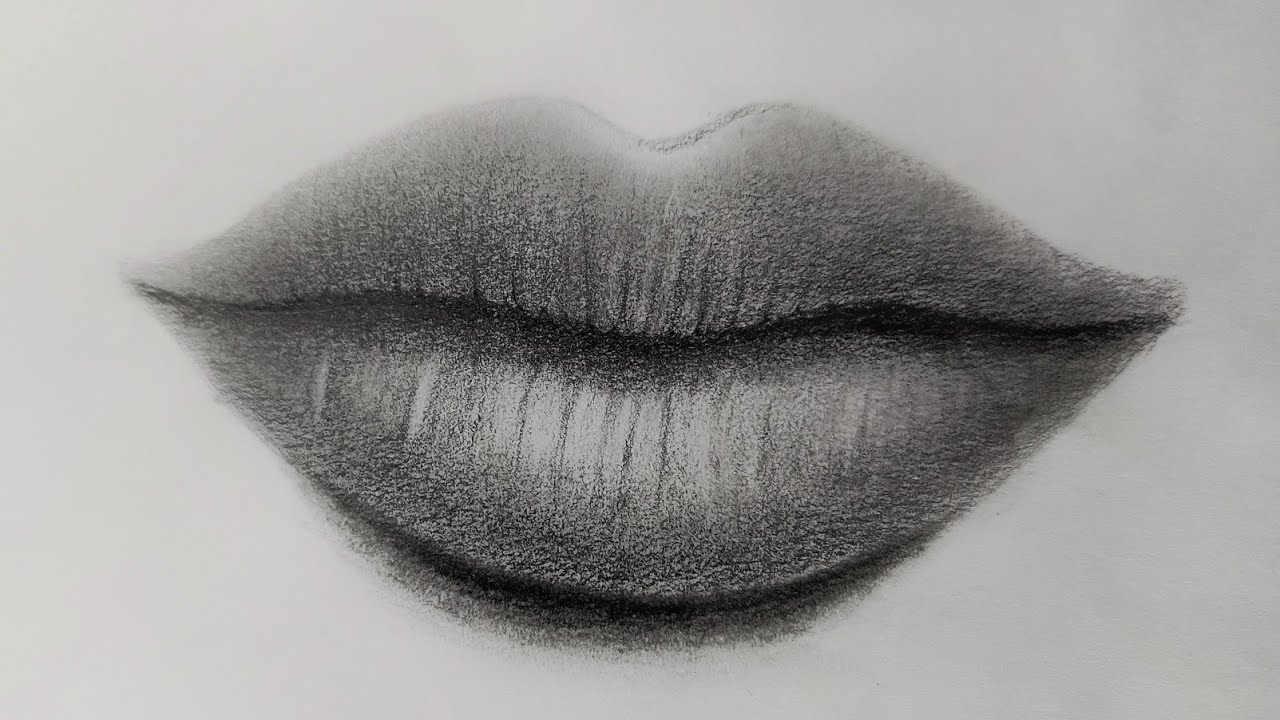
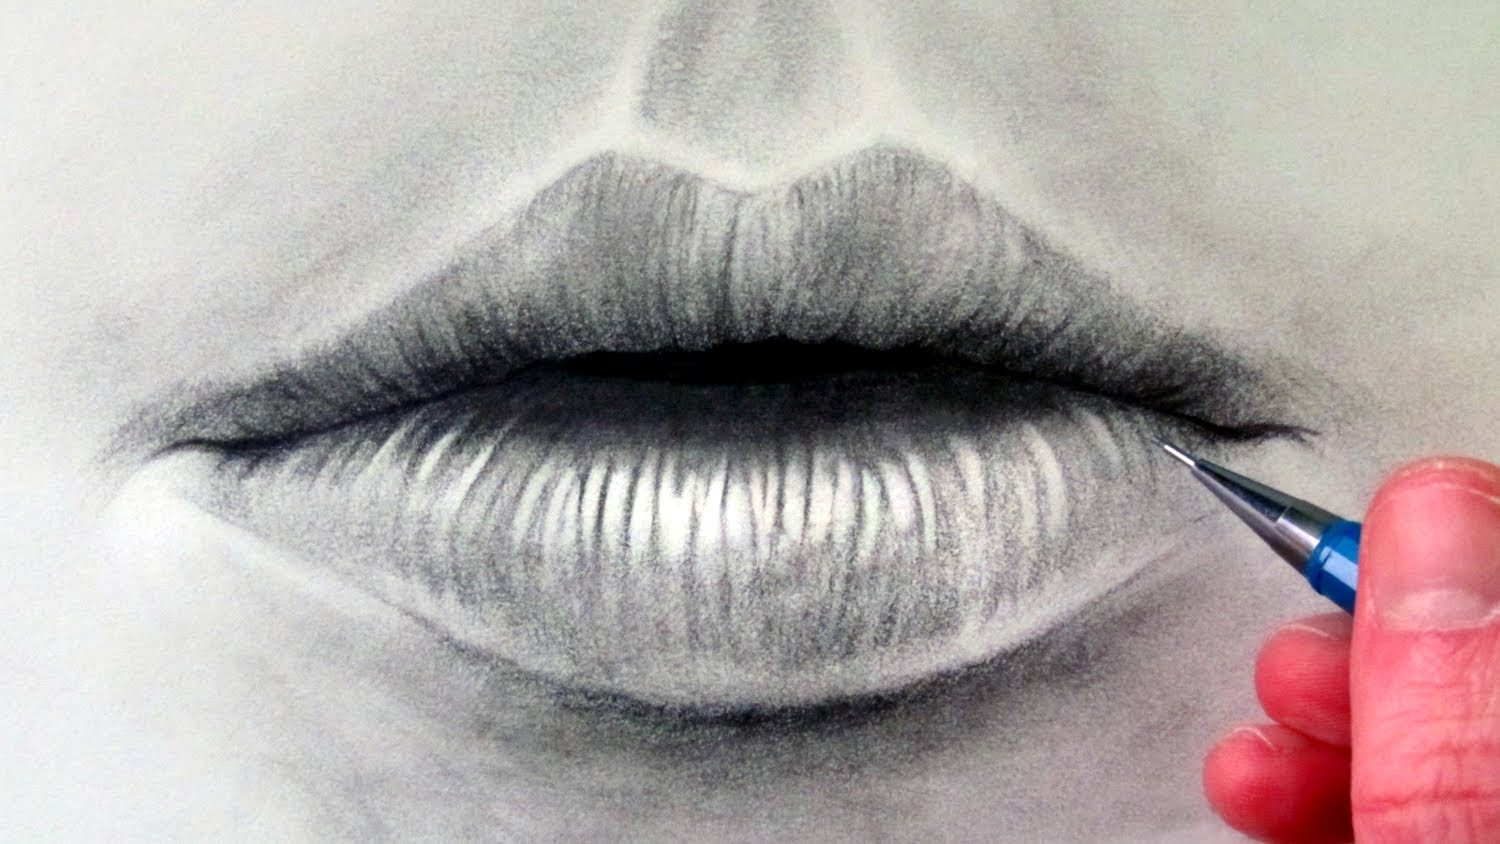
Web learn how to draw realistic lips with pencil in this easy art tutorial. As you work towards the center of the lips, the wrinkle lines should become more straight. Avoid using a softer graphite pencil, such as 2b, or a harder pencil such as a 2h. How to shade the mouth’s interior; Partway down draw a curve (similar to a “u” shape). This is a sturdy but lightweight drawing board made by helix. Erase your guidelines and mark the darkest area. Use a soft eraser or a kneaded eraser to add highlights on the lips. Web learn how to draw and shade realistic lips, step by step with pencil. Web the new ipad pro — the thinnest apple product ever — features a stunningly thin and light design, taking portability to a whole new level.
How to draw Lips by pencil step by step YouTube
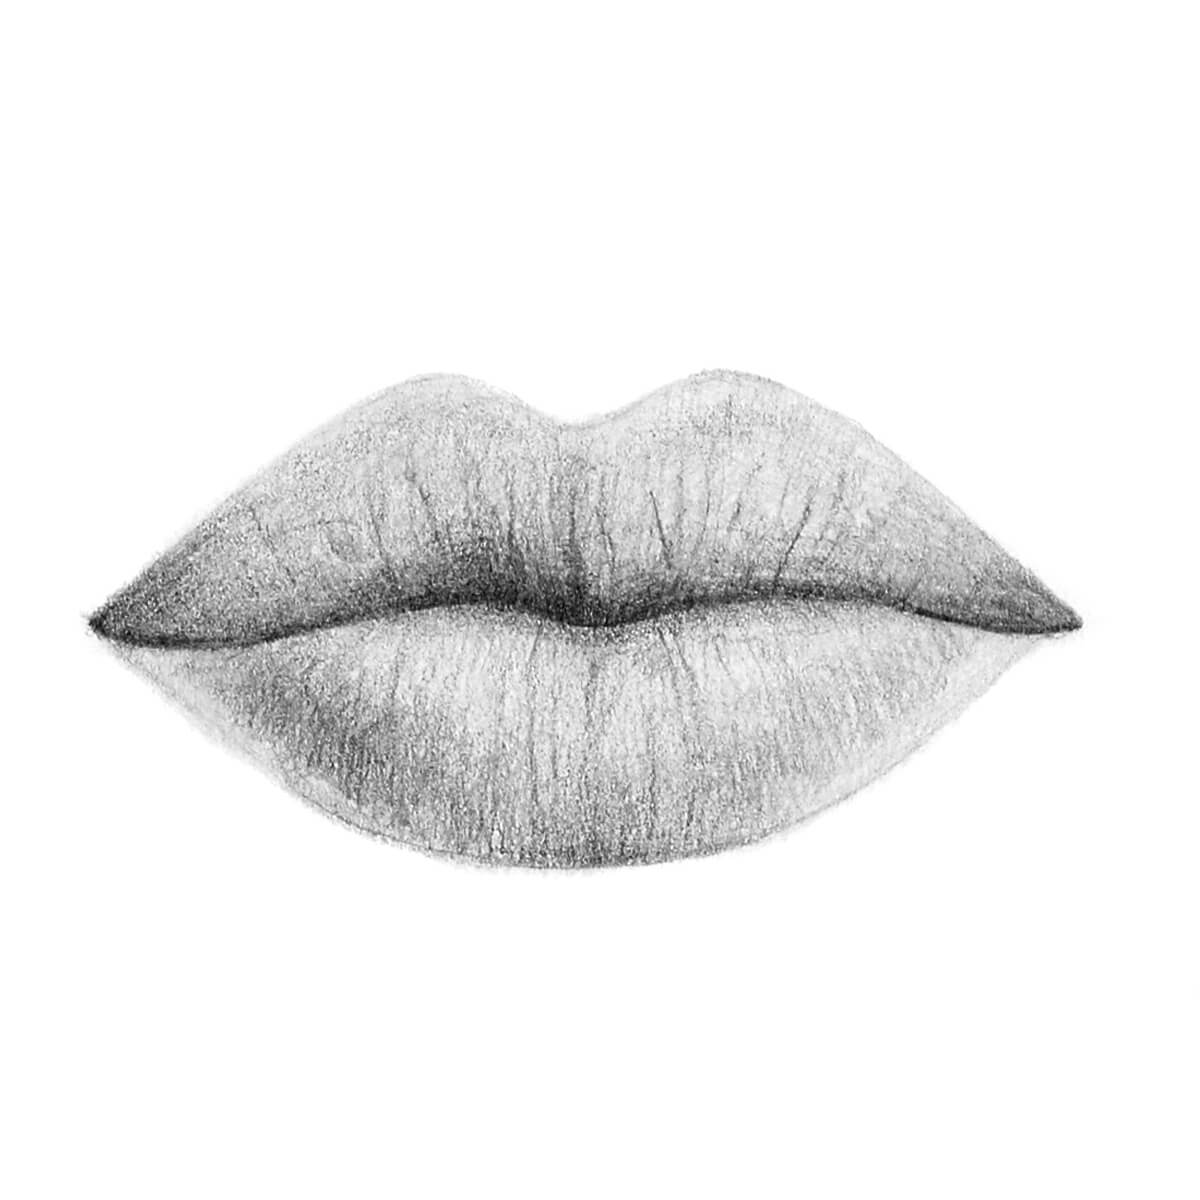
The most distinctive feature of the lips is, for sure, the line that separates them and the lower part of the bottom lip. With the shape of your lips refined, it’s time to start thinking about the shadows. I'm using the general's jumbo kneaded eraser. They will immediately add life to your smile drawing. Draw the bottom line of the.

How to Draw Realistic Lips Step by Step
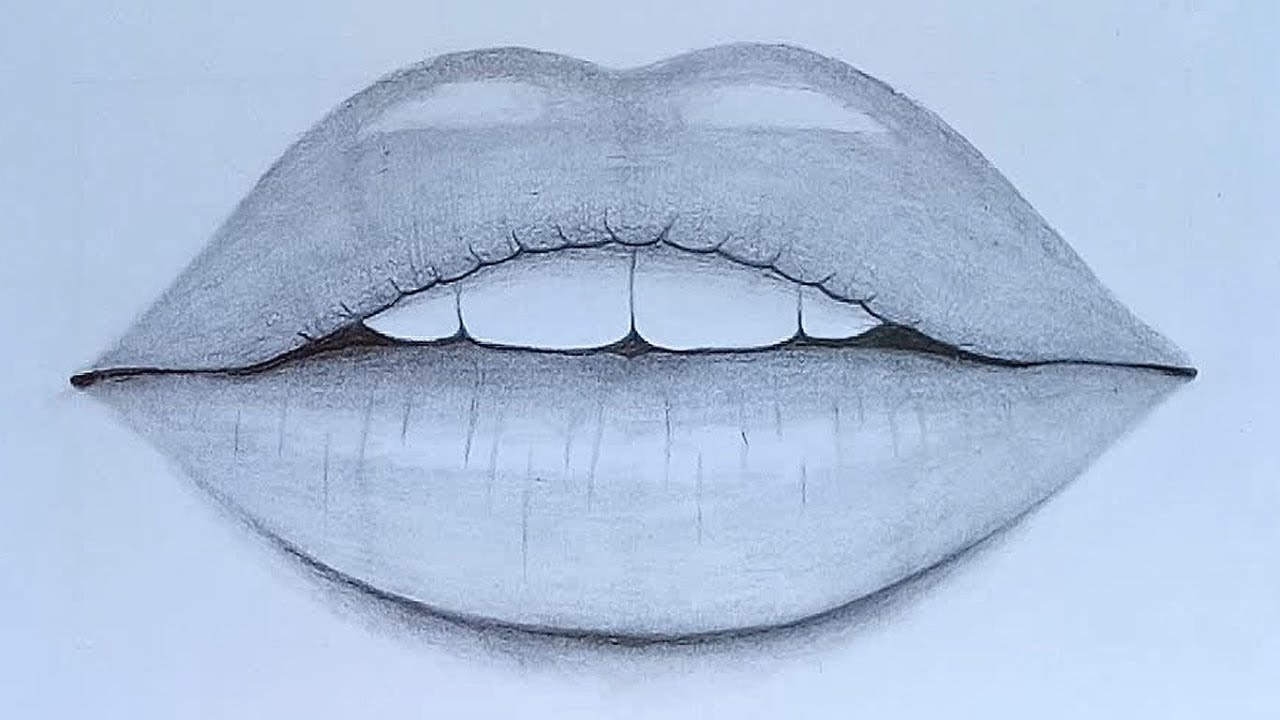
The most distinctive feature of the lips is, for sure, the line that separates them and the lower part of the bottom lip. Now draw the center line for your lips. Then, add two small marks or shading to the corners of the lips to signify the nodes. Web draw two circles in the bottom section of your lip drawing..
How to draw a realistic lips step by step for beginners YouTube
“this curved line is where you get a lot of your expression. Web learn how to draw and shade realistic lips, step by step with pencil. “i map that part out as guidelines in order to preserve the white space i need for highlights,” explains bevis. The longer you draw the horizontal line, the wider the lips will be. We.
How to draw Lips with pencil sketch step by step YouTube
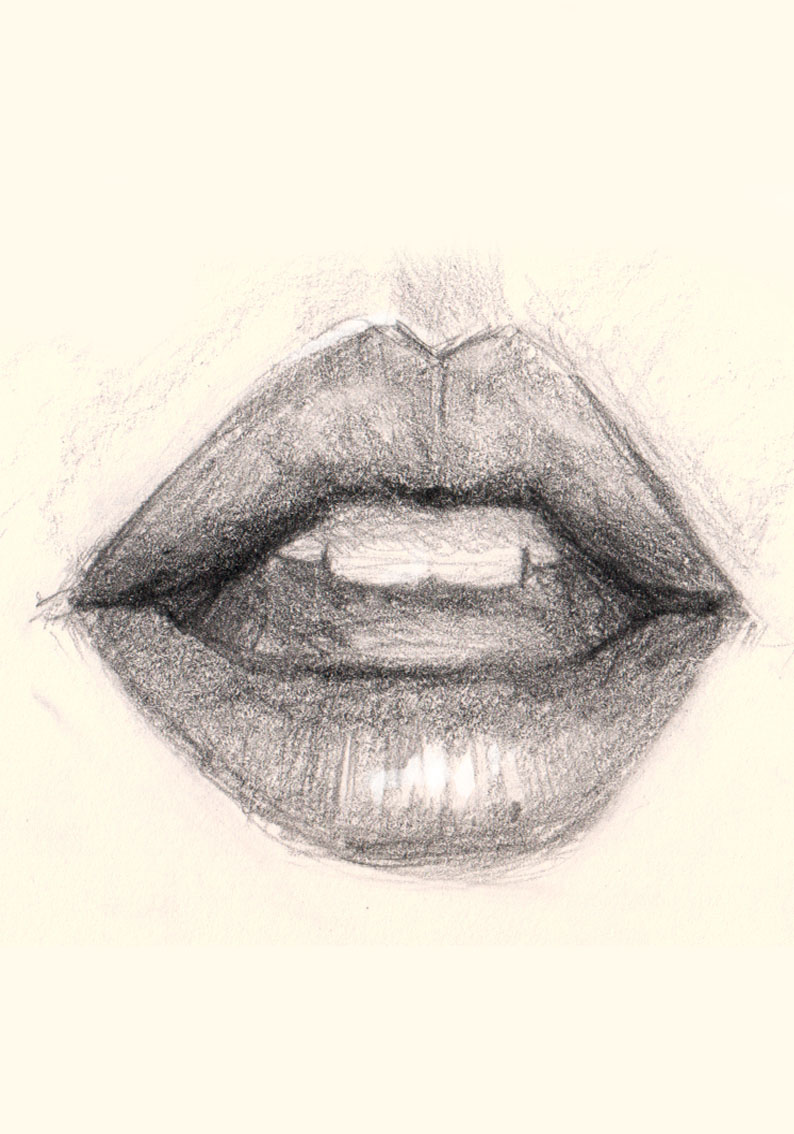
“never draw it as a straight line,” advises bevis. We'll first lightly draw a contour line drawing of the lips and teeth with a medium graphite pencil. Web how to draw e realistic lips easy step by step | easl lips drawing | easy pencil sketch subscribe my channel and support me Web welcome back!i hope you are all doing.
How to Draw Realistic Lips StepbyStep in 3 Different Ways ARTEZA
Web how to draw e realistic lips easy step by step | easl lips drawing | easy pencil sketch subscribe my channel and support me Add some additional guidelines to the middle of the circle that you drew on the upper lip. Draw a long isosceles triangle. The most distinctive feature of the lips is, for sure, the line that.
Lips Pencil Drawing at GetDrawings Free download
Web learn how to draw realistic lips with pencil in this easy art tutorial. “i map that part out as guidelines in order to preserve the white space i need for highlights,” explains bevis. Avoid using a softer graphite pencil, such as 2b, or a harder pencil such as a 2h. First, you’ll notice that the center line between your.

DermApproved Ingredients For Your Next DIY Lip Scrub Lip drawing
The shorter the line, the more plump they will be. Web more art tutorials on patreon: With our h pencil, we. I'm using the general's jumbo kneaded eraser. As you work towards the center of the lips, the wrinkle lines should become more straight.
How to draw lips Learn how to draw
Mark it on your drawing. Web begin drawing lips by adding in two large ovals to form the lower lip. Web how to draw e realistic lips easy step by step | easl lips drawing | easy pencil sketch subscribe my channel and support me There are many ways you can customize your drawing to make it extra unique, which.

Colored pencil drawing of lips (oceansfineart) LipPencilNatural
Web table of contents. The longer you draw the horizontal line, the wider the lips will be. The shorter the line, the more plump they will be. Web more art tutorials on patreon: “i map that part out as guidelines in order to preserve the white space i need for highlights,” explains bevis.

Sketchbook drawing of lips mouth close up I Pencil Art idea I drawing
Use a soft eraser or a kneaded eraser to add highlights on the lips. The corners, the center, and the upper middle of the lower lip. Then, draw a circle in the middle of the upper lips and add in another two thinner ovals on both sides of the upper lip. Web the new ipad pro — the thinnest apple.
Adding Shading To The Bottom Lip;
The corners, the center, and the upper middle of the lower lip. Use a soft hb pencil to add texture to the lips. For attaching my paper to my drawing board (fabulously easy to remove for taking tutorial photos!) 3. Start shading the lips by darkening the very center, bottom, sides and (very lightly) the top of the lips.
Web A Bit Of Gouache Is Used To Strengthen The Highlights After Colored Pencil Applications Have Been Made.
They should start at the center point of your triangle and extend past the edges of the triangle. Then, draw a circle in the middle of the upper lips and add in another two thinner ovals on both sides of the upper lip. After erasing our guidelines, using our 4b pencil, we are going to. Partway down draw a curve (similar to a “u” shape).
This Will Give You A Good Base To Begin Drawing The Lips From.
We can use the two points that we made to indicate where we can begin from. As you work towards the center of the lips, the wrinkle lines should become more straight. I'm using the general's jumbo kneaded eraser. Erase your guidelines and mark the darkest area.
Next, Begin To Shade The Darkest Areas Of The Lips:
Getting the shape of the lips takes time as the scale between the upper and bottom lips are slightly different. Establish the shape of the lips. Draw a straight horizontal line between the “u” shape and the base of the triangle. Now draw the center line for your lips.