Side Profile Lips Drawing
Side Profile Lips Drawing - A male will also often have sideburns and stubble. Web i know a lot of people struggles around the eye and mouth parts when drawing side profile, so let's take a closer look at them in the next section. This circle acts as a guide for the cranial mass, so make sure to draw the circle as large as you want the head to be in your drawing. Next, the anime style is a bit more realistic, but usually lacks the eye bridge and has more curves that are. Drawing a skull from the side profile is a fantastic way to understand facial anatomy better. Web draw a long line and then a smaller one to form the shape of the nose. To draw the bottom lip, start your stroke from the bottom left corner of the triangle and wrap it up until it. Web draw the lips. It’s better to draw a slightly curved line than a completely straight one. Web learn how to draw realistic lips from the side.
Lips three quarter view outline. Anime faces are all about exaggerated features and emotions. A male will also often have sideburns and stubble. Drawing a skull from the side profile is a fantastic way to understand facial anatomy better. Since this style is usually more curved, beginning with circles and ovals is a good way to structure the base of the face. Outline shape of nose and lips. Start by sketching a light outline of the face. Web side profile drawings can reveal distinct details such as the shape of the nose, the curve of the lips, and the prominence of the jawline. Drawing a male’s side profile differs from a female’s. Using a guideline when you’re starting is a very useful tool when you are just being familiar with drawing a side profile.
A male will also often have sideburns and stubble. Since this style is usually more curved, beginning with circles and ovals is a good way to structure the base of the face. It helps you get familiar with the process and makes it easier to start off on the right foot. Then, inside the first circle, draw an inner circle that should be around two thirds the size of the first circle. Step by step and fully narrated tutorial. Add rulers to the circle · step 3. Avoid drawing a straight line across. Draw two small circles above and below the lip line. It's handy to have a guideline when you're new to drawing a side profile. Make sure the upper lip is slightly ahead of the bottom lip.

How To Draw A Lips Step By Step Easy at Drawing Tutorials
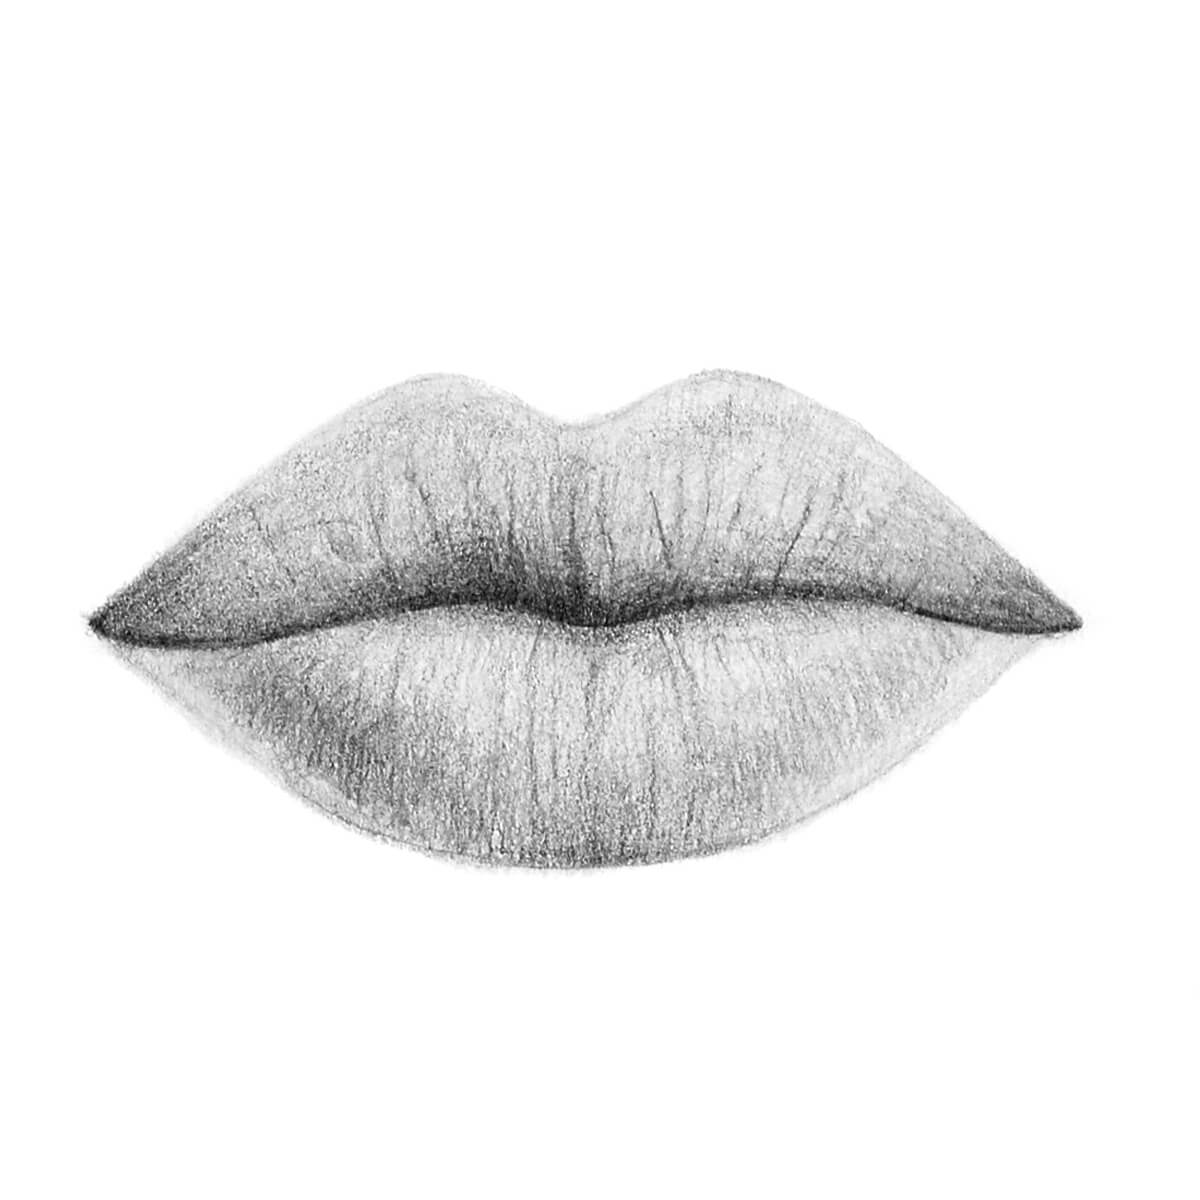
No nose or added chin detail, just the focus in the lips is perfect enough. Capture the subtle shadows and highlights to convey the texture and dimension of the lips, infusing them with a lifelike appearance. A male will also often have sideburns and stubble. The lips can be a bit tricky to draw if you don’t know the correct.

How To Draw Lips From The Side » 9 STEPS The Ravi arts
Next, begin to shade the darkest areas of the lips: This becomes more evident when you look at the lips in the three quarter view. Step by step and fully narrated tutorial. The side profile is more angular than a female side profile. Web how to draw anime face side profile.

How to draw lips from the side 12 steps RapidFireArt
Draw two small circles above and below the lip line. Outline a smaller shape inside the lip. Web how to draw a female’s side profile. It’s better to draw a slightly curved line than a completely straight one. Draw an intersecting horizontal and vertical line.

How to Draw Lips From the 3/4 View Perfect Side Lips Drawing
Side profile of eyes and lips important focal point that helps you as a guide here is the eyebrow bone / brow bridge / supra orbital torus. Web how to draw anime face side profile. Web since you will be drawing just the side profile of the mouth and lips, there's not much need to draw the rest of the.

How To Draw Female Lips Side View
Web how to draw a female’s side profile. “i map that part out as guidelines in order to preserve the white space i need for highlights,” explains bevis. Outline shape of nose and lips. Avoid drawing a straight line across. Start by sketching a light outline of the face.

17+ side lips drawing RoddyKarine
Make sure the upper lip is slightly ahead of the bottom lip. Lips three quarter view outline. Anime faces are all about exaggerated features and emotions. Drawing a profile of pursed lips means drawing those lips from the side. Since this style is usually more curved, beginning with circles and ovals is a good way to structure the base of.

how to draw lips with different angles and shapes
Make sure the upper lip is slightly ahead of the bottom lip. Draw a simple circle · step 2. Using a guideline when you’re starting is a very useful tool when you are just being familiar with drawing a side profile. Watch the video and follow the steps to create your own realistic mouth. Web draw the lips.
How to Draw Realistic Lips StepbyStep in 3 Different Ways ARTEZA
These will give shape to the lips. It looks more natural this way. Add rulers to the circle · step 3. Web since you will be drawing just the side profile of the mouth and lips, there's not much need to draw the rest of the features. Draw a simple circle · step 2.

Samantha Carlson (carlson3729) Lips drawing, Lips sketch, Realistic
Connect the curve you just drew to the corner of the mouth. “i map that part out as guidelines in order to preserve the white space i need for highlights,” explains bevis. These will give shape to the lips. Drawing it past the furthest eye corner gives it a cartoonish style! Drawing a skull from the side profile is a.

How to draw lips realistic lips from the side view YouTube
Web learn how to draw lips from different angles with this easy and fun tutorial. Watch the video and follow the steps to create your own realistic mouth. The side profile is more angular than a female side profile. In my step by step guide at the beginning of this post, we divided the head into thirds vertically. Connect the.
Watch The Video And Follow The Steps To Create Your Own Realistic Mouth.
Web how to draw a profile of pursed lips. Begin with a small oval for the chin, then add the jawline. Tips for drawing side profiles understanding the. Web how to draw anime face side profile.
The Completion Of A Side Profile Drawing Represents More Than A Visual Representation.
As already mentioned in the front view drawing of the lips the bottom lip is actually two parts. No nose or added chin detail, just the focus in the lips is perfect enough. Start by sketching a light outline of the face. Web draw a long line and then a smaller one to form the shape of the nose.
Step By Step And Fully Narrated Tutorial.
Web learn how to draw realistic lips from the side. Web how to draw lips(side view) easy for beginners drawing lips with pencil shading easy step by step Web male side profile drawing. Define the graceful curve of the lips, paying attention to the upper lip's contour and the fullness of the lower lip.
The First Step For Drawing Lips Is To Draw A Triangle!In This Drawi.
Learn techniques to create realistic and expressive lips that will bring your artwork to life. “i map that part out as guidelines in order to preserve the white space i need for highlights,” explains bevis. In my step by step guide at the beginning of this post, we divided the head into thirds vertically. Starting off with our cuter side profile, this is where you’ll have the most freedom.