Simple Paper Airplane Drawing
Simple Paper Airplane Drawing - Web how to draw a paper airplane step by step. Connect the inner corner of the far wing to the rear of the paper airplane using a straight line. You finished the stunt plane! Draw two straight lines and connect them at one point as shown in the picture. Once both sides are creased, unfold them slightly so the plane is flat on top. Web fold the paper in half lengthwise. Make sure the edges line up evenly, then press down to create a fold. Rotate the plane 90 degrees. From the same point where you connected the two lines, draw two more straight lines. Then, draw another straight line across the middle of the plane, between the two wings.
[5] make sure your wings are symmetrical to one another so your plane stays level when you throw it. Repeat the previous step on the opposite side to create the left wing of the paper airplane. You finished the stunt plane! This completely encloses the form of the plane. Web crease the paper with your knuckle or fingernail. Free youtube music (no copyright) This is the classic way to start a paper airplane, and probably what you first learned as a kid. Then, draw another straight line across the middle of the plane, between the two wings. Web how to draw a paper airplane step by step. Fold the top two corners down so they meet the center crease.
Fold the top 1 in (2.5 cm) of the paper down. Draw this paper plane by following this drawing lesson. Make sure the edges line up evenly, then press down to create a fold. Make 8 1 in (2.5 cm) folds from the top of your paper down. You can get the free printable templates at the bottom of the post. Free youtube music (no copyright) Web first print off the template. [5] make sure your wings are symmetrical to one another so your plane stays level when you throw it. Just click the orange button to fill out the form at the top of this page. Each design affects the airplane’s distance, time aloft, and acrobatics.
How to draw easy paper plane YouTube
Then fold in the paper on each side to the center. Web first print off the template. From the same point where you connected the two lines, draw two more straight lines. First you fold the paper in half lengthwise, and then unfold. How to make a paper airplane,paper airplane drawing,aesthetic paper airplane,how to draw a little airplane,how to draw.
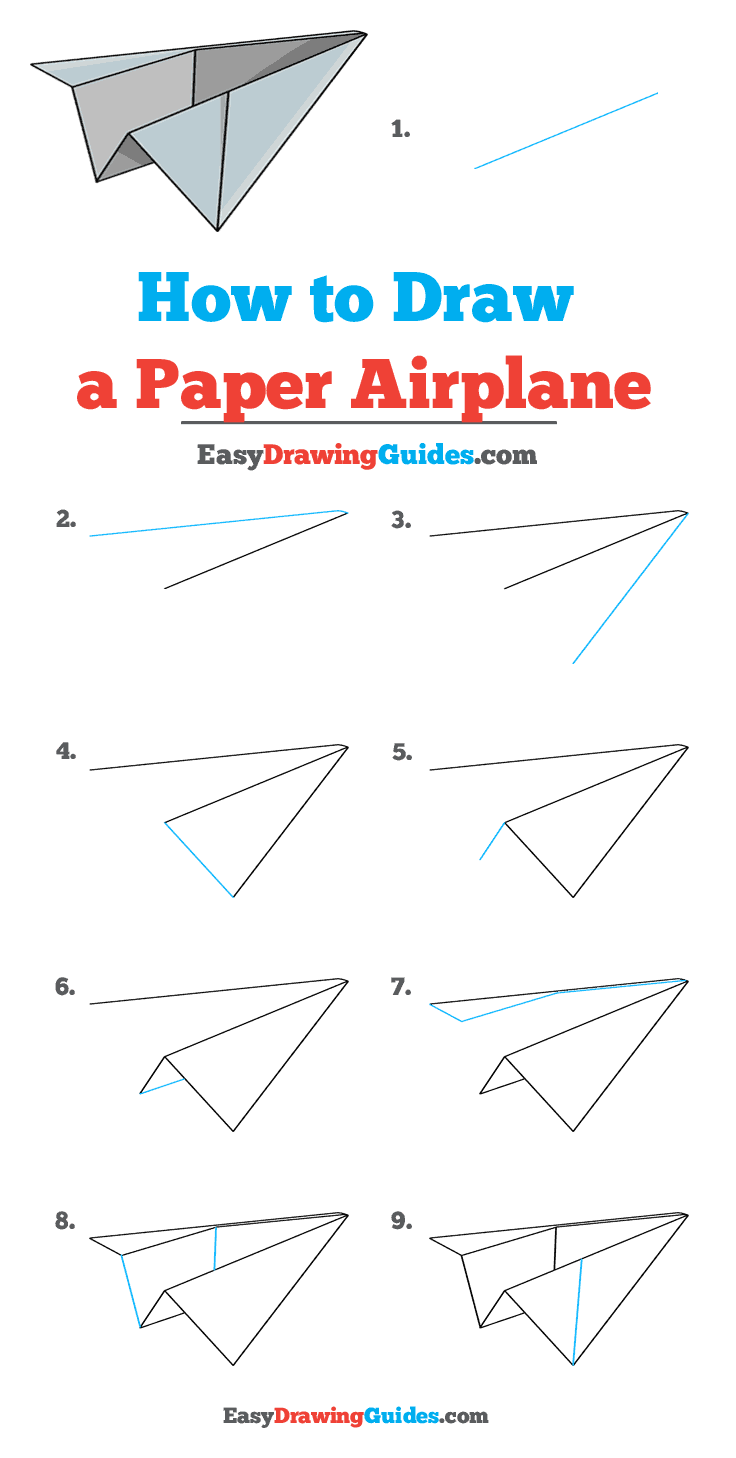
Paper Airplane Drawing How To Draw A Paper Airplane Step By Step
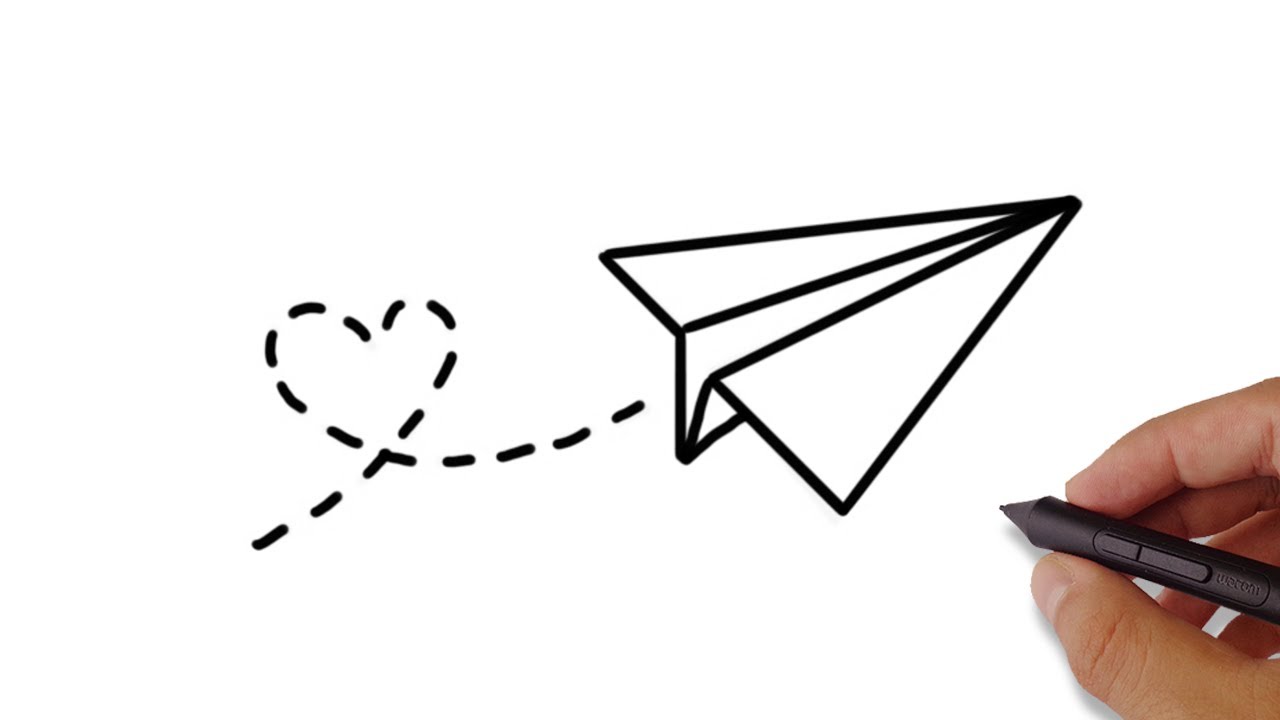
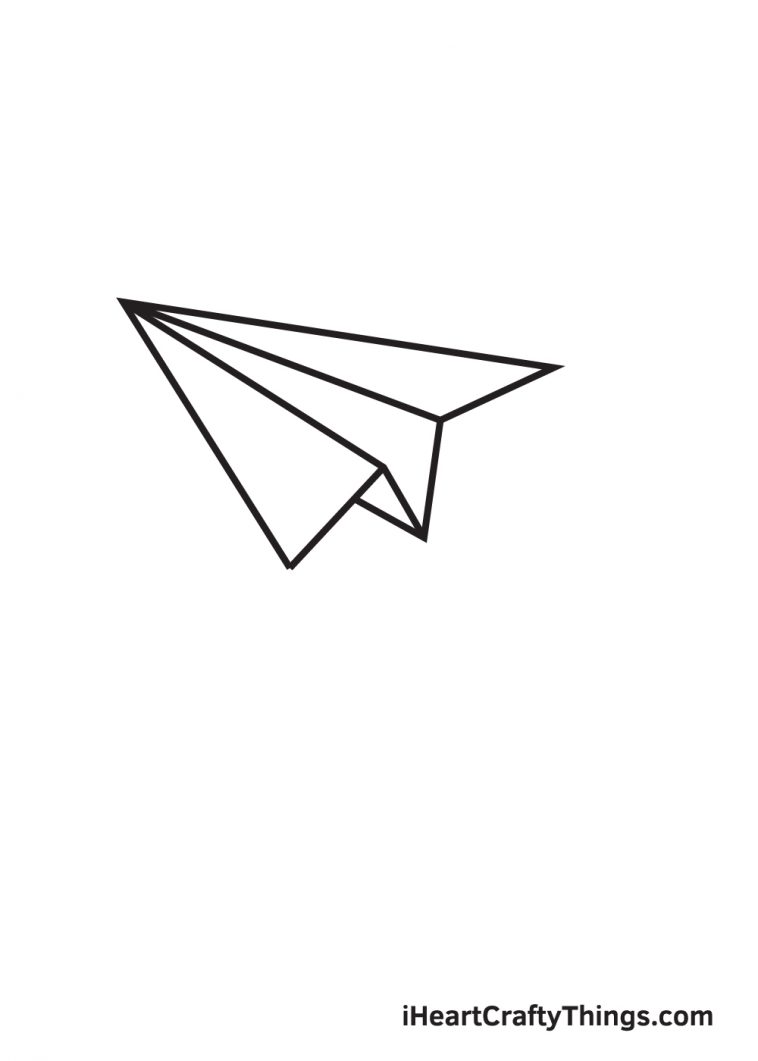
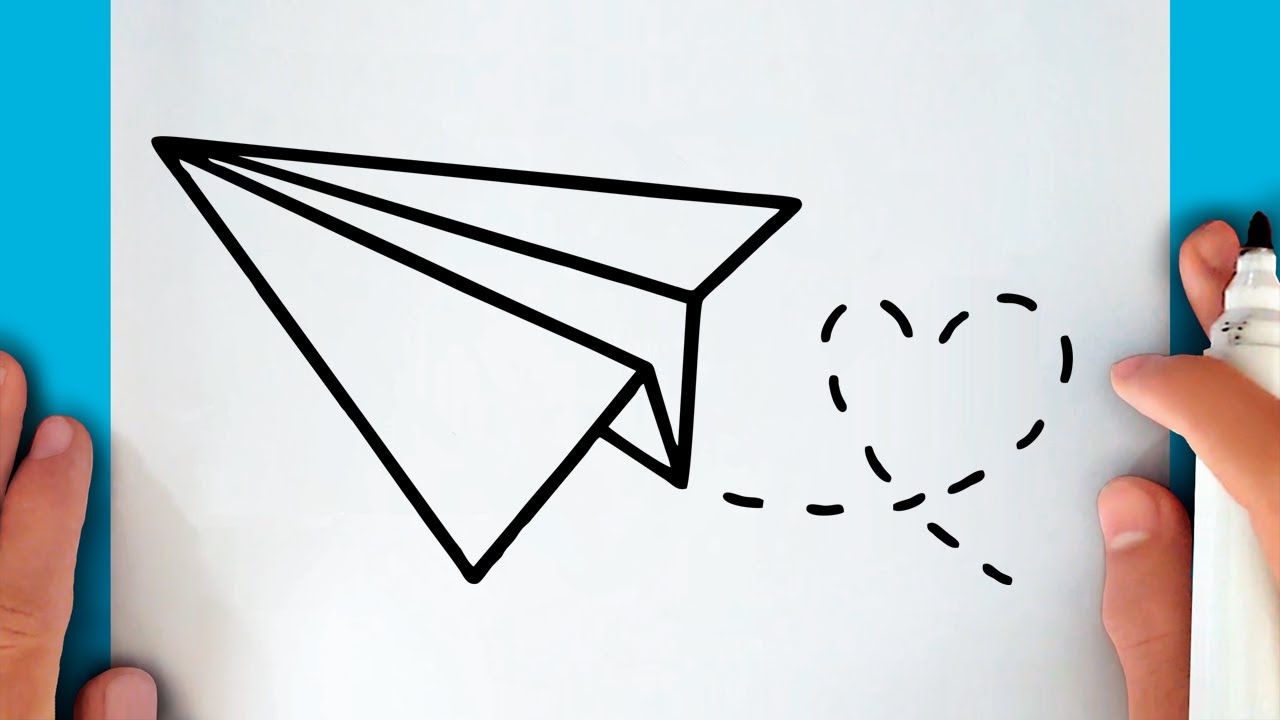
If you want even more doodling ideas, check out my entire doodle ideas collection! Draw a line to define the bottom of the paper airplane going from the bottom tip of the “v” fold towards the front tip. Start by drawing the upper part of the airplane. Flip the paper airplane over to create the wing on the other side..
HOW TO DRAW A PAPER PLANE YouTube
Web how to draw a paper airplane step by step. First you fold the paper in half lengthwise, and then unfold. Fold the top 1 in (2.5 cm) of the paper down. Then, draw another straight line across the middle of the plane, between the two wings. Web thanks for watching our channel.
How to draw a paper airplane step by step easy Simple paper airplane
Using two straight lines, connect. You finished the stunt plane! Flip the paper airplane over to create the wing on the other side. Make sure the edges line up evenly, then press down to create a fold. Web this paper plane step by step drawing tutorial is easy to follow and.

Paper Airplane Drawing How To Draw A Paper Airplane Step By Step
Fold the top outside corners down to meet the center line. [5] make sure your wings are symmetrical to one another so your plane stays level when you throw it. You finished the stunt plane! A4 size paperplease check out other awesome paper planes on my channel:paper h. Web add shadow to the paper airplane.
How to Draw a Paper Airplane Really Easy Drawing Tutorial
Paper airplanes are a simple subject, but they will have a range of values like anything else that you draw. Draw a line to define the bottom of the paper airplane going from the bottom tip of the “v” fold towards the front tip. Draw two straight lines and connect them at one point as shown in the picture. Each.
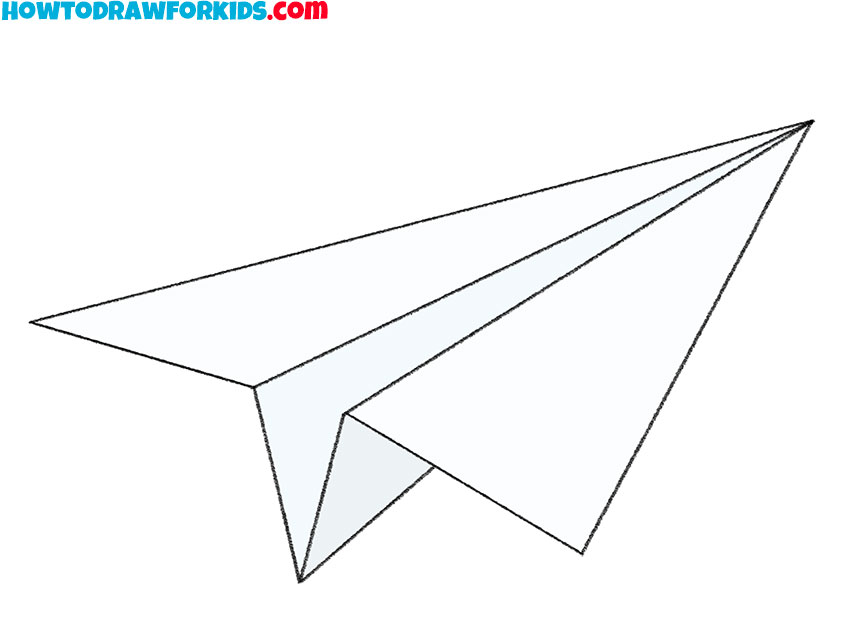
How to Draw a Paper Airplane Easy Drawing Tutorial For Kids
Make sure the edges line up evenly, then press down to create a fold. I’ll also show you how others have incorporated paper planes in their bullet journals, planners, and artwork. 50 out of 50 showing. Fold both edges down to meet the bottom fold. Once both sides are creased, unfold them slightly so the plane is flat on top.
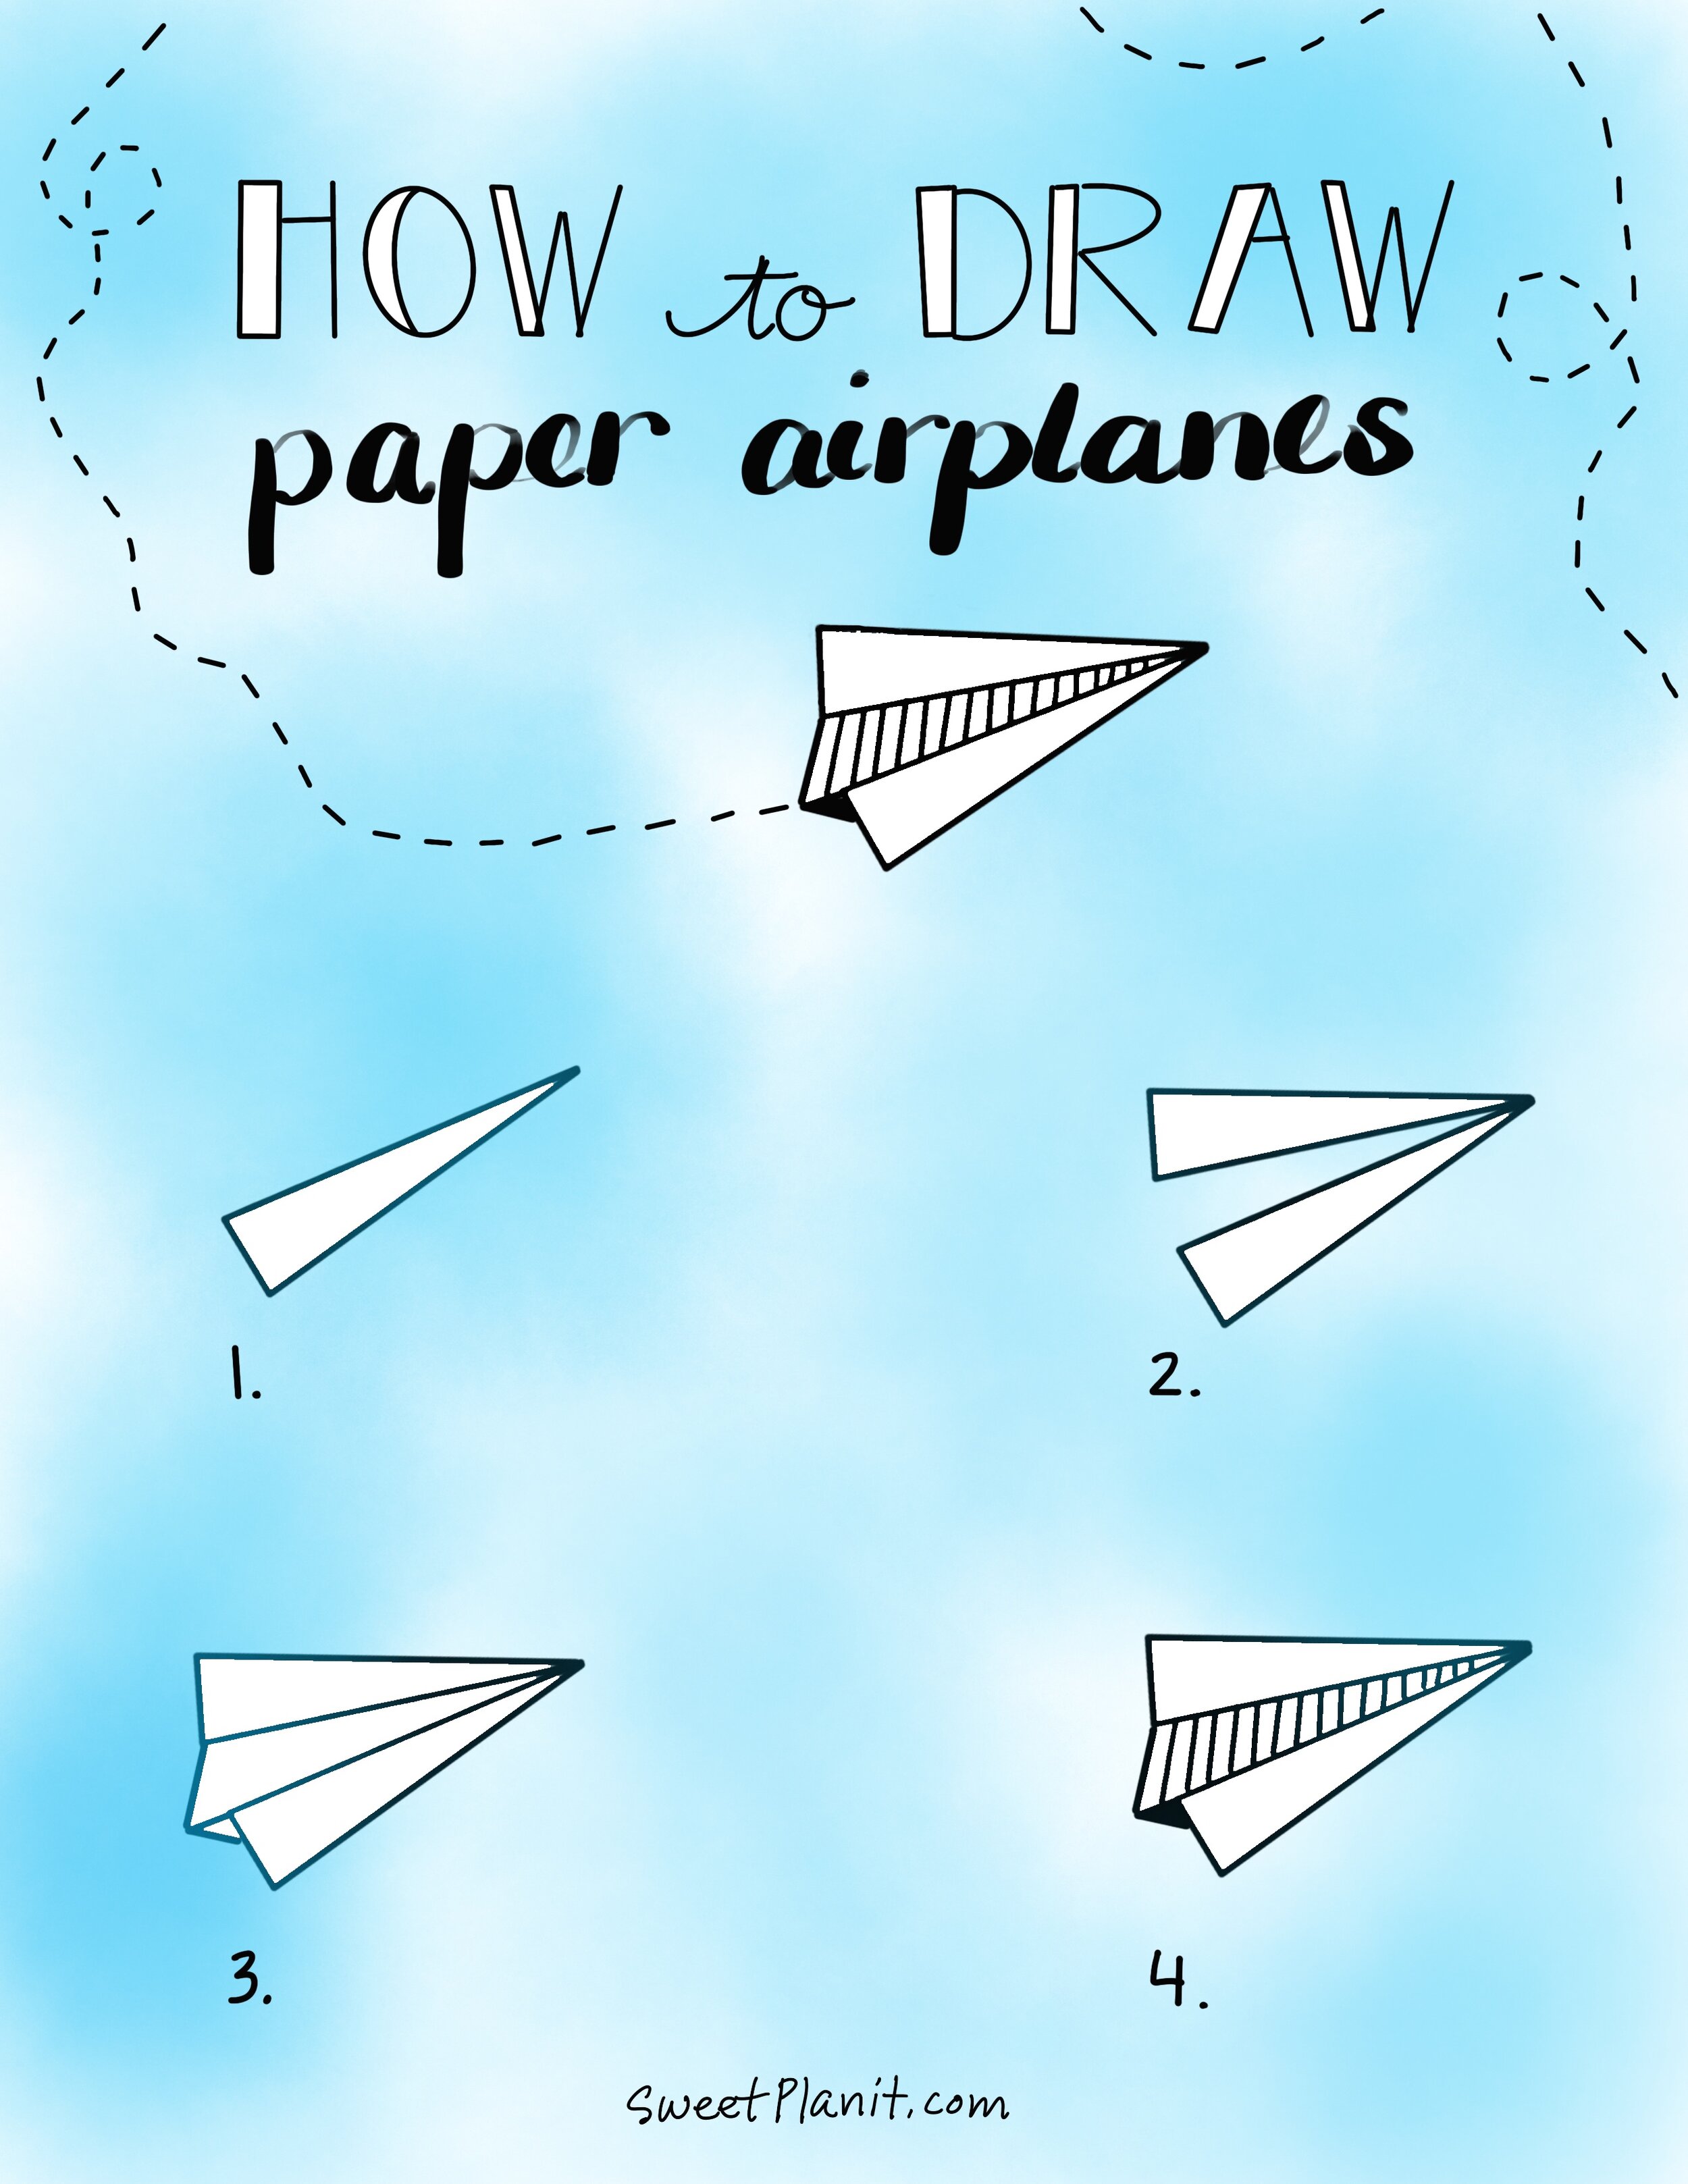
How to Draw Paper Airplane Doodles — Sweet PlanIt
First you fold the paper in half lengthwise, and then unfold. A4 size paperplease check out other awesome paper planes on my channel:paper h. Add the outer edges of the airplane. You can get the free printable templates at the bottom of the post. Repeat on the right side.
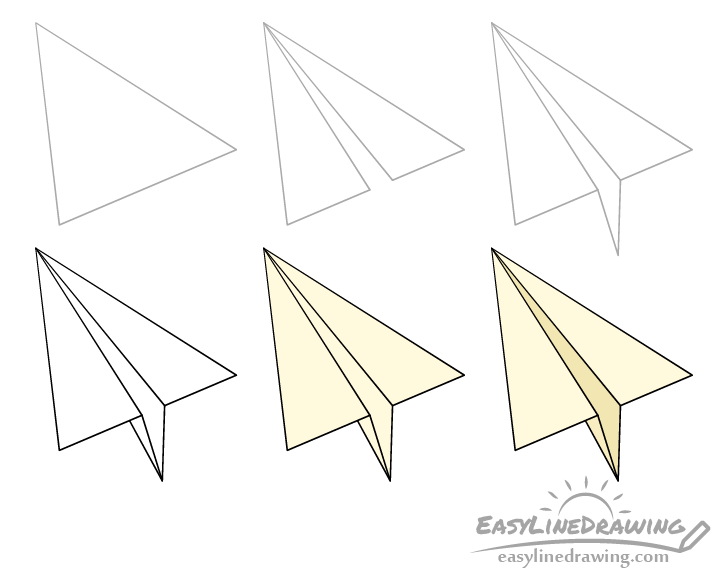
How to Draw a Paper Airplane Step by Step EasyLineDrawing
Draw this paper plane by following this drawing lesson. Fold the top two corners down so they meet the center crease. Flip the paper airplane over to create the wing on the other side. Finish drawing the outline of the wings of the airplane. Just click the orange button to fill out the form at the top of this page.

How to Draw a Paper Airplane Really Easy Drawing Tutorial
First you fold the paper in half lengthwise, and then unfold. Repeat on the right side. Gather the materials needed, like a piece of origami paper or any other type of paper, and be excited about the results. Make 8 1 in (2.5 cm) folds from the top of your paper down. Draw a line to define the bottom of.
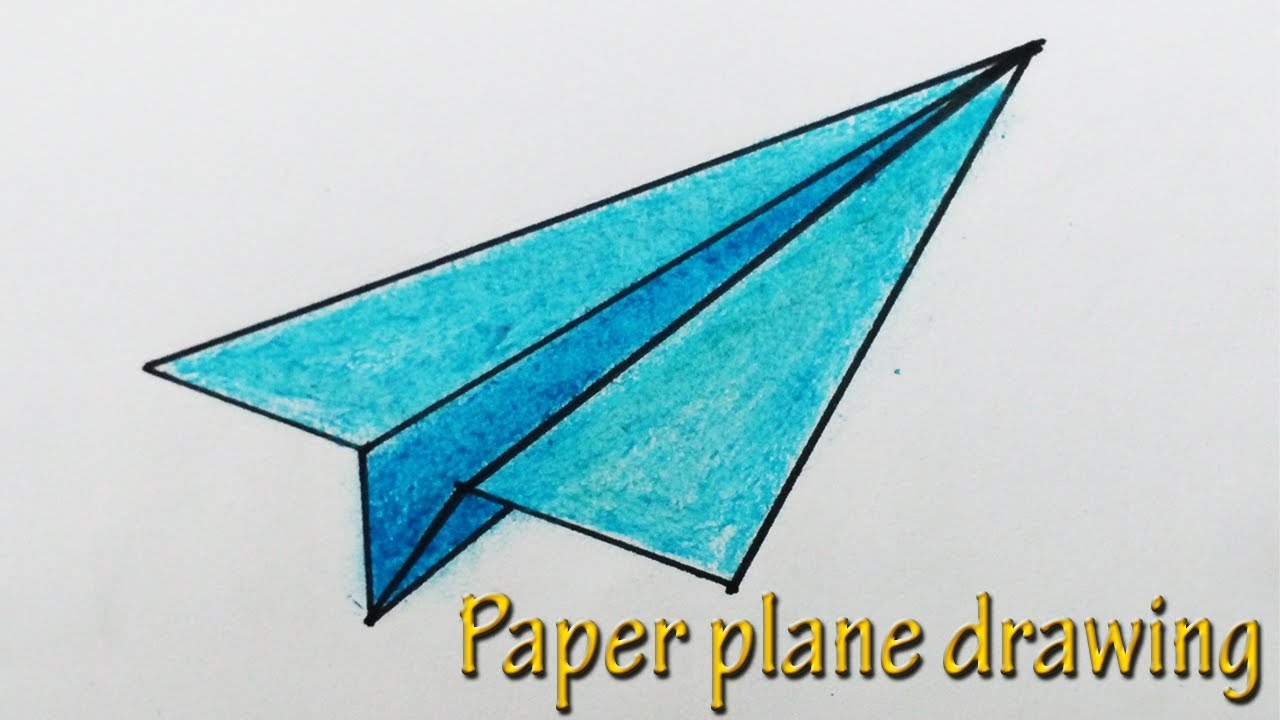
Web Add Shadow To The Paper Airplane.
Find the best paper airplanes that fly the furthest and stay aloft the longest. Web how to draw a paper airplane step by step. A4 (210 x 297mm)paper planeshow to make easy paper airplanes that fly farthis is very easy paper plane tutorials. Draw two straight lines and connect them at one point as shown in the picture.
Gather The Materials Needed, Like A Piece Of Origami Paper Or Any Other Type Of Paper, And Be Excited About The Results.
Finish drawing the outline of the wings of the airplane. Fold the top left edge in to the center line. I’ll also show you how others have incorporated paper planes in their bullet journals, planners, and artwork. This video is about how to drawing paper plane in cartoon style , super cute and kawaii.
You Can Get The Free Printable Templates At The Bottom Of The Post.
Web fold the paper in half lengthwise. Web a database of paper airplanes with easy to follow folding instructions, video tutorials and printable folding plans. Web crease the paper with your knuckle or fingernail. Flip the paper airplane over to create the wing on the other side.
Repeat On The Right Side.
Fold the top outside corners down to meet the center line. [5] make sure your wings are symmetrical to one another so your plane stays level when you throw it. Web this paper plane step by step drawing tutorial is easy to follow and. The final step in drawing a paper airplane is to add shading.