Step By Step Drawing Of A Rose
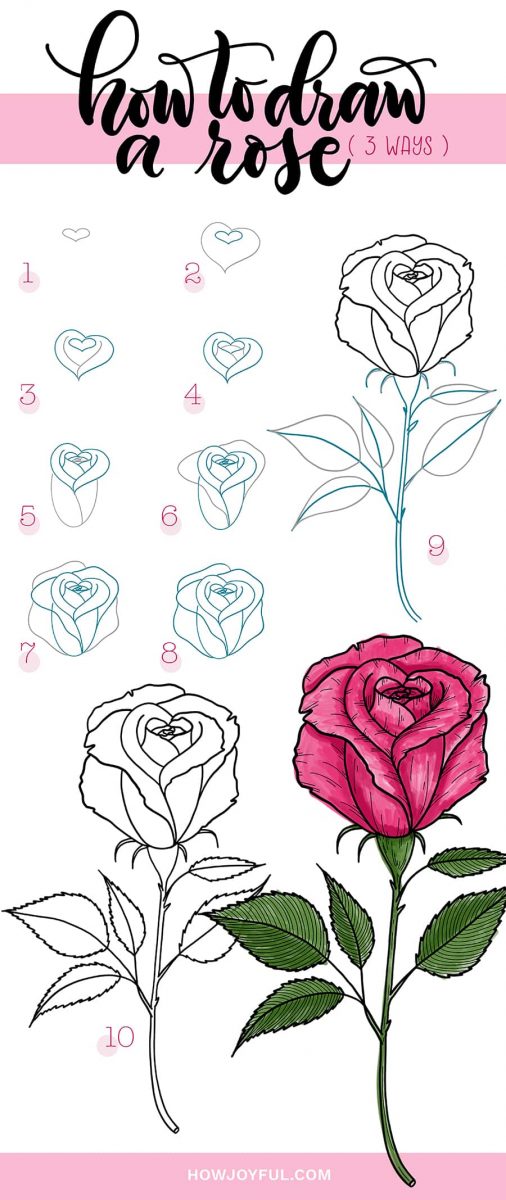
Step By Step Drawing Of A Rose - “it’s more about the idea of. Begin by drawing three small circles, each one a little larger than the last. This step is green in the following image. Web a conventional plm system uses one digital model to represent each variant of a product. Detail the leaves with edgy outer blades. Now, if you want a simple and easy rose drawing, you can just add a simple stem and finish here. Keep your movements fluid and loose throughout this process. Start drawing the rose by first sketching its overall shape sizing it to your drawing area. Web following a drawing tutorial online to draw a rose step by step is only one aspect of learning to draw roses. Web in fact, when you are shading it is better to use a pencil that is dull rather than sharp, because this makes for easier coverage.
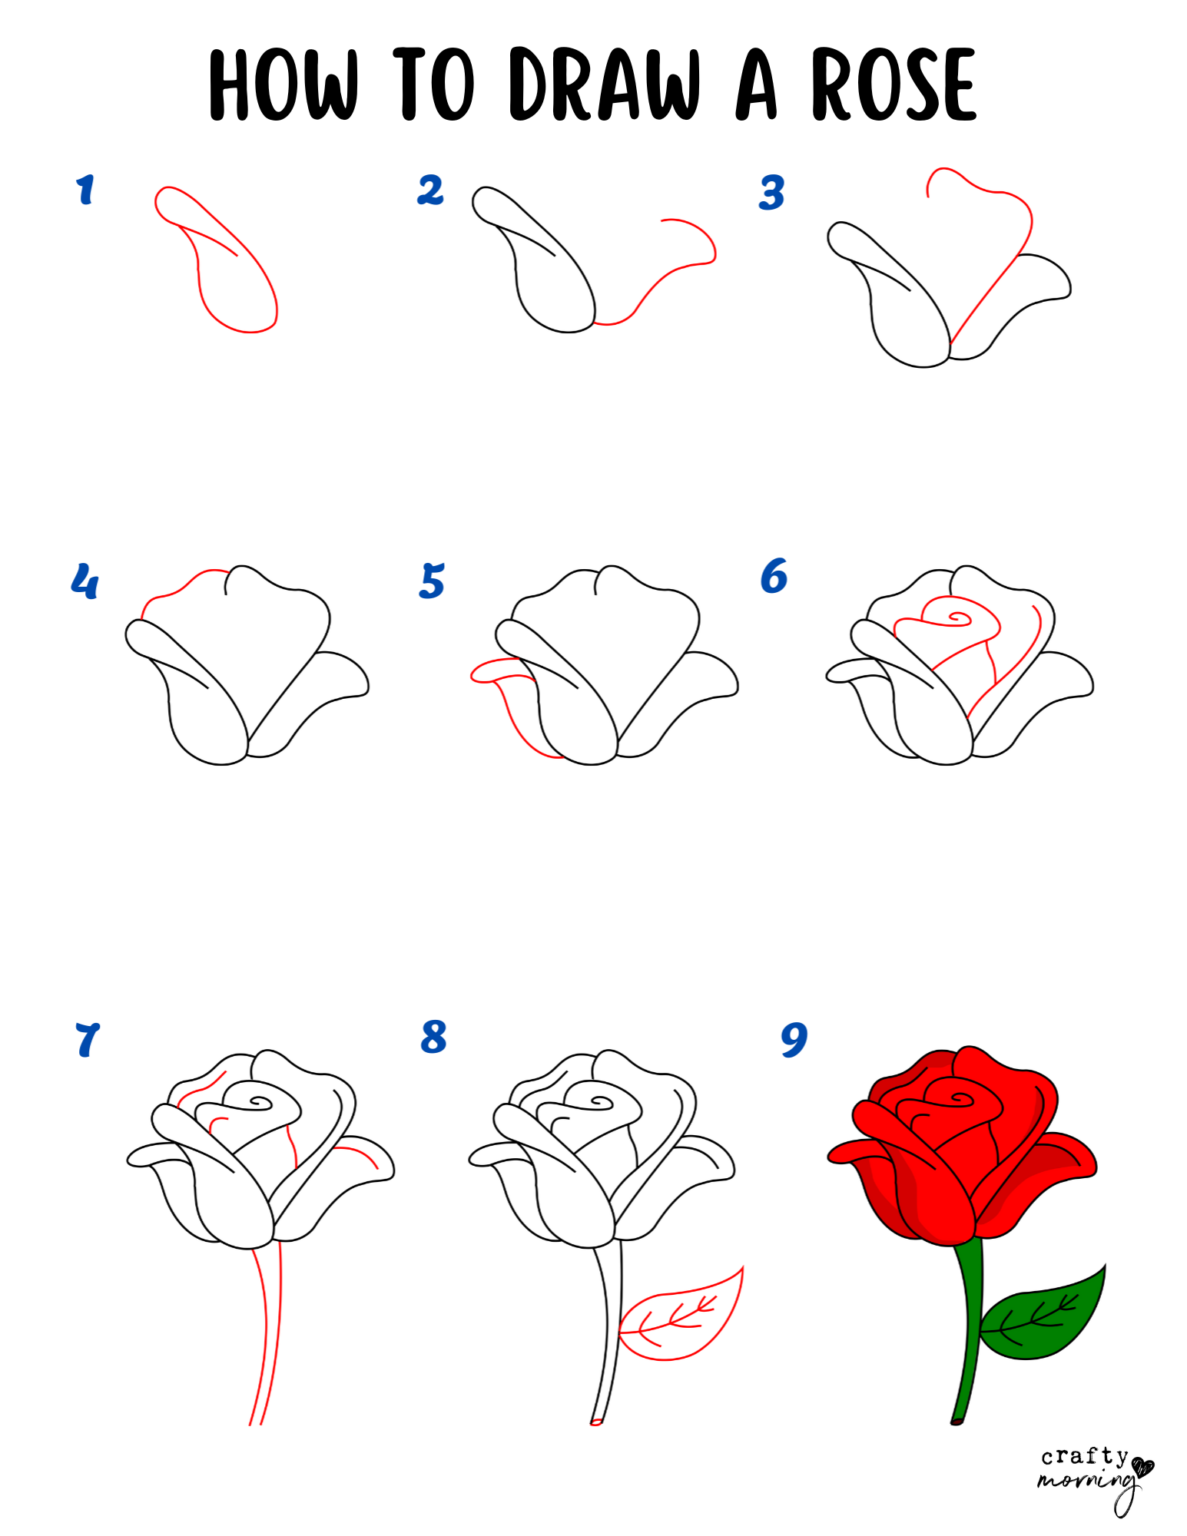
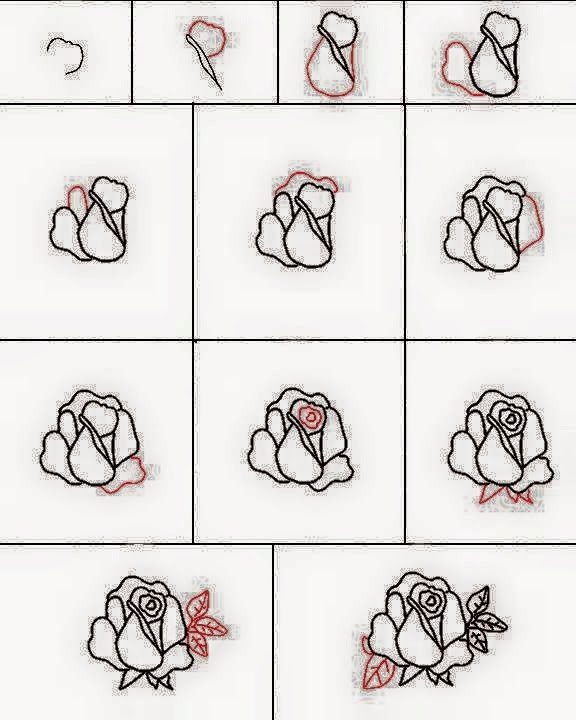
Draw little petals inside the realistic rose outline illustration. The swirl should be in the middle of the heart where you would normally find the indent of the heart. Add further petals of the rose heading upwards to the centre. Web the school took time to honor the class for not only their academic achievements but their extracurricular accomplishments as well. Draw another oval around the tiny shape, keeping the bottoms of the ovals. These lines represent the inner petals. In this step, we will be adding a single leaf on the right side of the stem of the rose. Design and draw a character. Learn a simple method for developing an original character, from mind map to finished drawing. Add the front petal edge.
Web following a drawing tutorial online to draw a rose step by step is only one aspect of learning to draw roses. Keep your movements fluid and loose throughout this process. In this step, we will be adding a single leaf on the right side of the stem of the rose. Web in fact, when you are shading it is better to use a pencil that is dull rather than sharp, because this makes for easier coverage. Step by step instructions to draw a rose step 1. This initial shape will serve as a guide for the petals. This forms the shape of a single leaf. Now draw a small oval around the beginning oval, making the bottom of the second oval even with the first. Sketching the outline of the rose. Now, if you want a simple and easy rose drawing, you can just add a simple stem and finish here.
How to Draw a Rose Step by Step (Easy) Crafty Morning
After all, a rose is a living thing, and maintaining that idea will. Draw the centre details of the rose petals. Add the front petal edge. Next, draw an oval around these, as in step 3. The shape and proportion of each part will be considered in each step of the tutorial.

Rose Flower Drawing Easy Step By Step Idalias Salon
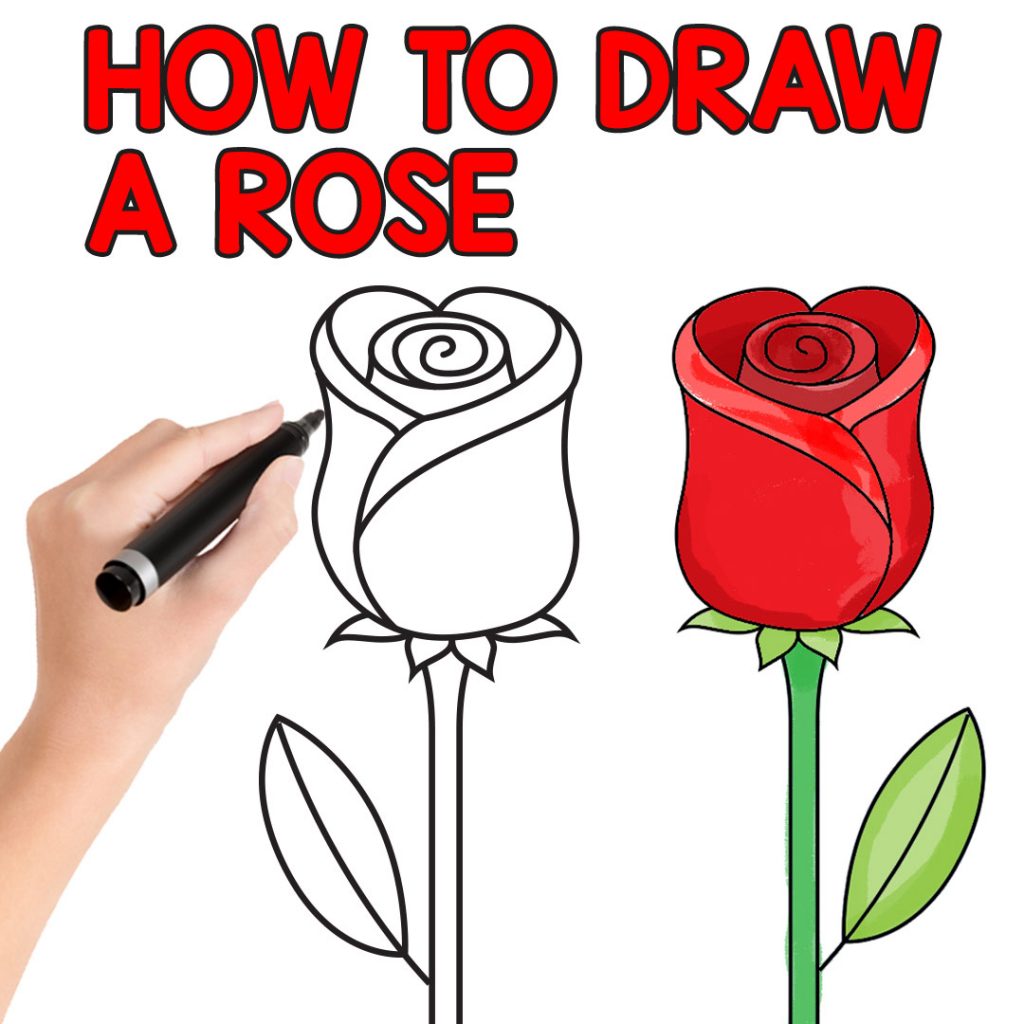
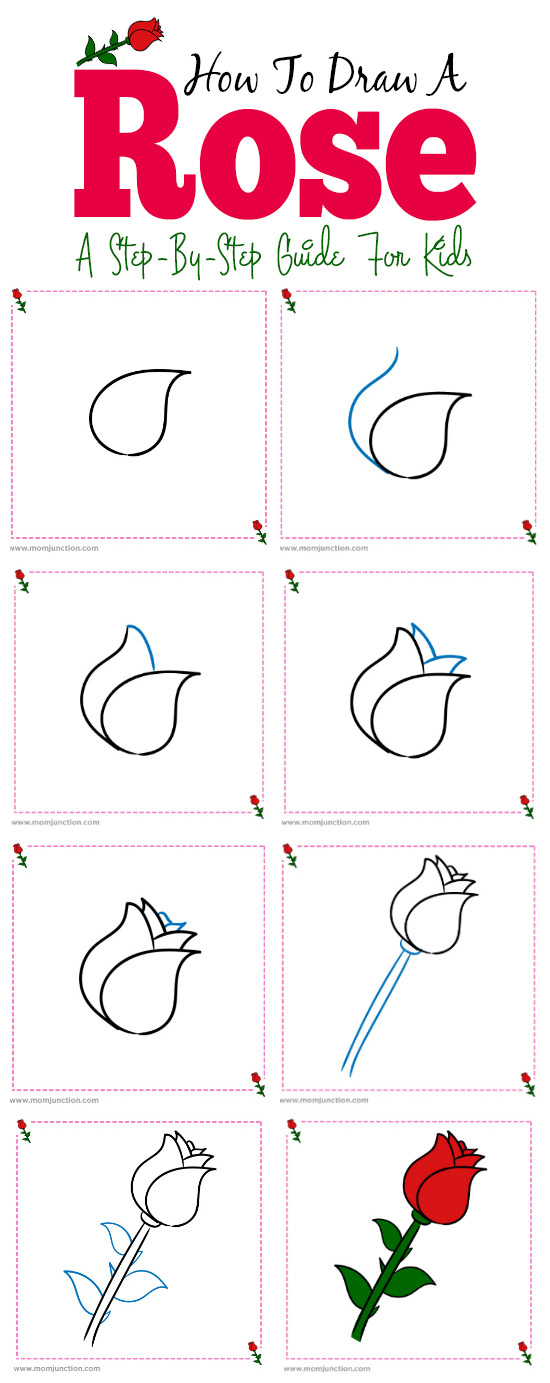
Rose flower in full bloom. Web with this how to draw a rose step by step tutorial makes drawing this beautiful flower super easy, which makes it perfect for beginners as well as kids. The shape and proportion of each part will be considered in each step of the tutorial. Draw little petals inside the realistic rose outline illustration. This.
How to Draw a Rose Easy Step by Step For Beginners and Kids Easy
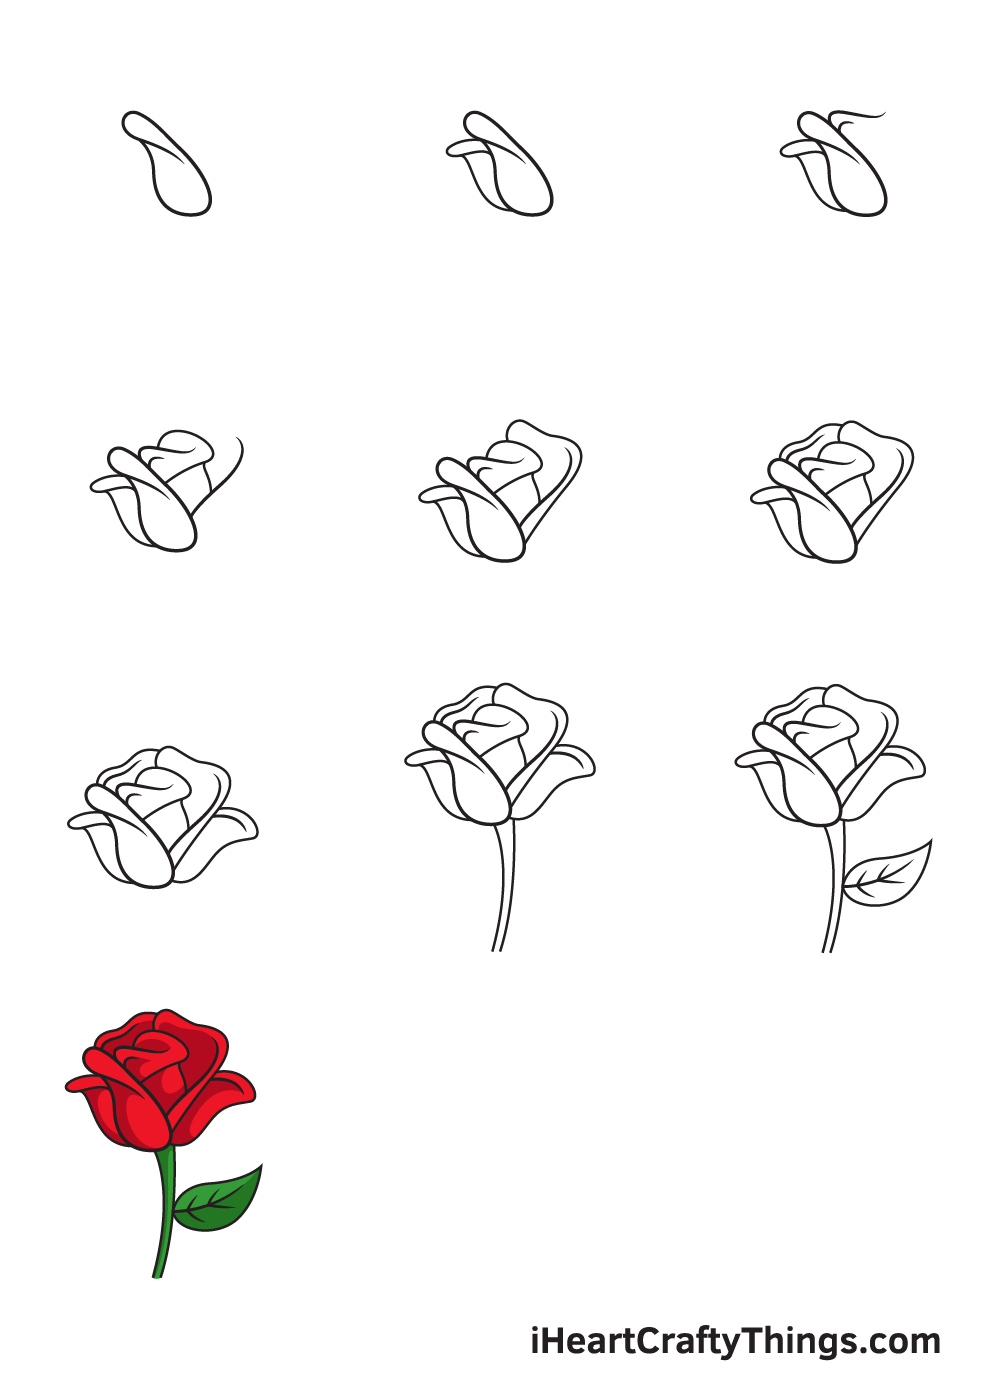
️ supplies you might love (amazon. This step is red in the following image. Connect the realistic rose flower outline drawing with the rest of the bud, creating a petal shape. Drawing the first rose petal. Afterwards, draw a slightly curved line across the.
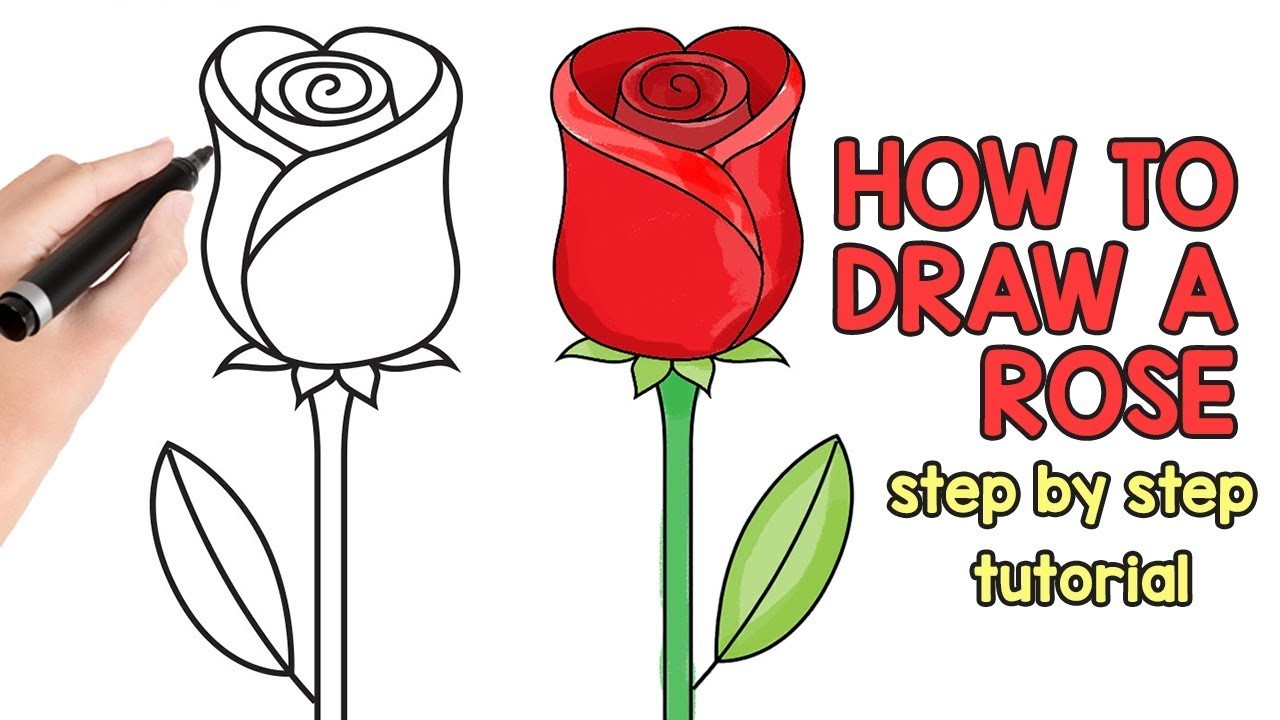
How to Draw a Rose step by step drawing tutorial YouTube
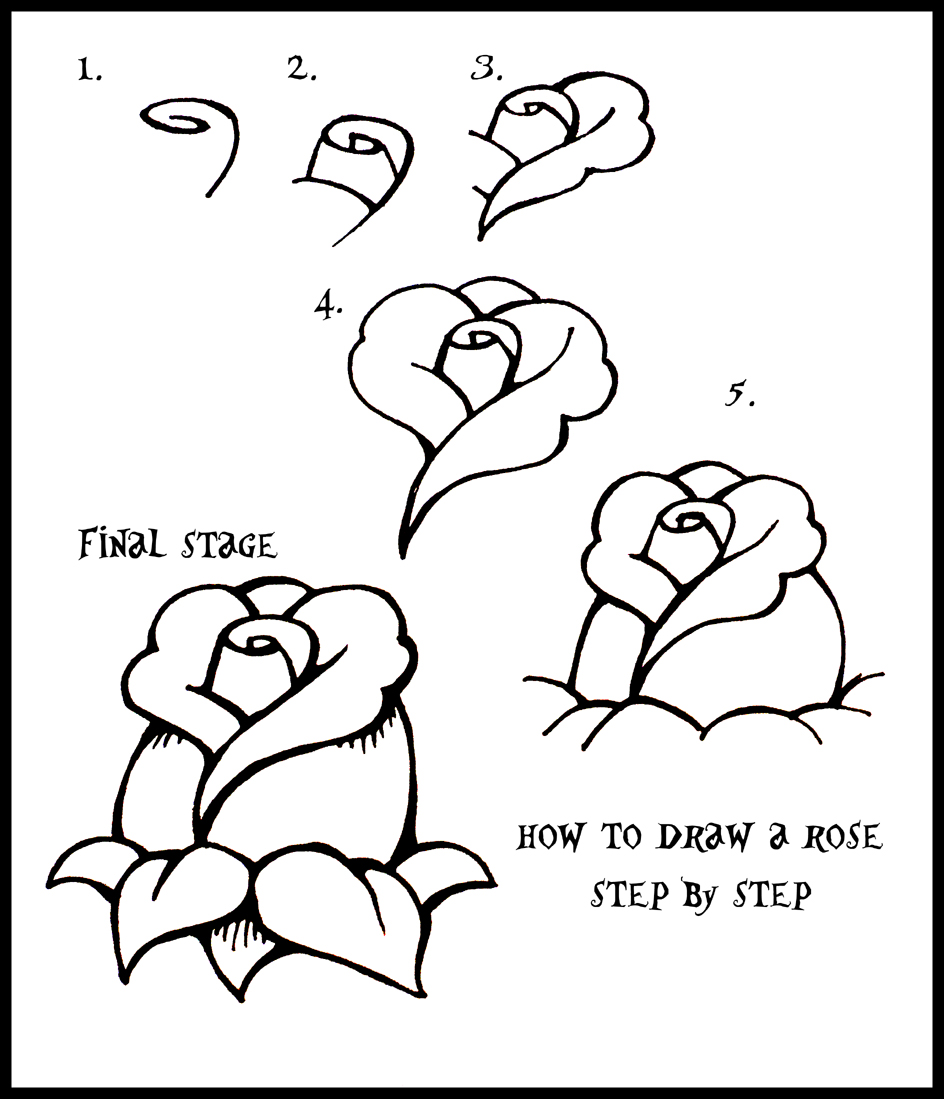
Web our how to draw book is here! Web follow along to learn how to draw and color this super easy rose drawing tutorial step by step. Divide the flower with a nice wide “s” curved line to suggest the edge of the topmost rose petal. Use overlapping curved lines to create an irregular spiral shape. Sketching the outline of.
Roses Drawing Step By Step
“don’t try to get every single piece exactly right,” warns illustrator and drawing instructor lucas elliott. Connect the realistic rose flower outline drawing with the rest of the bud, creating a petal shape. ️ supplies you might love (amazon. Divide the flower with a nice wide “s” curved line to suggest the edge of the topmost rose petal. These lines.
How To Draw A Rose Easy StepbyStep Guide
Web step 1 — what pencil to choose & a light touch. ️ supplies you might love (amazon. Start drawing the rose by first sketching its overall shape sizing it to your drawing area. Drawing the first rose petal. Rose flower in full bloom.
How To Draw A Rose Easy, Step by Step Learn To Draw And Paint
Next, sketch a heart connected to the swirl. Web in today’s post, we will learn how to draw a rose step by step on paper. Web a conventional plm system uses one digital model to represent each variant of a product. Web follow along to learn how to draw and color this super easy rose drawing tutorial step by step..

Rose Steps Roses drawing, Flower drawing, Roses drawing tutorial
Detail the leaves with edgy outer blades. Keep your movements fluid and loose throughout this process. In this step, we will be adding a single leaf on the right side of the stem of the rose. Sketching the outline of the rose. This will allow them to absorb more water and stay fresh longer.
How To Draw A Rose Step By Step Guide
“it’s more about the idea of. Begin the realistic rose flower outline by sketching the rosebud center of the flower. Detail the leaves with edgy outer blades. It is a good idea to start with a light pencil such as a 2h or 3h. Learn a simple method for developing an original character, from mind map to finished drawing.
Rose Drawing How To Draw A Rose Step By Step
Web how to draw a rose step by step. Design and draw a character. Keep your movements fluid and loose throughout this process. Web our how to draw book is here! Draw the centre details of the rose petals.
Begin The Realistic Rose Flower Outline By Sketching The Rosebud Center Of The Flower.
Start your rose drawing by first choosing one petal. It is a good idea to start with a light pencil such as a 2h or 3h. These lines represent the inner petals. Add further petals of the rose heading upwards to the centre.
Web Follow Along To Learn How To Draw This Realistic Rose Easy, Step By Step.
Afterwards, draw a slightly curved line across the. After all, a rose is a living thing, and maintaining that idea will. Keep your movements fluid and loose throughout this process. Web in today’s post, we will learn how to draw a rose step by step on paper.
Web Step 1 — What Pencil To Choose & A Light Touch.
Drawing the first rose petal. This will allow them to absorb more water and stay fresh longer. This step is green in the following image. Sketching the outline of the rose.
Note That The Blue Pencil Lines Are Used To Indicate The New Lines Being Drawn In Each In Each Of The Steps.
Step by step instructions to draw a rose step 1. Design and draw a character. To recap, there are 4 main techniques at work to create this rose drawing: Then draw the first inner petal with a.