Whirlpool Refrigerator Crisper Drawer Installation
Whirlpool Refrigerator Crisper Drawer Installation - It extends freshness of produce up to 25%. Pull the drawer or shelf out to full extension. The produce preserver absorbs ethylene allowing the ripening process of many produce items to slow down. Web get this part fast! Hand wash, rinse, and dry removable parts and interior surfaces thoroughly. As a result, certain produce items will stay fresh longer that are kept in your crisper drawer. Web to put drawers back in a whirlpool refrigerator, follow these steps:remove the drawers from the fridge.identify the designated slots for each drawer.align th. Lift the front of the drawer and slide it out the rest of the way. Web fasten the shutoff valve to the cold water pipe with the pipe clamp. Web a crisper drawer can be high or low humidity depending on how you adjust its settings.
Web need help replacing the crisper drawer cover frame (part # wp2222031) in your whirlpool refrigerator? Web fasten the shutoff valve to the cold water pipe with the pipe clamp. When the crisper is set to “high humidity,” airflow is cut off from the drawer. Crisper drawers work by controlling the airflow that enters and exits the bin, which means you can toggle between high and low humidity levels. Lettuces stay crisp and fresh much. Web get this part fast! This part acts as a support rail for the crisper drawer by holding the center of the crisper frame. Fit the compression sleeve and nut onto the tubing, similarly to step 7. Secure the tubing onto the refrigerator valve using an adjustable wrench. Web to put drawers back in a whirlpool refrigerator, follow these steps:remove the drawers from the fridge.identify the designated slots for each drawer.align th.
Crisper drawers work by controlling the airflow that enters and exits the bin, which means you can toggle between high and low humidity levels. Crisper humidity control refrigerator features to remove the crisper(s) cover: The produce preserver absorbs ethylene allowing the ripening process of many produce items to slow down. Crisper cover to remove the crisper(s) cover: Web a crisper drawer can be high or low humidity depending on how you adjust its settings. The part came fast and was easy to install. Secure the tubing onto the refrigerator valve using an adjustable wrench. He also shares some helpful tip. Use a clean sponge or soft cloth and a mild detergent in warm water. Refrigerator pantry drawer endcaps for right and left side *install both end caps to complete repair.

Whirlpool Refrigerator Repair How to Replace the Crisper Drawer YouTube
The drawer shown in this video is part # w10850377 (pd00034429) b. As a result, certain produce items will stay fresh longer that are kept in your crisper drawer. Replace the drawer or shelf into the frame rails and push it back into place. Crisper humidity control refrigerator features to remove the crisper(s) cover: Locate the water line port in.
Refrigerator Repair Replacing the Crisper Drawer Cover and Shelf Frame
Use a clean sponge or soft cloth and a mild detergent in warm water. Web need help replacing the crisper drawer (part wpw10233488 ) in your refrigerator? I wash, spin dry, and wrap lettuce in clean kitchen towels as soon as i get home and store them in the crisper drawer. It extends freshness of produce up to 25%. He.

Whirlpool Refrigerator Repair How to Replace the Crisper Shelf Glass
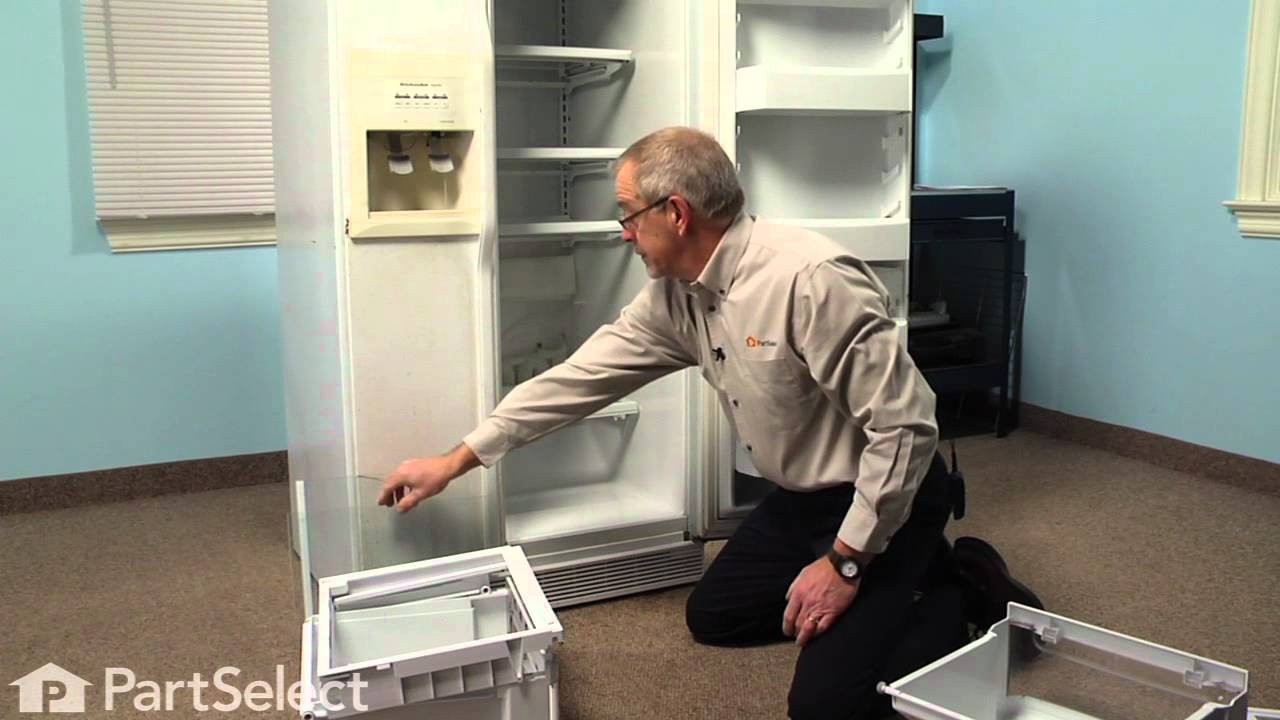
Replace a drawer by sliding it back in, fully past the stop. Web need help replacing the crisper drawer (part wpw10233488 ) in your refrigerator? Web get this part fast! Lift the front of the drawer and slide it out the rest of the way. Web do you need help replacing the crisper drawer (part # wpw10233488) in your refrigerator?

Whirlpool Refrigerator Repair How to Replace the Crisper Drawer
Web get this part fast! Unplug the refrigerator or disconnect the power. Web find whirlpool refrigerator drawer support parts using our appliance model lookup system with diagrams. Crisper humidity control refrigerator features to remove the crisper(s) cover: Web a crisper drawer can be high or low humidity depending on how you adjust its settings.

Whirlpool Barracuda Refrigerator Crisper Shelf Frame Replacement
When the crisper is set to “high humidity,” airflow is cut off from the drawer. Slide drawer straight out to the stop. Web find whirlpool refrigerator drawer support parts using our appliance model lookup system with diagrams. Replace a drawer by sliding it back in, fully past the stop. The drawer shown in this video is part # w10850377 (pd00034429).

Whirlpool Refrigerator Crisper Drawer Rail Replacement (Part 2163835
This part acts as a support rail for the crisper drawer by holding the center of the crisper frame. The produce preserver absorbs ethylene allowing the ripening process of many produce items to slow down. Web get this part fast! Lift the front of the drawer and slide it out the rest of the way. Web need help replacing the.

Whirlpool Refrigerator Repair How to Replace the Crisper Drawer
Ap6005507, 12603701, 8208330 back to top. Tighten the pipe clamp screws slowly and evenly so washer makes a watertight seal. Web this genuine oem crisper frame support provides stability to the crisper drawer in your refrigerator, preventing sagging or collapse under the weight of produce. Refrigerator pantry drawer endcaps for right and left side *install both end caps to complete.

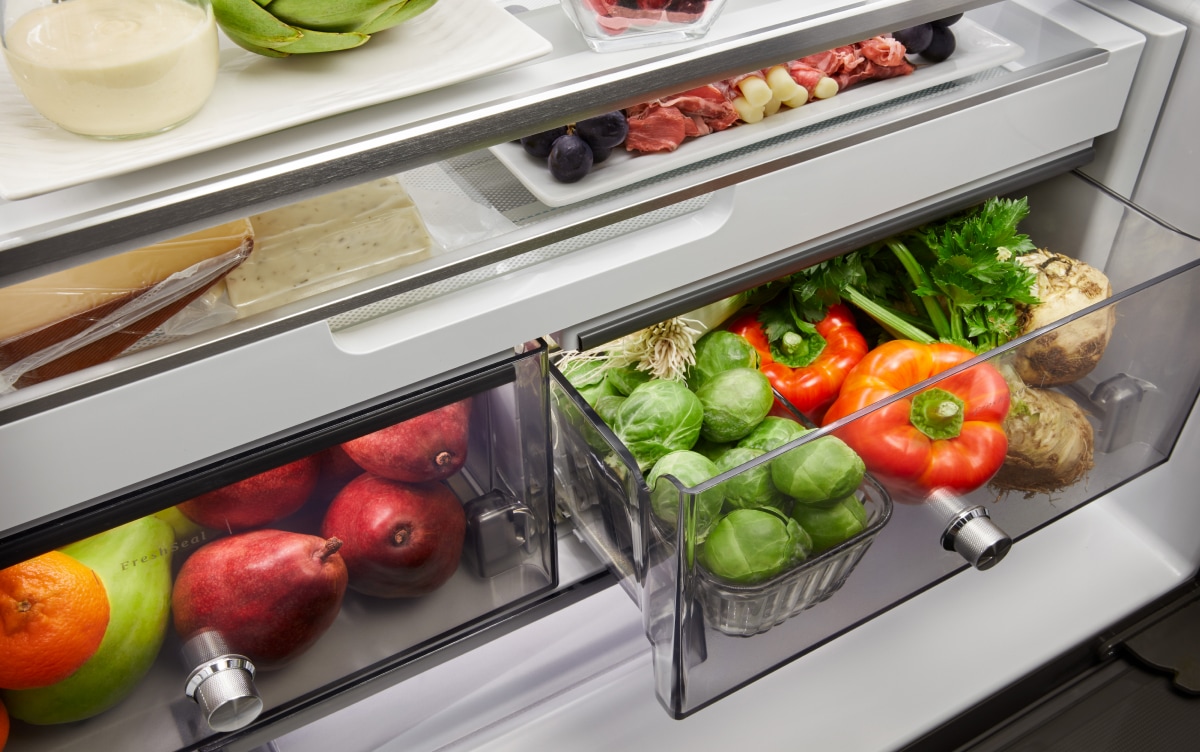
What Crisper Drawer Settings Should You Use? Whirlpool
This allows produce to be. Use a clean sponge or soft cloth and a mild detergent in warm water. Adjust the control to any setting between low (open) and high (closed). Web a crisper drawer can be high or low humidity depending on how you adjust its settings. The produce preserver absorbs ethylene allowing the ripening process of many produce.

How to Replace Your Whirlpool Refrigerator's Crisper Cover Frame Twin
Our free refrigerator diy manuals and videos make repairs easy and fast. Unplug the refrigerator or disconnect the power. Slide drawer straight out to the stop. Web to put drawers back in a whirlpool refrigerator, follow these steps:remove the drawers from the fridge.identify the designated slots for each drawer.align th. Crisper drawers work by controlling the airflow that enters and.
How to Use a Refrigerator Crisper Drawer KitchenAid
Crisper humidity control refrigerator features to remove the crisper(s) cover: Locate the water line port in the back of the refrigerator and connect it to the free end of the tubing. This part acts as a support rail for the crisper drawer by holding the center of the crisper frame. Unplug the refrigerator or disconnect the power. This allows produce.
Be Sure The Outlet End Is Solidly In The 1⁄4 Drilled Hole In The Water Pipe And That The Washer Is Under The Pipe Clamp.
Pull the drawer or shelf out to full extension. Hand wash, rinse, and dry removable parts and interior surfaces thoroughly. Slide drawer straight out to the stop. Web a crisper drawer can be high or low humidity depending on how you adjust its settings.
The Part Came Fast And Was Easy To Install.
When the crisper is set to “high humidity,” airflow is cut off from the drawer. The drawer shown in this video is part # w10850377 (pd00034429) b. This kit includes a produce preserver housing, 2. Web get this part fast!
With This Video, Steve Will Show You How Easy It Is To Complete This.
Lettuces stay crisp and fresh much. Replace the drawer or shelf into the frame rails and push it back into place. Crisper humidity control refrigerator features to remove the crisper(s) cover: Web need help replacing the crisper drawer cover frame (part # wp2222031) in your whirlpool refrigerator?
Web Find Whirlpool Refrigerator Drawer Support Parts Using Our Appliance Model Lookup System With Diagrams.
Fit back of cover frame into supports on side walls of the refrigerator and lower the front of the cover frame into place. Our free refrigerator diy manuals and videos make repairs easy and fast. Web this genuine oem crisper frame support provides stability to the crisper drawer in your refrigerator, preventing sagging or collapse under the weight of produce. Fit the compression sleeve and nut onto the tubing, similarly to step 7.