How To Build A Drawer With Slides
How To Build A Drawer With Slides - Web cut a channel on either side of the stem width. I'll show you the easiest drawers to make followed by a better drawer. You don’t want any pocket holes to face inward. Move the fence in 1/8th inch and pass the blank through again. Web the hard way is to measure the opening width, then subtract the width of the sides and the width of the drawer slides. Choose these when you need easy access to the rear of the drawer, as in a file drawer. Repeat for the other side of the drawer box. Web repeat the process on the second mount/drawer side. Mock assemble the box and drill at least three pilot holes at each joint. Web the big disadvantage:
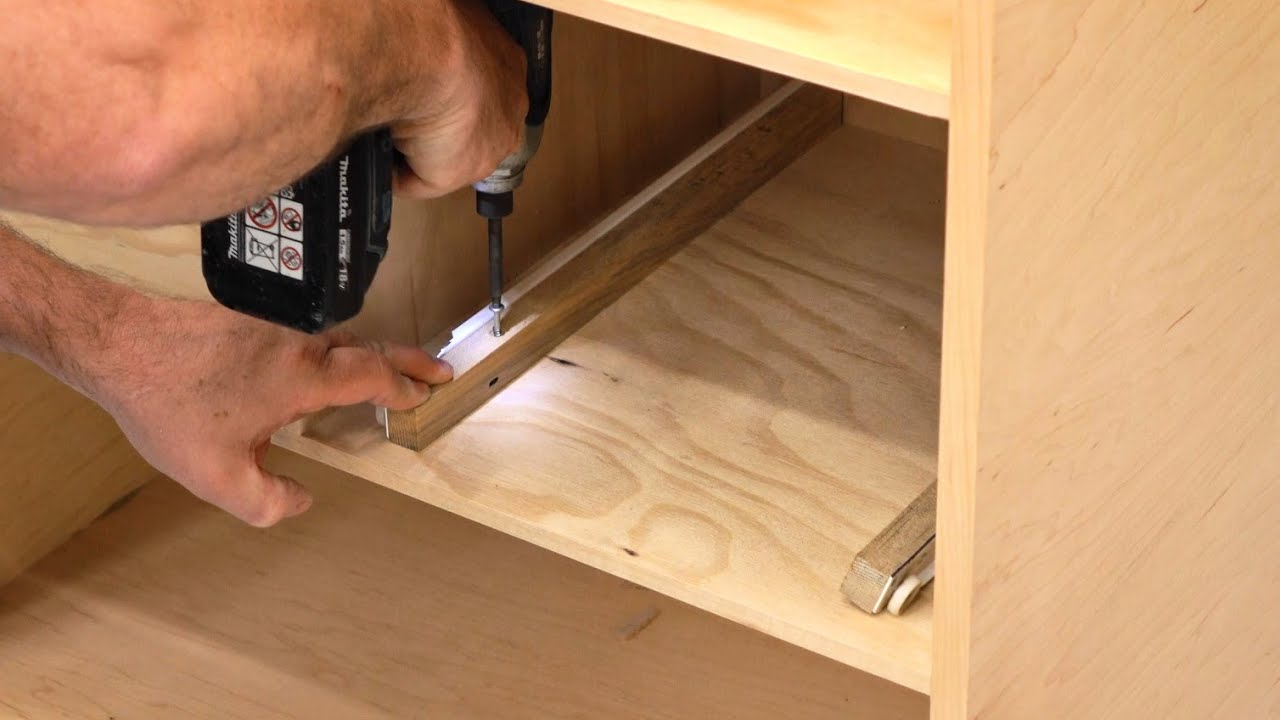
Place a strip of 1/4 plywood inside your drawer box against each side. More potential for malfunctions over time. If you're making your own drawers, wood slides are a great diy option. If your drawer is a hair too big or small, these slides won’t glide. Place the plywood inside the drawer box and drill pilot holes around the perimeter. I used ½” maple plywood for the drawer sides and ¼” maple plywood for the bottom and broke down the pieces for the sides on the table saw to start. Set your drawer slide on top of the strip, lined up with the front edge. If using 3/4″ plywood, use 1.25″ kreg screws. My drawer and cabinet are 32. I had previously marked the position of the wood slides but due to an, um “error”, i had to change the position of the slides.
My drawer and cabinet are 32. Web the big disadvantage: Web i'll show you three different ways to make drawers for your next woodworking project. Move the fence in 1/8th inch and pass the blank through again. I used ½” maple plywood for the drawer sides and ¼” maple plywood for the bottom and broke down the pieces for the sides on the table saw to start. More potential for malfunctions over time. Mock assemble the box and drill at least three pilot holes at each joint. Depth rather than over it. The goal is to place the slides so that the top of the dado rests on them and the drawer bottom clears the lower stretcher by at least 1/8″. Web we’ll assemble the drawer box using wood glue and kreg screws.
How To UnderMount Drawer Slides Woodworking YouTube
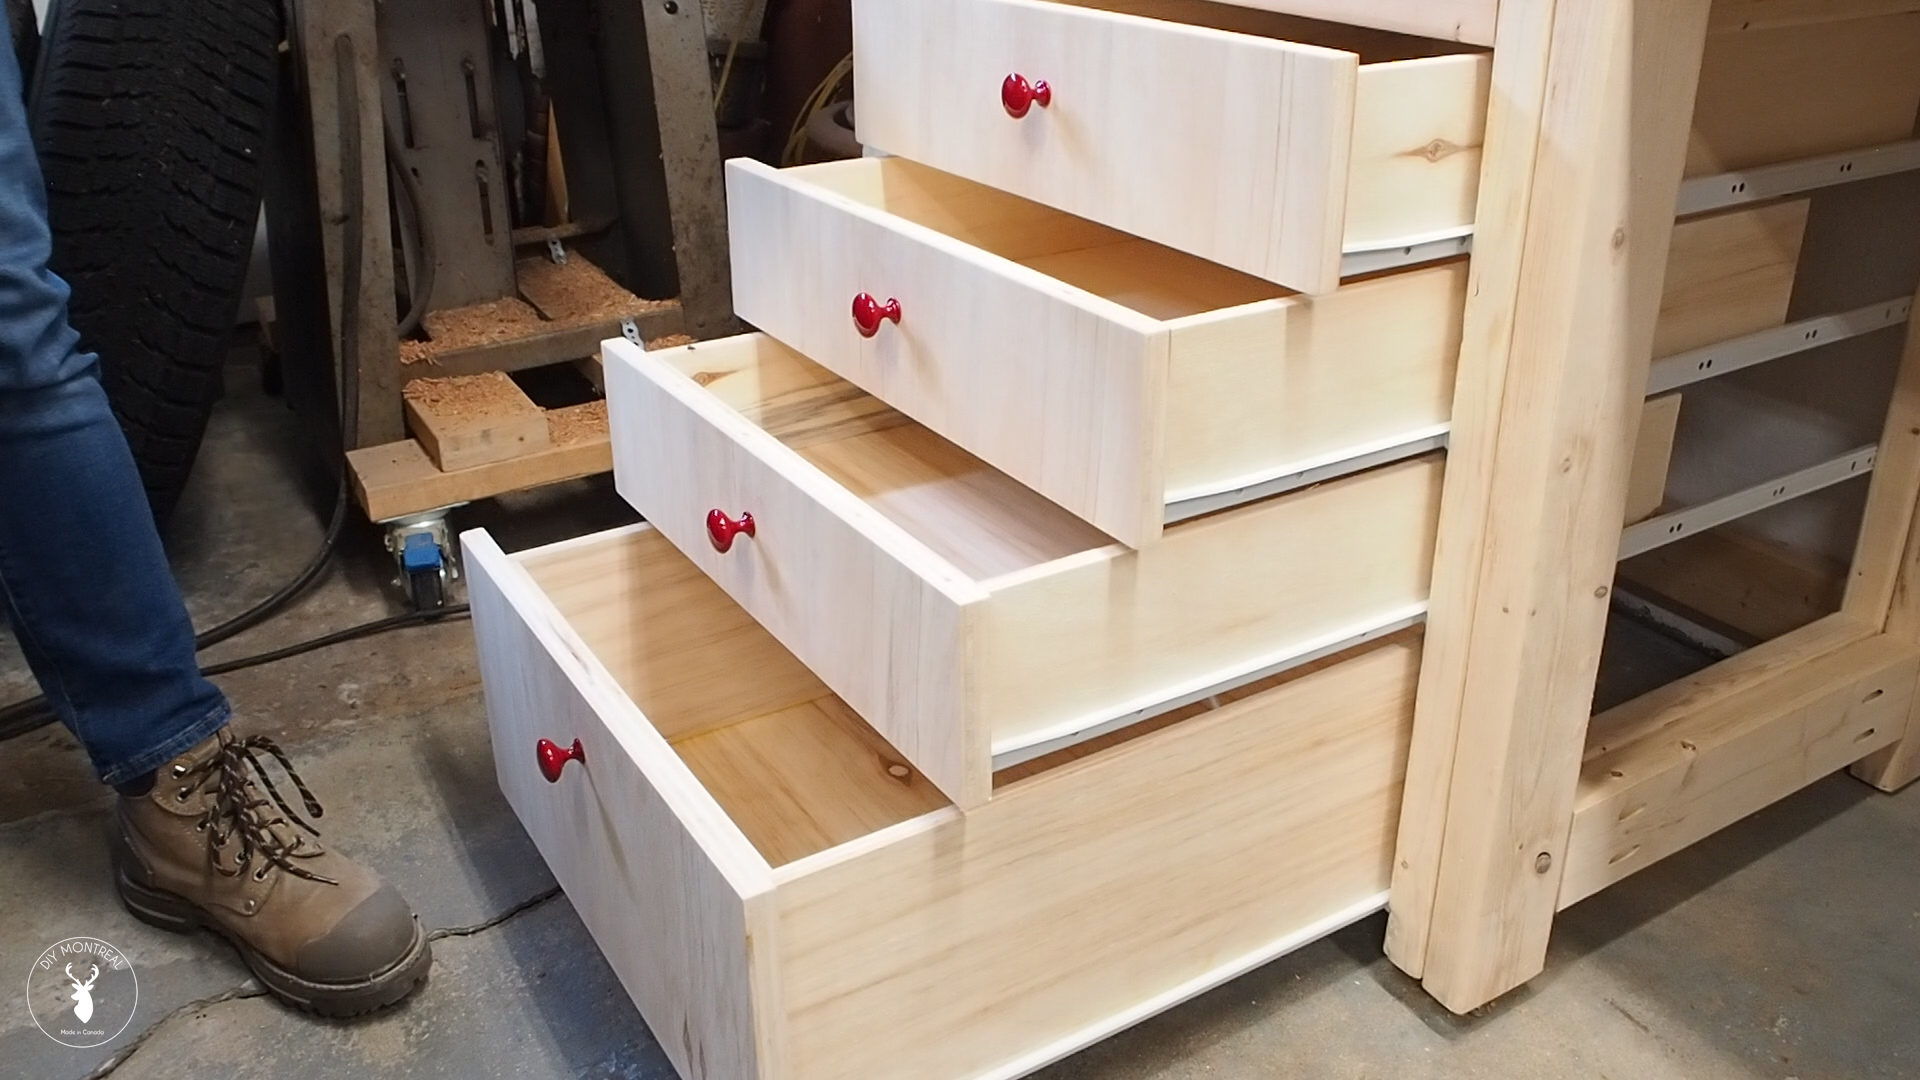
Planning out spacing of each drawer. Web for each drawer you build you should have four pieces like this, plus a 1/4″ plywood piece for the bottom drawer panel. Web prepare the drawer back for the drawer runners. Wooden drawer slides have been used in furniture for 100s of years. Place a strip of 1/4 plywood inside your drawer box.

How To Build A Drawer For Beginners Tips And Tricks For The Beginner!
Requires fewest modifications to the drawer box. Break off any remaining wood and clean up the cuts with a chisel and some sand paper. Make drawer boxes about 1/32 in. Drill three countersink holes along this line. My drawer and cabinet are 32.
How to build shop drawers with Euro Slides DIY Montreal
Planning out spacing of each drawer. I had previously marked the position of the wood slides but due to an, um “error”, i had to change the position of the slides. So instead of using lower quality and finicky drawer slides, i have decided to make my own. There are plenty of ways to install the drawer boxes, but this.

How To Make Easy DIY Drawers w/ Blum Undermount Slides // Home Bar Pt
Web blum undermount slides. Or, you can do it the easy way but putting two pieces of ply and your drawer slides. Before moving on, let’s hop into. And adjust the fence back to the 10 degree bevel line marked on your workpiece. It’s easier to do this before assembly than after.

DIY Wood Drawer Slides Install An immersive guide by Learn Make Live
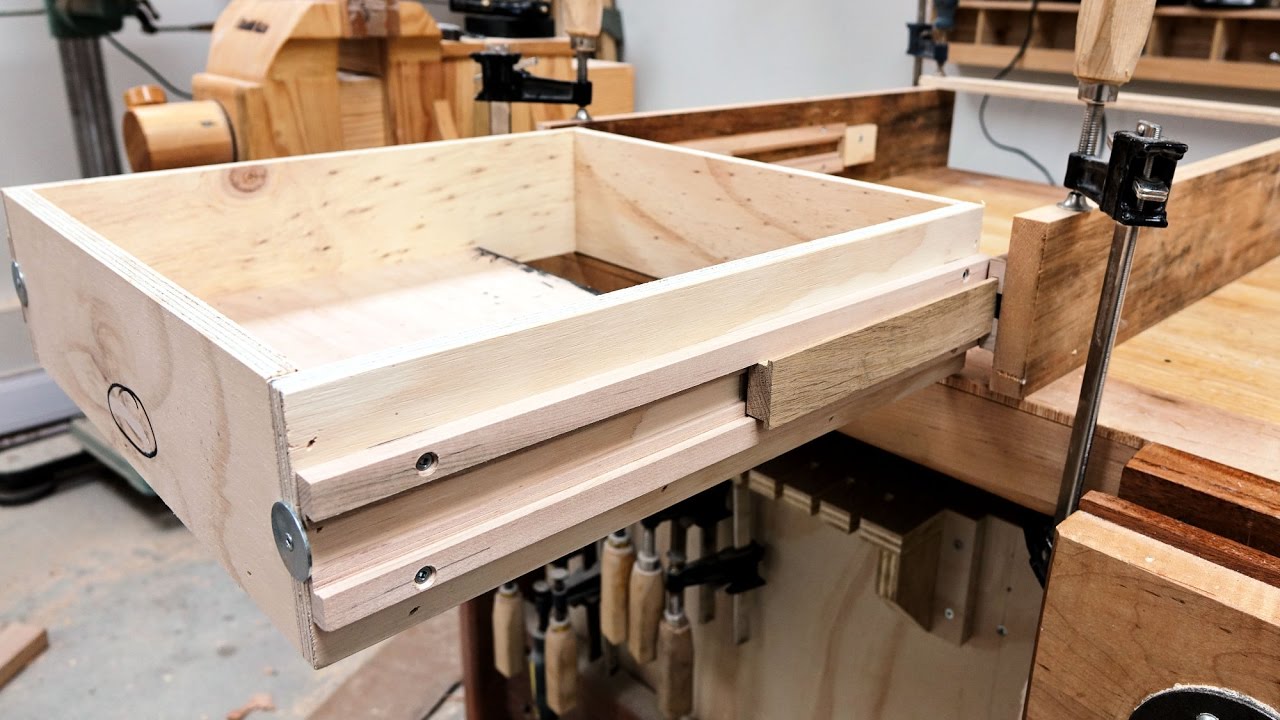
Web cut a channel on either side of the stem width. Glue and nail a ¼” plywood base cut to the size of the drawer box. Mine are white oak, 3/8 inch (9.5 mm) thick x 1 inch (25 mm) wide. Predrilling the screw holes will prevent the wood from splitting near the edge. There are plenty of ways to.
Top 21 Diy Wood Drawer Slides Home, Family, Style and Art Ideas
I'll show you the easiest drawers to make followed by a better drawer. There are plenty of ways to install the drawer boxes, but this is quick and works well. So instead of using lower quality and finicky drawer slides, i have decided to make my own. Web blum undermount slides. It’s easier to do this before assembly than after.
How to Install Drawer Slides Build Basic
Drill three countersink holes along this line. Build the drawer box using wood glue and 1 ¼” pocket screws keeping all the sides square. It’s a lot harder to deal with a drawer that’s too wide. Web i'll show you three different ways to make drawers for your next woodworking project. So instead of using lower quality and finicky drawer.

How To Make Drawers With Slides
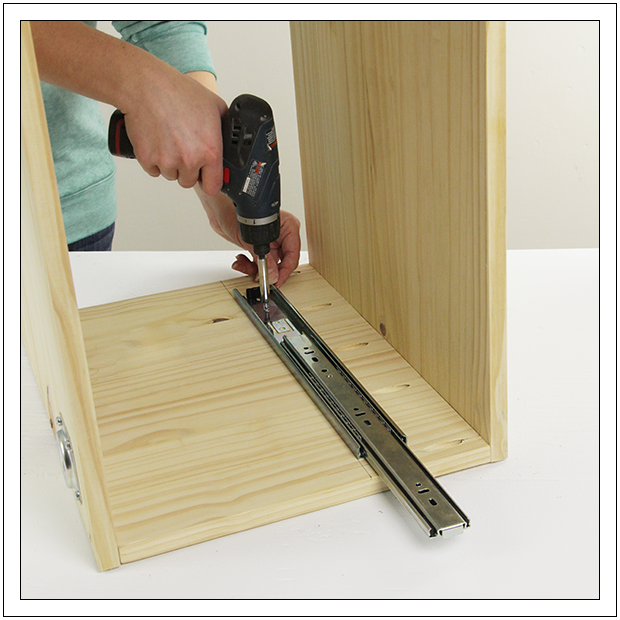
Screw the slides into place on the drawer. If your wood drawer is getting stuck in certain areas you can also wax those places. In my case the width is 16 3/4 inches, minus 1 inch for the two half inch plywood sides, minus 1 inch for the two drawer slides equals 14 3/4s. Again run both edges of the.
How to Install Drawer Slides Build Basic
There are plenty of ways to install the drawer boxes, but this is quick and works well. Screw the slides into place on the drawer. Web we’ll assemble the drawer box using wood glue and kreg screws. Web i'll show you three different ways to make drawers for your next woodworking project. Wooden drawer slides have been used in furniture.

How To Install Drawer Slides Easily and Accurately YouTube
If your wood drawer is getting stuck in certain areas you can also wax those places. Web the hard way is to measure the opening width, then subtract the width of the sides and the width of the drawer slides. You don’t want any pocket holes to face inward. If you're making your own drawers, wood slides are a great.
I Always Start At The Bottom And Install The Bottom Drawer First.
Ensure that the box is square and fix for square as needed. In fact, many of the antique furniture pieces in my own home. Web blum undermount slides. The goal is to place the slides so that the top of the dado rests on them and the drawer bottom clears the lower stretcher by at least 1/8″.
Build The Drawer Box Using Wood Glue And 1 ¼” Pocket Screws Keeping All The Sides Square.
It’s a lot harder to deal with a drawer that’s too wide. In my case the width is 16 3/4 inches, minus 1 inch for the two half inch plywood sides, minus 1 inch for the two drawer slides equals 14 3/4s. I had previously marked the position of the wood slides but due to an, um “error”, i had to change the position of the slides. Break off any remaining wood and clean up the cuts with a chisel and some sand paper.
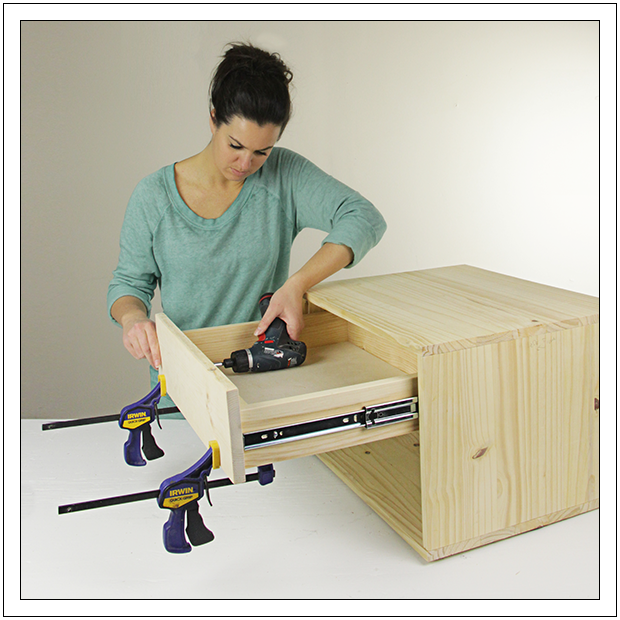
Place A Strip Of 1/4 Plywood Inside Your Drawer Box Against Each Side.
First attach the front to the first side, making sure the pocket holes are facing out towards you. Make drawer boxes about 1/32 in. Or, you can do it the easy way but putting two pieces of ply and your drawer slides. It’s easier to do this before assembly than after.
Web Whether You Need To Update An Existing Kitchen Drawer Or Build A New One From Scratch, The Liberty Franklin Brass Ball Bearing Drawer Slide Gets The Job Done Seamlessly With A Straightforward.
Web ️ project plans for sale: Glue and nail the plywood to the frame using the plywood to square up the frame as you fasten it. I used ½” maple plywood for the drawer sides and ¼” maple plywood for the bottom and broke down the pieces for the sides on the table saw to start. You need to drill a 1/4″ hole and cut a notch for your drawer glide.